3.15 Three Ways to See a Cell: Our Competing Station Designs
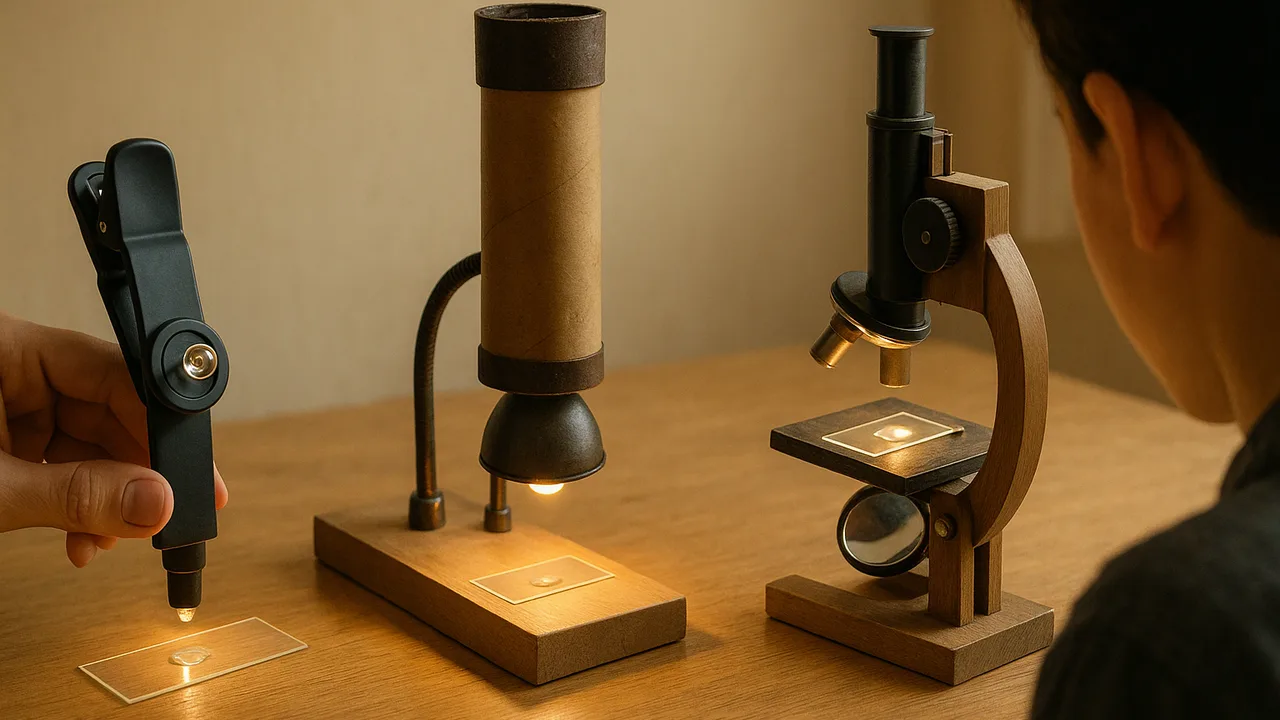
describe three competing microscope station designs and explain, with lens and light ideas, how each one could solve the clinic’s problem.
- I can identify scientific ideas that relate to the problem and each possible solution.
- I can explain how each design solution could solve the problem.
- I can define the criteria for a solution that meet the needs of the people or groups affected by the problem.
- I can explain who the solution is meant to help and use criteria to compare different solutions, including using numbers when needed.
Phase 4: Build
Warm-Up ~5 min
Do Now. Picture a drop of pond water on a clinic counter. A parent asks, “Is anything alive in there?” What would you need to answer, and how could you show the parent at home later?
Why can't we see a single onion cell with our eyes alone?
Instruction ~10 min
Station designers, welcome to the Build phase. In Part 1 you investigated how light bends, how lenses magnify and how pictures become digital. You also met our client, a community health clinic. Now you will design a station the clinic can really use.
Restate the problem first. The clinic wants a low-cost digital microscope station. Staff want to show students and families real cells and pond life, then share those pictures by phone. The system includes the light source, the lens, the specimen, the phone camera and the people using it. Things outside the system include the internet and the families at home.
| Criterion or constraint | How we check it |
|---|---|
| Criterion: magnifies at least 100×, so the nucleus and cell wall are clear | Ruler photo for magnification; can a classmate label both parts on stained onion skin? |
| Criterion: at least 8 people can see a cell’s nucleus from 2 m away | Show the image on the screen; count who can point to the nucleus from the 2 m line |
| Criterion: images are saved and sent to families as digital files | Save it, then send it to the teacher’s class account |
| Constraint: parts cost less than the $150 sample budget | Add up the class price list |
| Constraint: set up in under 10 minutes | Time a teammate who did not build it |
| Constraints: safety and privacy | No lasers, no human samples, no loose cords; images show slides, never faces |
How a lens helps. Light travels in straight lines until it passes from one material into another, such as from air into glass or water. A curved, bulging lens bends the light rays from a tiny object so they spread out. Our eye or a camera then sees a larger image.
Worked example 1: the phone clip-on lens. A small, strongly curved plastic or glass lens clips over the phone camera. Mei’s team explains: “The tiny lens bends light a lot, so the camera can focus very close to the slide. The phone saves the picture right away.” Possible weaknesses: the phone must be held very still, and many cheap lenses may not reach 100×.
Worked example 2: the water-drop lens. A single drop of water sits on a clear plastic sheet above the slide. Its curved surface bends light just like a glass lens. Jamal’s team explains: “A smaller drop curves more, so it magnifies more. The water is nearly free.” A possible weakness: in Part 1 (3.14), a drop gave far less than 100× and slid off.
Worked example 3: the school microscope with a phone adapter. A plastic bracket holds the phone camera over the eyepiece of a regular microscope. Its glass lenses are made to give a sharp image at high magnification, and the phone can feed a larger screen. A possible weakness: a microscope can use up much of the sample budget unless the clinic borrows one or already owns one.
| Design | How it uses lenses and light | Likely strength | Likely weakness |
|---|---|---|---|
| Clip-on lens | |||
| Water-drop lens | |||
| Microscope + adapter |
Guided Exercises ~15 min
Work with your team. Fill in one row of the design table after blocks 3, 5 and 7.
Independent Practice ~10 min
Sketch all three concepts.
Sketch each of the three designs. Label the light source, the lens, the specimen and the phone. Draw two light rays bending through each lens.
For each design, explain in two sentences how it could meet the clinic's criteria. Name one constraint it might break.
Closure ~5 min
Strong start, station designers. Next class we score these designs fairly with a decision matrix.
Exit ticket: which design do you trust most right now? Name the criterion that makes you trust it, and one criterion it might fail.
How confident are you that you can I can explain how each design solution could solve the problem.
Teacher notes
Materials: one sample of each design if you have them (a clip-on phone lens, a plastic sheet and dropper, a school microscope with or without an adapter), notebooks, the class criteria poster from Part 1.
Setup: if your class set different criteria in Part 1, use your wording everywhere this part lists them. Let teams handle each design for two minutes before sketching.
Listen for: “the lens makes the cell bigger” (the lens makes a larger IMAGE; the cell does not change); confusing criteria with constraints.
Support / stretch: give a sketch template with label lines and arrows for light rays. Stretch: invent a fourth hybrid design and explain what it borrows from two others.