4.05 Can Ice Break a Rock?
test what happens when water freezes in a small space, and set up a freeze-and-thaw test that counts cycles.
- I can identify what we are investigating, including how weathering or erosion changes Earth materials.
- I can describe how we will collect data about the speed of air or water flow.
- I can describe how we will count cycles of freezing and thawing, and the number and types of plants in the Earth material.
- I can describe how we will measure the amount or size of soil, sediment, or rocks moved or broken down by weathering or erosion.
- I can make and record observations to show how weathering or erosion changes rocks, soil, or sediment.
Phase 2: Investigate
Warm-Up ~5 min
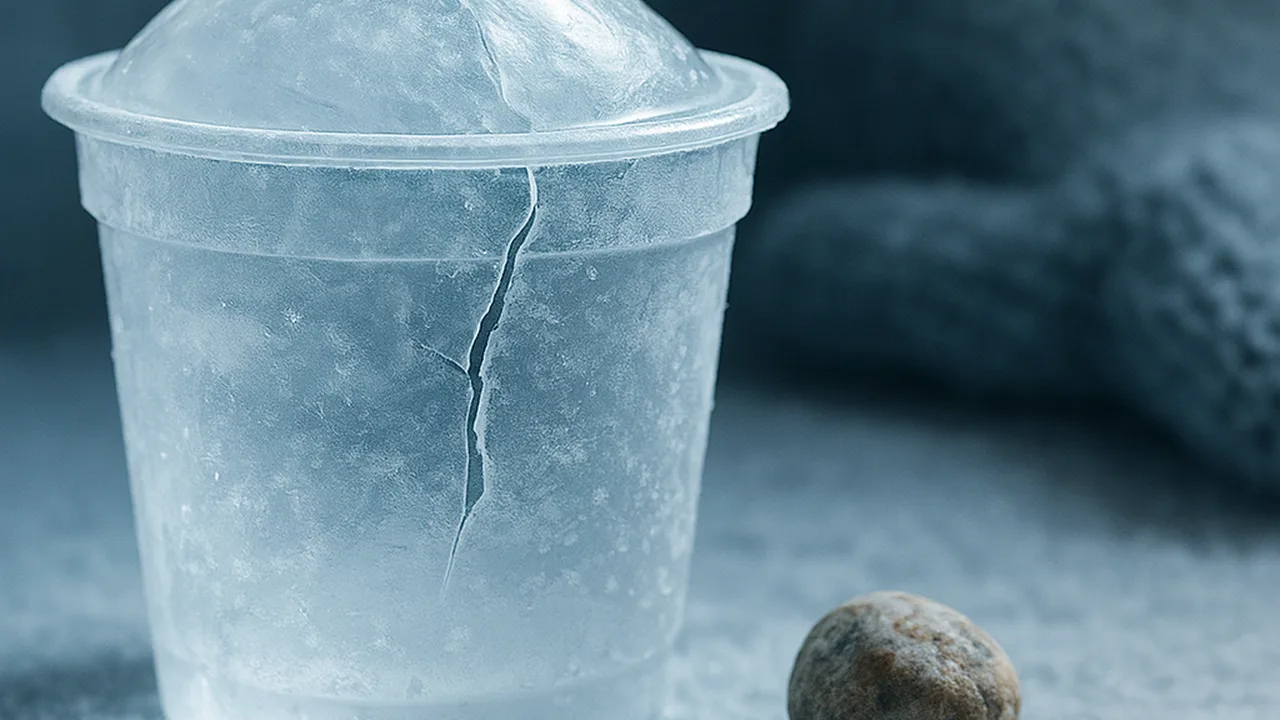
Do Now. Yesterday your teacher filled a plastic cup with water up to a line. Then the cup went into the freezer overnight. Before you look, make a prediction.
Where will the top of the ice be?
Instruction ~10 min
Junior engineers, explore first. Look at the frozen cup. Talk with your team. What happened to the water? Then we will run two tests.
What are we investigating? We are testing one way that rock can break. The question is: can freezing water break Earth materials? This matters for our town. Hills and roads there freeze and thaw many times each winter.
Test 1: the straw push. Plug one end of a plastic straw with clay. Fill it with water. Plug the other end. Lay it in a tray and freeze it. Tomorrow, look at the clay plugs. Did the ice push them out?
Test 2: freeze and thaw. Soak small chips of soft rock or broken clay flowerpot in water. Put them in a zipper bag. Freeze the bag overnight. Thaw it the next day. That is one cycle. We will count the cycles and look for new cracks and crumbs after each one. A second bag holds dry chips that never freeze. It is our control.
Worked example 1: counting cycles. Jamal’s team writes “Cycle 1” after the first freeze and thaw. After each cycle, they pour the chips onto a paper towel. They count the crumbs. They look for new cracks with a hand lens. Then they put the chips back and freeze again.
Worked example 2: what stays the same. Priya’s team keeps the same number of chips in each bag. They use the same kind of chips and the same freezer. Only one thing is different: wet chips that freeze versus dry chips that do not.
A real-world clue. In places with cold winters, many roads get potholes in late winter. Water gets into cracks in the road, freezes and pushes. Then it melts, and cars press on the weak spot.
Guided Exercises ~15 min
Set up both tests. Then start the cycle log. Your team will add a row each day after the bags thaw.
| Cycle | Wet bag: crumbs | Wet bag: new cracks? | Dry bag (control): crumbs | What we noticed |
|---|---|---|---|---|
| 0 (start) | ||||
| 1 | ||||
| 2 | ||||
| 3 | ||||
| 4 |
Independent Practice ~10 min
Connect the test to the real world.
Draw a crack in a rock in three steps: water gets in, the water freezes, the ice melts. Label what happens to the crack at each step.
Closure ~5 min
We saw ice push and grow. Our bags will keep cycling this week. Next lesson, we test another way rocks break: by bumping and tumbling.
Exit ticket: what did the ice in the cup do? How could that break a rock on a hillside?
Teacher notes
Materials (per team): 1 plastic cup frozen the day before with a marker line, 2 plastic straws, modeling clay, 2 zipper bags, 10–15 chips of soft rock (sandstone or shale from a garden center) or pieces of an old clay flowerpot, a hand lens, paper towels. Access to a freezer.
Setup: Break pots or rock inside a cloth bag with a hammer before class, wearing goggles. Soak the wet-bag chips for an hour. Plan a quick daily check-in of 3–5 minutes to log each cycle through 4.09.
Listen for: “the cold broke the rock.” It is the growing ice, not the cold alone. Changes after a few cycles may be small. Small results are still data; compare with the control.
Support / stretch: Give a picture card of each step. Stretch: ask how roots growing in a crack are like ice in a crack.