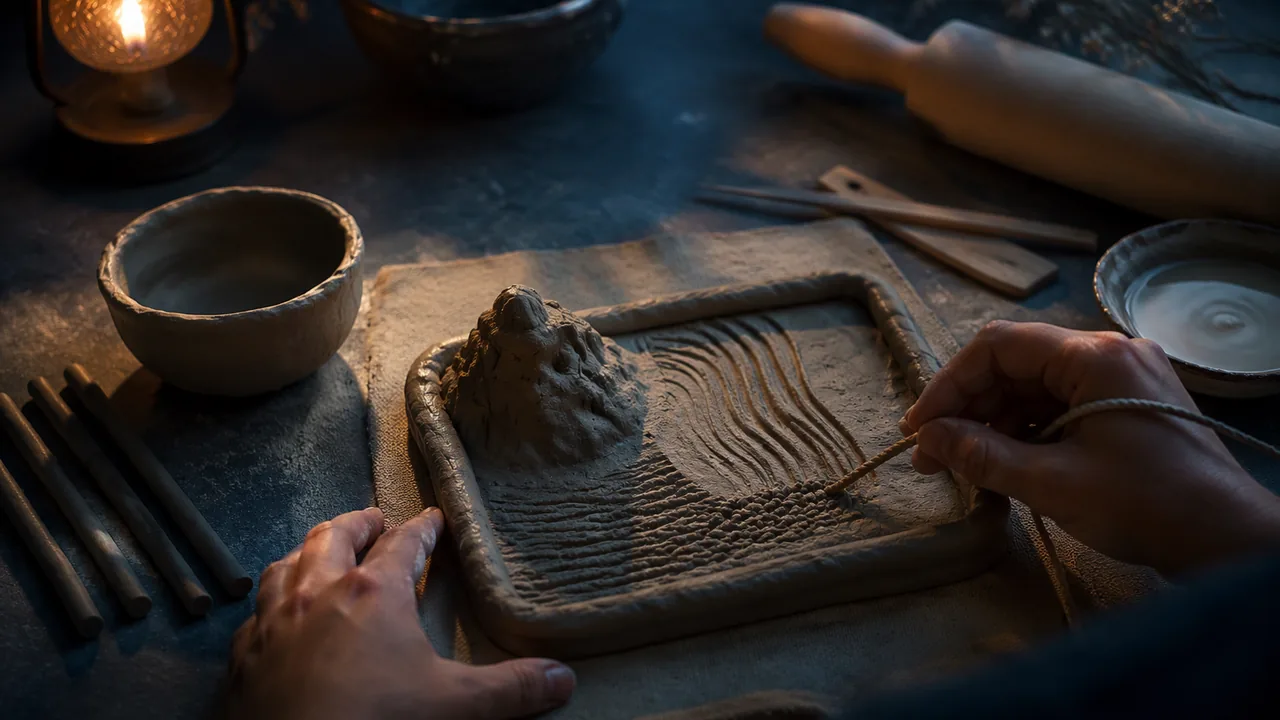
use pinch, slab, coil and relief techniques in air-dry clay to make a test tile with raised, carved and impressed areas, and handle clay and tools safely.
Instruction
Clay is the oldest tactile medium and the most forgiving. It records every press of a finger, it can be added to and carved away, and it holds a surface you can read with your hand. This lab gives you the basic vocabulary you will use all year.
Four ways to form clay. A pinch form starts as a ball; press your thumb into the center and rotate while squeezing the wall evenly. A coil is a rope of clay rolled under flat fingers and stacked or spiralled. A slab is a flat sheet, rolled to even thickness between two guide sticks so the rolling pin cannot go thinner than the sticks. Relief is sculpture that projects from a flat background: in low relief the forms rise only a little; in high relief they stand out so far they are almost free of the ground.
Additive and subtractive. You can build up (add clay) or carve down (remove it). When you add, you must join: score both surfaces with crosshatched lines, brush on slip (clay mixed with water to a thick paste), press together and blend the seam. Unjoined pieces crack off as the clay dries and shrinks. When you carve, work when the clay is firm but not dry — potters call this leather-hard.
Levels. A tactile surface is read through changes in height. A useful discipline is to plan three levels: the ground (the slab), a middle level about 3-5 mm up, and a top level for the most important forms. Too many levels and a hand cannot sort them; too few and everything feels the same.
Surface as meaning: Jōmon. Look at the Deep Vessel from Japan’s Jōmon period (about 2500 BCE, Cleveland Museum of Art). Its maker built it from stacked coils, then pressed twisted cord into the wet surface and incised wavy lines. The word jōmon means cord-marked, and archaeologists named a whole era of Japanese history after this texture. The pattern is not decoration added afterward; it is the record of a hand and a tool moving across wet clay.
Relief as a way of seeing: Egypt. The Relief of Nyankhnesut Seated (Egypt, Dynasty 6, about 2311-2281 BCE, Cleveland Museum of Art) comes from a tomb at Saqqara. Figures are carved in shallow relief on painted limestone: each body is shown in its most readable view, and scale shows importance, so the tomb owner is larger than the people bringing food. Egyptian carvers solved the same problem you face: how to make a flat surface carry clear, readable forms.
Closer to home: a Mississippian shell in clay. The Nelson-Atkins Museum of Art in Kansas City holds an earthenware Vessel in the Form of a Conch Shell (Mississippian culture, 1200-1500, about 26 cm long; the museum catalogs it under Missouri). Its maker took a hard, spiraled sea shell and remade its form in soft clay, which is a translation between materials, the same move you will make when you turn a flat machine image into a tile. The record gives the form and the material but does not describe the surface, so when you write about it, say what the record says and no more.
Why start with a test tile? Professional artists test before they commit. Your tile is a dictionary of marks: impressed (pressing an object in), incised (drawing a line with a tool), carved (removing clay), added (scored and slipped) and smoothed. Label each one; you will reuse them in every project this year.
📖 Read for this lesson
The reading opens over the lesson; close it to come back to exactly where you were. The checks below draw on it.
Studio: The relief test tile
Question. How many distinct levels and surfaces can one small clay tile carry and still be read clearly by touch?
Materials
- Air-dry clay (about 500 g), or oven-bake polymer clay, or the salt dough in the alternative below
- Two guide sticks about 6 mm thick (paint stirrers or two stacks of cereal-box card work) and a rolling pin, smooth dowel or drinking glass
- A blunt pencil, a plastic fork for scoring, and a craft stick or old spoon as a modeling tool
- A small cup of water and a brush for slip
- Texture objects: cord or yarn, a leaf, a bottle cap, burlap, a comb
- Canvas or cardboard work surface and a damp sponge
- Dry clay dust contains silica: never sweep or brush dry clay; wipe tables and floors with a damp sponge or mop, and do not sand dried clay indoors.
- Use blunt modeling tools; if a needle tool or wire cutter is used, cut away from your hand and store it point-down.
- Wash hands after working and before eating; if your skin is sensitive, wear thin household gloves.
- Keep clay out of sinks; rinse tools in a bucket and let the sediment settle. Air-dry clay needs no heat. If you use polymer clay, bake it only with an adult, in a home oven at the temperature on the package (never a microwave), on a foil-lined tray, with the kitchen ventilated; never bake air-dry clay or salt dough above the package directions.
Procedure
- Roll a slab between the guide sticks and cut a 10 × 10 cm square; this is the ground level.
- Divide the tile lightly into four zones with a blunt pencil. In zone 1 press in two texture objects; in zone 2 incise a line drawing; in zone 3 carve down 2-3 mm; in zone 4 add a small coil or pinched form, scoring and slipping the join.
- Build one form to a third, higher level somewhere on the tile, joining it properly.
- Close your eyes and run your fingertips across the tile. Mark with a pencil dot any place where two textures feel the same or a form is hard to find, and revise it.
- Smooth the edges, scratch your initials on the back, and let the tile dry slowly under loose plastic for a day, then uncovered.
- Photograph the tile in raking light (a lamp low to one side) and label each technique in your sketchbook.
Data
| Zone | Technique | Tool or object | Describe how it feels (eyes closed) | Readable by touch? (yes / partly / no) |
|---|---|---|---|---|
| 1 | Impressed | |||
| 2 | Incised | |||
| 3 | Carved | |||
| 4 | Added | |||
| Top level | Added form |
Analysis
- Which two surfaces were easiest to tell apart by touch, and what made them different (depth, sharpness, spacing, direction)?
- Which surface looked interesting but felt weak? What would you change to make it readable by hand?
- Compare your impressed zone with the Jōmon Deep Vessel. What does pressing a tool into clay record that drawing on paper does not?
If you cannot do this studio in person: At home, use salt dough (2 cups flour, 1 cup salt, about 3/4 cup water) or a store-bought air-dry clay, a drinking glass as a rolling pin and household objects for texture. Photograph each stage for your sketchbook and the lesson upload. Salt dough air-dries in two to three days, or an adult can dry it in a low oven.
Formative check
Work through these before moving on. They are not graded — they tell you whether the standard below has landed yet.
To join two pieces of clay, first both surfaces, then apply and press them together.
What is the safe way to clean up dried clay crumbs from a table?
The Jōmon period of Japanese history is named after the cord-marked texture of its pottery.
Upload a raking-light photo of your tile. For each zone, name the technique, say how it feels with eyes closed, and say what you would change to make it clearer to a hand.
How confident are you that you can form, join and texture clay safely to make a surface that reads by touch?
The Clay Test Tile: A Measured Recipe and Three Museum Records
SLS original technique sheet; museum records from the Cleveland Museum of Art Open Access API (retrieved 26 Sept 2026) and the Nelson-Atkins Museum of Art online collection (retrieved 9 Nov 2026) · SLS original, with CC0 museum metadata (Cleveland Museum of Art) and factual catalog data from the Nelson-Atkins Museum of Art
Why this reading. The test-tile lab asks you to name the technique in each zone of your tile and to say how it feels, and it points to three museum objects. The measurements and the museum records are here so you can work without a screen. Numbers for the tile are an SLS studio recipe; the museum facts are from the Cleveland Museum of Art open-access records (CC0), retrieved 26 September 2026, and from the Nelson-Atkins Museum of Art collection record, retrieved 9 November 2026.
The test tile, step by step
- Slab. Set two guide sticks 6 mm thick on either side of a ball of air-dry clay and roll between them, so the pin cannot go thinner. Cut a 10 × 10 cm square with a ruler and a plastic knife. This is level 0, the ground.
- Middle level (about 3–5 mm up). Roll a second slab 4 mm thick, cut a shape (for example a 3 cm disc), score the back with crosshatch lines, brush on slip (clay thinned with water to the thickness of yogurt), press onto the ground and blend the seam with a damp finger.
- Top level. Add one small form on the middle level, about 3 mm more, joined the same way. Three levels are now present: 0, +4 mm, +7 mm.
- Surface treatments, one per zone, each about 2 cm across: impressed (press twisted cord or a leaf, 1 mm deep); incised (a wooden skewer, a line 1–2 mm deep); carved (remove clay at leather-hard, 2 mm deep); smoothed with a damp finger.
- Dry flat under a loose cloth for one to three days; the tile shrinks a little and can warp if dried on one side only.
To fill in for each zone: its technique (impressed, incised, carved, added, smoothed), how it feels with eyes closed (rough or smooth, its direction, whether the edge is sharp or soft), and one change that would make it clearer to a hand.
Jomon Deep Vessel
Deep Vessel, Japan, Jōmon period (c. 10,500–300 BCE), about 2500 BCE; earthenware with impressed and carved decoration; height 44.7 cm, diameter 36.8 cm; Cleveland Museum of Art, accession 1998.32. The museum says it was formed by piling coils of clay, then smoothing and thinning the walls; that vertical incised squiggle lines and diagonal impressed cord patterns create texture; and that the mouth rises in four triangular forms, each with a coiled design inside. In touch terms, from the museum photograph: a tall pot, narrowest near the base and widest at the shoulder, whose body is covered in a fine diagonal hatching of twisted-cord impressions, crossed from top to bottom by two wavy lines; a smooth, plain band sits at the neck; above it the rim flares wide and rises into pointed peaks, one of which carries a small spiral you can trace with a fingertip.
Relief of Nyankhnesut Seated
Egypt, Saqqara, Old Kingdom, Dynasty 6 (c. 2311–2281 BCE); painted limestone; 98.7 × 80.6 cm; Cleveland Museum of Art, accession 1930.735. The panel shows the official himself: a large figure seated in profile, facing right, on a chair with a shaped leg, one hand raised holding a long staff that runs almost the full height of the panel, the other resting in his lap holding a small object. In the museum photograph the stone is pale and little color is visible; the figure stands only slightly out from the ground, its inner details (collar, hands, toes, chair) drawn as thin grooves, and the left edge is rough and chipped, with a diagonal crack near the upper right. The museum’s text is about the tomb as a whole: reliefs from it are dispersed among 15 museums and private collections, and the scenes center on food production and the provisioning of the tomb, with farming activities labeled “sowing,” “plowing” and “pulling flax” and a farmer exclaiming “What a beautiful day.” Those scenes are on other panels, not this one; here, the point for a hand is a single readable silhouette, raised a little and outlined by grooves.
Closer to home: Vessel in the Form of a Conch Shell (Mississippian)
Record: Mississippian culture, 1200–1500; earthenware; 8.89 × 19.37 × 26.04 cm (3 1/2 × 7 5/8 × 10 1/4 inches); Nelson-Atkins Museum of Art, Kansas City, Missouri, object number 32-73/19 (Purchase: William Rockhill Nelson Trust); the record’s subject terms are “Mississippian,” “Ceramics” and “Missouri.” Retrieved 9 November 2026. What the record does and does not say: it gives the culture, date, material, size and the conch-shell form; it has no description of the surface or of how the vessel was built, so do not invent one. For the lab: the point for your tile is the translation. A conch is hard, glossy and spiraled; the potter remade that form in soft clay, low and long (about 26 cm long but under 9 cm high). Ask the lab’s question of it: which features of a shell can survive in clay, and which must be left out or invented?
Sources: Cleveland Museum of Art, Deep Vessel, 1998.32 (clevelandart.org); Cleveland Museum of Art, Relief of Nyankhnesut Seated, 1930.735 (clevelandart.org); Nelson-Atkins Museum of Art, Vessel in the Form of a Conch Shell, 32-73/19 (art.nelson-atkins.org)