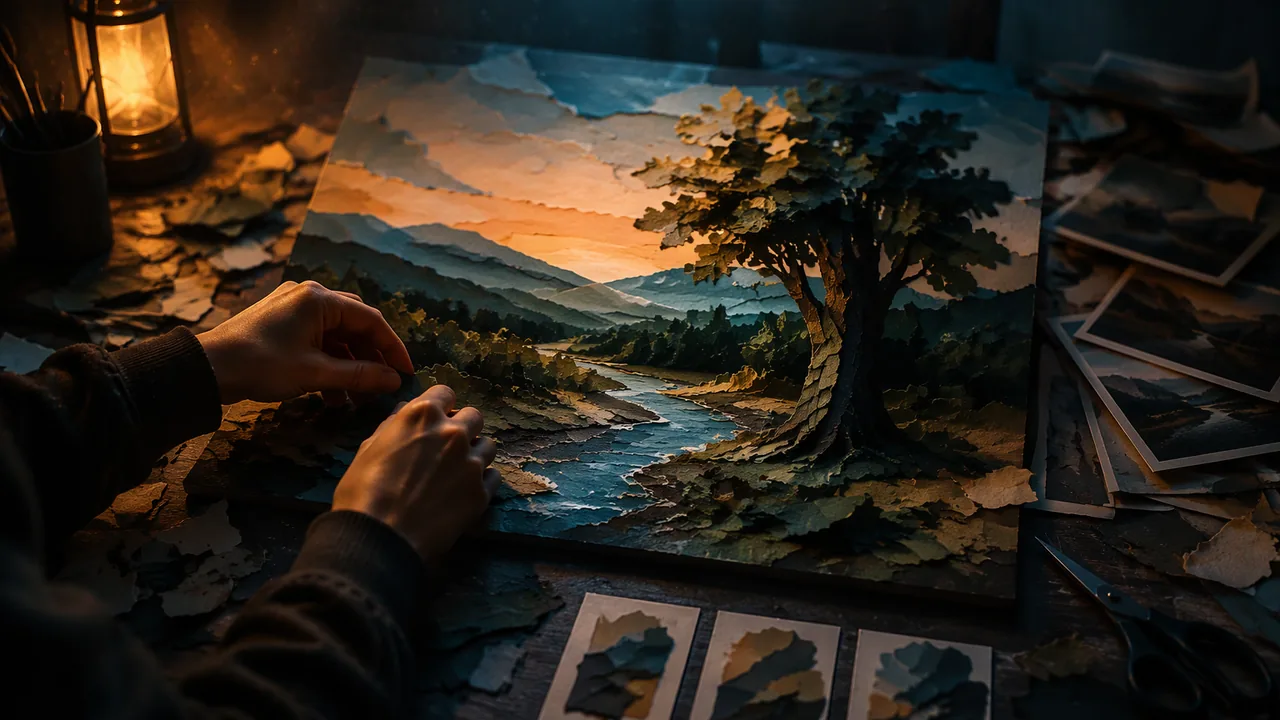
plan and build a landscape in torn and cut paper over a painted wash, using paper pieces as brushstrokes to create depth and a dominant area.
Instruction
Now you paint a landscape with paper. The record describes the process: photograph an original landscape, lay a base wash of paint on the substrate, then apply paper so that its texture, tint and shape add to (or detract from) the visual unity, with layers of paper resembling brushstrokes.
1. Photograph a place you know. Take at least ten photographs of a landscape you can visit: your backyard at sunset, a street with trees, a city park, a farm field, a creek in an Ozark hollow, a bluff above the Missouri or Mississippi River, or a state park such as Elephant Rocks near Belleview, with its giant granite boulders, or Ha Ha Tonka near Camdenton, with its sinkholes, natural bridge, spring and castle ruins. Landscapes do not have to be rural or grand. Go with a parent’s knowledge, photograph only from public places or your own property, and stay back from bluff edges and fast water. Photograph at different times of day if you can; low morning or evening light gives long shadows and warm color. Choose a place connected to your sustained investigation if it fits.
2. Compose. From your photos, make three thumbnails. Decide the horizon’s placement, the foreground, middle ground and background, and the dominant area. You may combine photographs, move a tree, remove a car. The photograph is a source, not a rule. Choose the conventions from Lesson 2.3 you will follow and any you will break.
3. Transfer and wash. On a canvas board or heavy board at least 11 x 14 inches, sketch the big shapes lightly. Lay a thin wash of acrylic in a color that sets your temperature: warm under a sunlit scene, cool under a misty one. Let it dry completely.
4. Build from back to front. Start with the sky and farthest distance, then the middle ground, then the foreground. This order lets nearer pieces overlap farther ones, as in the real world. Keep distant pieces lighter, cooler and larger in shape; make foreground pieces darker, warmer, smaller and more varied in edge and texture.
5. Make pieces work like strokes. Tear or cut each piece to the shape of the stroke you would paint: short curved pieces for leaves, long horizontal strips for water, tall thin pieces for grass. Keep the direction of pieces consistent with the form: grass pieces run vertical, water horizontal, a hill’s pieces follow its slope. Glue each with a thin coat of medium underneath and a light coat over the top, pressing out bubbles.
6. Unity check. The record warns that each paper’s texture, tint and shape can add to or detract from the visual unity. Printed text, faces or logos on magazine pieces can suddenly jump forward. Every session, stand back and look for pieces that break the unity; cover them or glaze them with thin paint to knock them back. Squint to check that the values step correctly from near to far.
A worked example (constructed). A photograph of the main street of a small Missouri river town at dusk becomes a paper painting with a warm orange wash; a sky of pale peach and lavender magazine pieces torn horizontally; dark blue-violet silhouettes of two bare oak trees cut sharply against it; and a street of long, dark, cut strips with small flecks of yellow and red for car lights. The dominant area is a single lit shop window, the lightest, warmest spot in the lower third. Looking again after a day away, the artist sees that the red flecks compete with the window and cuts their number in half.
Stop at two-thirds, with the sky, distance and middle ground built and the foreground begun, for the critique in Lesson 2.5.
📖 Read for this lesson
The reading opens over the lesson; close it to come back to exactly where you were. The checks below draw on it.
Formative check
Work through these before moving on. They are not graded — they tell you whether the standard below has landed yet.
Why do you build a paper landscape from the sky and distance forward?
A large piece of magazine paper with a bright face on it sits in your background sky. What will a viewer notice?
Describe where your landscape is and why you chose it. Which convention from Lesson 2.3 are you following, and which, if any, are you breaking?
How confident are you that you can build a paper landscape over a wash with depth, unity and a dominant area?
Practice
Work these on paper or in your notebook, then open Check your answer. Aim for all of Fluency and Application; try at least one Challenge.
Printable version: this unit’s practice workbook (PDF)
Fluency
Build speed and accuracy with the core skill.
- In what order do you build a paper landscape, and why?
Check your answer
Answer: Sky and farthest distance first, then middle ground, then foreground, so nearer pieces overlap farther ones, as in the real world.Overlap is the simplest cue for depth. - How should distant pieces differ from foreground pieces?
Check your answer
Answer: Distant pieces: lighter, cooler and larger in shape. Foreground pieces: darker, warmer, smaller and more varied in edge and texture.This is atmospheric perspective built from paper. - List the safety and permission rules for photographing your landscape.
Check your answer
Answer: Go with a parent’s knowledge; photograph only from public places or your own property; stay back from bluff edges and fast water.Take at least ten photographs, at different times of day if you can.
Application
Use the skill in context. Show your reasoning.
- The technique sheet’s picture is 14 x 11 inches. If the horizon is one-third of the height from the top, how far down is it, and how many square inches are sky and land?
Check your answer
Answer: About 3.67 inches down; about 51.3 sq in of sky and 102.7 sq in of land.11 / 3 = 3.67. Sky = 14 x 3.67 = 51.3. Total = 14 x 11 = 154; land = 154 – 51.3 = 102.7. A horizon two-thirds down (7.33 in.) reverses the areas. - Match each direction of paper pieces to a form: vertical, horizontal, following a slope. Then explain why consistency matters.
Check your answer
Answer: Grass: vertical; water: horizontal; a hill: pieces follow its slope. Consistent direction lets the pieces describe the form, as a painter’s strokes would; inconsistent pieces look like pasted scraps.Tear or cut each piece to the shape of the stroke you would paint. - A magazine piece in your sky has printed text on it and jumps forward. What does the workshop tell you to do, and what principle is at stake?
Check your answer
Answer: Cover it or glaze it with thin paint to knock it back. The principle is visual unity: each paper’s texture, tint and shape can add to or detract from it, and text, faces or logos pull forward and break the sense of distance.Stand back every session and squint to check values step correctly from near to far. - In the worked dusk street scene, what is the dominant area, and what revision did the artist make after a day away? Why did it help?
Check your answer
Answer: A single lit shop window, the lightest, warmest spot in the lower third. The red car-light flecks competed with it, so the artist cut their number in half, restoring the window’s dominance.Revision after a day away is the same self-critique habit as in semester A.
Review
Keep earlier skills sharp.
- Review (Lesson 2.3): name two composition conventions you might follow in your paper landscape, and one you might deliberately break, with a reason.
Check your answer
Answer: Model: follow a horizon near the lower third and foreground/middle ground/background planes; break the fixed single viewpoint by leaving an empty misty area, as in Chinese landscape, to let the composition breathe. Reason: the mist suits the morning river scene.Any reasoned choice from the lesson’s lists is acceptable; a broken convention needs a stated reason.
Paper Landscape Technique Sheet: Horizon Arithmetic, a Value Plan by Plane, a Worked Plan and a Build Order
SLS original technique sheet; Missouri park facts from Missouri State Parks (mostateparks.com), retrieved Nov. 10, 2026 · SLS original
Why this reading. The workshop lists six steps, but a paper landscape fails or works on numbers: where the horizon falls, how dark each plane is, how big each piece is. This technique sheet gives them and works one plan through, start to finish, so you can follow it with only this page. It is an SLS original. The example is a constructed plan of a Missouri river-town street, not a real student’s work.
1. Materials and sizes
- Support: canvas board or heavy board, 11 × 14 in. minimum, used landscape (14 in. wide, 11 in. tall) in the example below.
- Wash: thin acrylic (about one part paint to three parts water) in one color, brushed over the whole board and dried fully, about 20 minutes.
- Paper palette: your sorted envelopes; at least five values of green, five of blue, and several earth colors.
- Adhesive: acrylic matte medium or white glue thinned about 4 parts glue to 1 part water. Brush a thin coat on the board, press the piece down, then brush a light coat over it.
- Tools: scissors, a tearing ruler or straightedge, a soft brush, a brayer or clean card to press out bubbles, tweezers for small pieces.
1a. Choosing and photographing your place
Any place you know works: a backyard, a street, a farm field, a creek in an Ozark hollow, a bluff above the Missouri or Mississippi River, or a state park. Two Missouri state parks with strong shapes: Elephant Rocks, near Belleview, where giant boulders of 1.5-billion-year-old granite stand end to end; and Ha Ha Tonka, near Camdenton in the Lake of the Ozarks area, with sinkholes, caves, a natural bridge, steep bluffs, Ha Ha Tonka Spring and the ruins of a stone castle (Missouri State Parks). Go with a parent’s knowledge, photograph only from public places or your own property, stay back from bluff edges and fast water, and take nothing from the park.
2. Plan the composition with numbers
The picture is 14 in. wide and 11 in. tall (154 square inches). Choose a horizon. A horizon at one third of the height from the top is 11 ÷ 3 = 3.67 in. down and gives 14 × 3.67 = 51.3 square inches of sky and 102.7 of land (one third sky, two thirds land). A horizon two thirds down is 7.33 in. and reverses those areas: 102.7 square inches of sky. Do not put the horizon at the middle (5.5 in.), which splits the picture in two equal halves. Mark a rule-of-thirds grid on your thumbnail with lines at x = 4.67 in. and 9.33 in. and y = 3.67 in. and 7.33 in.; put the dominant area near one of the four crossings.
3. A value plan: how dark each plane is
Give each plane a target darkness on a scale where 0 percent is paper white and 100 percent is black. Check your pieces by photographing them in grayscale.
| Plane | Target darkness | Temperature | Size of pieces |
|---|---|---|---|
| Sky | 10–30 percent | Warm at the horizon, cool overhead | Long strips, 2–3 in. long, torn horizontally |
| Far distance (hills) | 30–45 percent | Cool blue-violet | Wide, 1.5 × 0.5 in., soft torn top edge |
| Middle ground | 45–65 percent | Neutral, greens and ochres | Mixed, 1 × 0.5 in. |
| Foreground | 65–90 percent | Warm, saturated | Small, 0.25 × 0.75 in., varied and overlapping |
| Dominant area | The lightest light or the strongest contrast in the picture, about 1 to 2 sq in. | The warmest color | Cut sharply |
4. Worked plan (SLS original; constructed)
Subject: the main street of a small Missouri river town at dusk, horizon at 7.33 in. down (two thirds), so the sky gets 102.7 square inches. Wash: warm orange. Sky (y = 0 to 7.33 in.): pale peach and lavender strips torn horizontally, lightest at the horizon (about 15 percent), slightly darker and cooler at the top (about 30 percent); about 14 pieces. Silhouettes: two dark blue-violet bare oak trees cut sharply, 3 to 4 in. tall, standing at x = 2 in. and x = 11 in. and rising into the sky, so the horizon is broken. Street (y = 7.33 to 11 in.): long dark strips (70 to 85 percent) cut with a ruler along the perspective lines; small flecks of yellow and red for lights, no more than eight in total. Dominant area: one lit shop window 1.5 in. wide × 1 in. tall, placed at (9.3 in., 7.3 in.), the lower-right thirds crossing, in the lightest, warmest yellow. Unity checks: a magazine piece with printed letters in the sky is covered with a thin gray-violet glaze; the red flecks, which competed with the window, are cut from eight to four.
5. Build from back to front
- Sketch the horizon, big shapes and the dominant area lightly in pencil.
- Lay and dry the wash.
- Sky first, then far distance, middle ground, foreground. Nearer pieces overlap farther ones by about a quarter inch.
- Cut or tear each piece to the stroke it stands for: short curved pieces for leaves, long horizontal strips for water, tall thin pieces for grass, pieces that follow a slope for a hill.
- Glue with a thin coat under and a light coat over. Press out bubbles from the center outward.
- After every session: stand back, squint, and take a grayscale photo. Do the values step from light (far) to dark (near)? Is the dominant area still the lightest or most contrasty spot? Does any piece with text, a face or a logo jump forward? Cover it or glaze it.
6. Stop at two-thirds
For the self-critique in Lesson 2.5 have the sky, far distance and middle ground built, the foreground begun, and the dominant area placed. That is about 25 to 30 pieces glued.
7. Time and safety
Allow five 50-minute sessions: photographs and thumbnails (1), wash and sky (2), distance and middle ground (3), foreground and unity check (4), revisions after the self-critique (5). Work on a covered table, rinse your brush in a jar of water rather than the sink, keep scissor points down when carrying, and use a craft knife only with an adult present.
Sources: Missouri State Parks, Elephant Rocks State Park (mostateparks.com); Missouri State Parks, Ha Ha Tonka State Park (mostateparks.com)