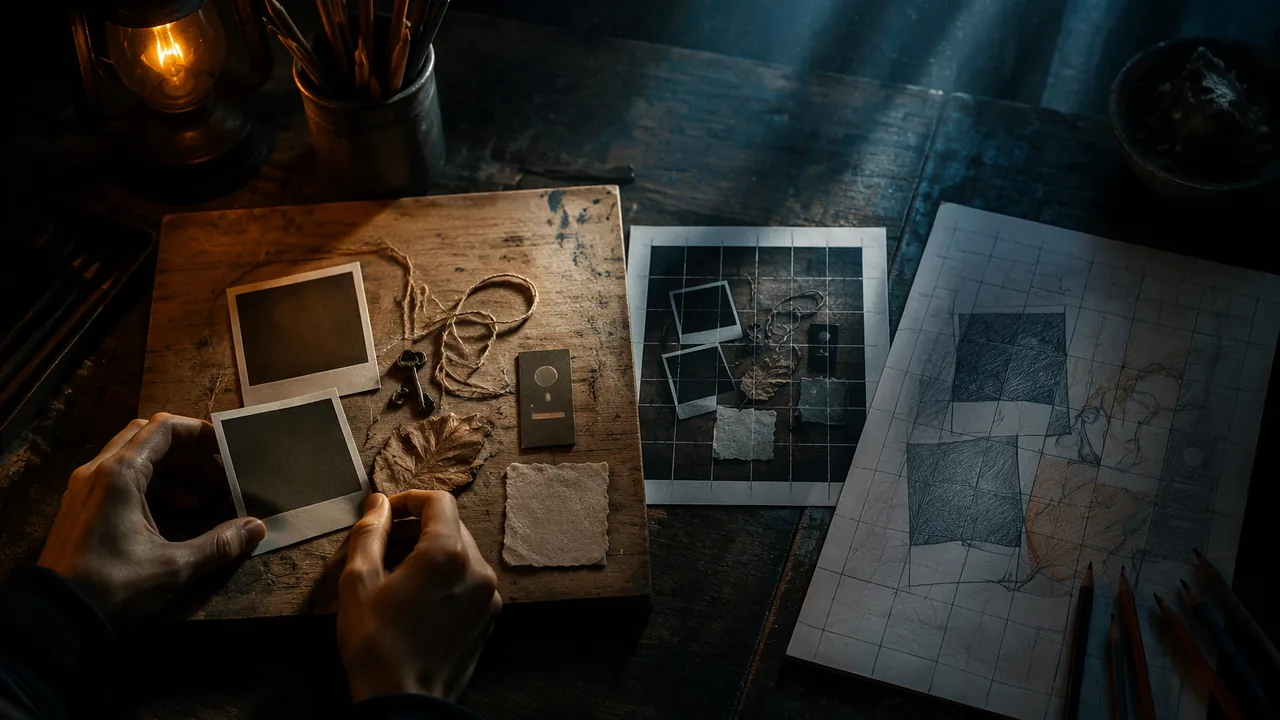
build and photograph a shallow arrangement, transfer it with a proportional grid, and render it in colored pencil to work-in-progress stage.
Instruction
The record’s project uses original photography, a grid and colored-pencil painting technique to create a trompe l’oeil work. This workshop takes you through each step. It is the longest single making period of the semester, so plan your sessions.
1. Build the arrangement. Use the strategies from Lesson 1.1. Choose a flat backing: a board, a door, a corkboard, a cutting board. Attach flat or nearly flat objects that mean something together: letters, photographs of your own, tickets, a pressed leaf, a key on a string, torn notes, a playing card. Your arrangement can connect to your sustained investigation. Avoid currency, official documents and other people’s photographs. Keep all objects within about two inches of the backing.
2. Light and photograph. Use one strong light from the upper left or upper right, at a low enough angle that each object throws a visible cast shadow on the backing. Photograph straight on, with the camera parallel to the board, to avoid perspective distortion. Take several exposures and choose the one with detail in both the lights and the darks.
3. Scale and grid. Trompe l’oeil works best at life size. Measure your board and plan the drawing at the same size if possible. To transfer the photograph accurately, draw a grid on a print of it (or overlay one digitally in GIMP) and a proportional grid on your paper. If the photo print is 6 x 8 inches and your paper area is 12 x 16 inches, a 1-inch grid on the print becomes a 2-inch grid on the paper; the scale factor is 2. If the print is 8 x 10 inches and your area is 16 x 20 inches, the factor is also 2. Always use the same ratio for both dimensions; if they differ, crop the photograph to match the paper’s proportions first. Draw lightly, square by square, attending to where contours cross grid lines. Then erase the grid lines before coloring, because colored pencil will not cover graphite cleanly.
4. Render in order.
- Impress any fine white lines (string, scratches, paper edges) with a stylus first.
- Lay in the backing surface across the whole sheet in light layers, so the objects will sit on it.
- Render the cast shadows early; they position everything.
- Build each object from light to dark with layered color, following your lab techniques.
- Save burnishing for glossy surfaces, at the end.
5. Check from a distance. Every session, stand six feet away and look. Trompe l’oeil must work first from a distance, through value and shadow, and then up close, through surface detail. If the objects look pasted on from across the room, their shadows are too weak, too soft or in the wrong direction.
Following or breaking conventions. Standard VA:Cr1B.III asks you to choose materials and methods, following or breaking established conventions. You might break the trompe l’oeil rule on purpose: one object rendered with perfect illusion while another is left as a flat outline, so the viewer sees the trick being made. If you do, write down why.
Stop at two-thirds for the critique in Lesson 1.5, with the backing, shadows and at least one object complete.
📖 Read for this lesson
The reading opens over the lesson; close it to come back to exactly where you were. The checks below draw on it.
Formative check
Work through these before moving on. They are not graded — they tell you whether the standard below has landed yet.
Your photo print is 5 x 7 inches with a 1-inch grid. You want the drawing to be 15 x 21 inches. What grid size do you draw on the paper?
You photograph your board at an angle rather than straight on. What will happen in the drawing?
List the objects in your arrangement and explain what they mean together. How does the arrangement connect to your sustained investigation, if it does?
How confident are you that you can photograph, grid and render a shallow arrangement toward a convincing illusion?
Practice
Work these on paper or in your notebook, then open Check your answer. Aim for all of Fluency and Application; try at least one Challenge.
Printable version: this unit’s practice workbook (PDF)
Fluency
Build speed and accuracy with the core skill.
- Define proportional grid, scale factor and perspective distortion.
Check your answer
Answer: Proportional grid: matching grids on a reference image and on the drawing surface, scaled by the same factor, to transfer an image accurately. Scale factor: the number every measurement is multiplied by when enlarging or reducing. Perspective distortion: the change in shape when a camera is not parallel to a flat surface.Glossary terms from the workshop. - Put the rendering steps in order: build each object light to dark; impress white lines; burnish glossy surfaces; lay in the backing; render cast shadows.
Check your answer
Answer: Impress white lines; lay in the backing across the whole sheet in light layers; render cast shadows early; build each object from light to dark; burnish glossy surfaces at the end.The shadows position everything, so they come before the objects. - How far from the backing should objects sit, and what should you avoid including?
Check your answer
Answer: Within about two inches of the backing. Avoid currency, official documents and other people’s photographs.Shallow space keeps the illusion convincing.
Application
Use the skill in context. Show your reasoning.
- Your print is 6 x 8 inches with a 1-inch grid and your paper area is 12 x 16 inches. What is the scale factor, what grid goes on the paper, and where does a point at (2.5, 3.25) on the print land?
Check your answer
Answer: Scale factor 2; a 2-inch grid on the paper; the point lands at (5.0, 6.5).12 / 6 = 2 and 16 / 8 = 2. 2.5 x 2 = 5.0; 3.25 x 2 = 6.5. Both grids have 6 x 8 = 48 squares. - Your phone photo is 4000 x 3000 pixels and your paper is 14 inches wide by 11 inches tall. Keeping the full height, what width should you crop to, and how many pixels come off each side?
Check your answer
Answer: Crop to about 3818 pixels wide, removing 182 pixels in all, 91 from each side.Width = 3000 x 14 / 11 = 3818.2, about 3818. 4000 – 3818 = 182; 182 / 2 = 91. Now both are 14:11. - A print is 8 x 10 inches and your drawing will be 16 x 20 inches. What is the scale factor? What should you do if a print were 8 x 10 and the paper 16 x 24?
Check your answer
Answer: Factor 2 (16 / 8 = 2; 20 / 10 = 2). For 16 x 24 the ratios differ (2 and 2.4), so crop the photograph (or the paper area) to matching proportions first; always use the same ratio for both dimensions.Different factors would stretch the image in one direction. - From six feet away your objects look pasted on. Give the workshop’s diagnosis and the fix.
Check your answer
Answer: Their shadows are too weak, too soft or in the wrong direction. Strengthen and sharpen the cast shadows, darkest at contact and paler where objects lift, all falling consistently away from the single light.Trompe l’oeil must work first from a distance through value and shadow, then up close through surface detail. - Using the technique sheet’s 40-degree lamp (offset = height x 0.84), how wide should the shadow be under a key that stands off the board by 1/4 inch? And under a card that lifts 1 inch?
Check your answer
Answer: About 0.21 inch under the key; about 0.84 inch under the card.0.25 x 0.84 = 0.21; 1 x 0.84 = 0.84. Where an object touches the board its shadow is thin and dark; where it lifts away, the shadow widens and softens.
Review
Keep earlier skills sharp.
- Review (Lesson 1.2): why must you erase the grid lines before coloring, and what lab lesson about colored pencil explains it?
Check your answer
Answer: Colored pencil will not cover graphite cleanly. Colored pencil is transparent and builds in light layers, so graphite underneath would show through and muddy the color.Lift the grid with a kneaded eraser before coloring.
Trompe l’Oeil Technique Sheet: Arrangement, Shadow Table, Grid and Crop Worked Examples, Session Plan
SLS original technique sheet; trigonometric shadow table and grid arithmetic computed by SLS · SLS original
Why this reading. The workshop has you build, photograph, grid and render, and it gives the steps but not the numbers. This is the technique sheet: measurements, a light-and-shadow table, a grid and crop worked through with real figures, a session plan and a stop-at-two-thirds checklist. It is an SLS original made for this course; no museum work is copied. The lesson quiz on grid scale (5 × 7 print to 15 × 21 paper) uses the scale-factor method of example 1 below.
1. The arrangement: a specification
- Backing: a flat board or corkboard, 12 × 16 in. is a good size. Paint or cover it in one matte color so its grain is simple to render.
- Objects: five to eight flat or nearly flat things you own or made: a key on a string, a ticket, a postcard you wrote yourself, a pressed leaf, a paper clip, a torn note, a bus pass, a playing card. Nothing farther than 2 in. from the backing. No currency, no ID, no one else’s photograph.
- Fix each object: pin, tape from behind, or hang by a string from a nail. Let at least one object curl away from the board and at least one overlap another. Overlaps and curls make shadows, and shadows make the illusion.
- Meaning: choose the objects so they say something together (a trip, a family recipe, a school year). Write one sentence naming the theme.
2. Light and shadow: how long should a shadow be?
Set one lamp to the upper left or upper right. Measure the angle between the lamp’s beam and a line sticking straight out of the board (the board’s normal). A lamp 40 degrees off the normal gives shadow offset = height above the board × tan 40° = height × 0.84. At 30 degrees the factor is 0.58; at 45 degrees it is 1.00.
| Object stands off the board by | Shadow shifts sideways by (light at 40°) |
|---|---|
| 1/16 in. | about 0.05 in. |
| 1/8 in. | about 0.10 in. |
| 1/4 in. | about 0.21 in. |
| 1/2 in. | about 0.42 in. |
| 1 in. | about 0.84 in. |
The rule that comes out of the table: where an object touches the board, its shadow is thin and dark; where it lifts away, the shadow widens and softens. A curling note that lifts 1/2 in. at its far corner throws a shadow about 0.4 in. wide there and none where it is pinned.
3. Photograph straight on
Put the camera 3 to 4 feet from the board, on a stack of books, with the lens level with the board’s center. Check the alignment: on the photo, measure the board’s two diagonals with a ruler on the screen or print. If the board was square to the camera, the diagonals are equal. If one is more than about 2 percent longer, the camera was angled; retake. Shoot three exposures and pick the one with detail in both the brightest paper and the darkest shadow.
4. Grid and crop: two worked examples
Example 1: same-shape print and paper. Print 6 × 8 in., paper 12 × 16 in. Scale factor 12 ÷ 6 = 2 and 16 ÷ 8 = 2, the same. Draw a 1-in. grid on the print (6 × 8 = 48 squares) and a 2-in. grid on the paper (also 6 × 8 = 48 squares). A point on the print at 2.5 in. across and 3.25 in. down lands on the paper at 5.0 in. across and 6.5 in. down.
| Print (in.) | Paper (in.) |
|---|---|
| (1.0, 1.0) | (2.0, 2.0) |
| (2.5, 3.25) | (5.0, 6.5) |
| (4.75, 0.5) | (9.5, 1.0) |
| (5.5, 7.5) | (11.0, 15.0) |
Example 2: the shapes do not match, so crop first. A phone photo is 4000 × 3000 pixels (ratio 4:3 = 1.333). Your paper is 14 in. wide and 11 in. tall (ratio 1.273). Keep the full height, 3000 pixels, and cut the width to 3000 × 14 ÷ 11 = 3818 pixels, so crop 182 pixels off the sides (91 from each). Now both are 14:11. If the print is 7 × 5.5 in., use a 0.5-in. grid on it (14 × 11 squares) and a 1-in. grid on the paper (14 × 11 squares): scale factor 2.
Transferring square by square. Number the columns along the top and the rows down the side on both grids. In each square, note where each edge crosses the square’s sides (for example, “the key ring leaves the square one-third of the way down the left side”) and mark the same fractions on the paper. Draw very lightly with a 2H pencil. When the outline is done, lift the grid lines with a kneaded eraser before coloring.
5. Render in this order
- Impress any white lines (string, scratches) with a stylus while the paper is bare.
- Backing color across the whole sheet in light layers, pressure 1–2.
- Cast shadows next. Layer a dark blue or brown with a complementary color, not black. Make them darkest at contact and paler where they lift.
- Each object from light to dark, pressure 1–3, then a burnish only on glossy things such as a key or a ticket’s laminate.
- Last: the two or three smallest details that convince up close (a fiber, a nail head, a torn corner).
6. Session plan (six 50-minute periods)
| Period | Goal |
|---|---|
| 1 | Build, light, photograph, choose the photo; write your theme sentence. |
| 2 | Crop and grid; transfer the outlines; erase the grid. |
| 3 | Backing color and impressed lines; begin shadows. |
| 4–5 | Build the objects from light to dark; six-foot check at the end of each period. |
| 6 | Stop at about two-thirds: backing, all cast shadows and at least one object finished, for the critique in Lesson 1.5. |
7. Checks before you stop
- Six-foot test: do the objects look pasted on? If yes, the fault is almost always the shadows: too pale, too soft, or on the wrong side.
- Squint test: take a grayscale photo of your drawing. Are there at least five clear values from white paper to darkest shadow?
- Light direction: every shadow must fall away from the same side.
- If you break a convention on purpose (one object left as an outline), write one sentence saying why.