photograph two- and three-dimensional artwork accurately, correct the images honestly with free software, and cut a window mat to present and protect a work.
Instruction
Most people will see your portfolio as photographs: on a college application, a website, an online show. A strong work badly photographed looks like a weak work. This lab teaches, at home, the documentation and presentation skills professionals use, and the record’s expectation that students prepare their portfolios, use digital imagery, and store and preserve their work.
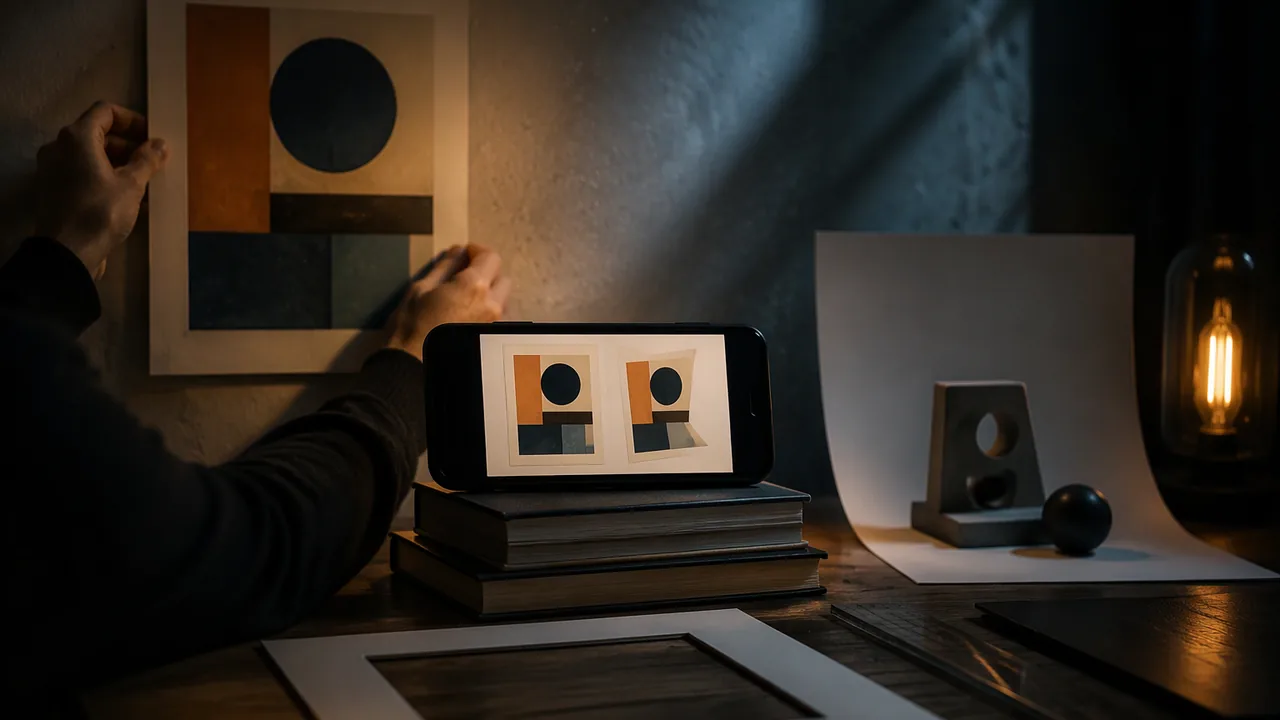
Photographing two-dimensional work. Use soft, even light: bright overcast daylight outdoors in shade, or two lamps at 45 degrees on either side of the work to avoid glare. Hang or tape the work flat on a wall. Place the camera (a phone is fine) on a stack of books or a tripod so the lens is centered on the work and exactly parallel to it; this prevents the keystone distortion that makes rectangles into trapezoids. Fill the frame, leaving a small margin. Turn off the flash, which causes glare on glossy surfaces such as burnished colored pencil, pastel and varnish.
Photographing three-dimensional work. Place the work on a plain, neutral background, ideally a sheet of paper curved up behind it so there is no visible horizon line (a “sweep”). Use one main light from the side and a white card on the other side to soften the shadows. Photograph at least three views: front, three-quarter and a detail.
Honest correction. In GIMP (free), crop to the edge of the work; use Perspective to straighten any remaining keystone; adjust Levels so the white paper is white and the darkest darks are dark; and correct color balance if the light was yellow or blue. Compare the image with the real work, side by side, and stop when they match. Standard VA:Cr2B.II asks you to consider the ethics of making and distributing work: documentation must represent the work as it is. Removing a smudge from the photograph that is on the real work, or brightening colors beyond the original, misrepresents it. If you edit, say so.
Files and backup. Name files consistently: lastname_title_year_view.jpg. Keep the original photo and the corrected version. Save a full-resolution copy and a smaller copy for the web (about 1,600 pixels on the long side). Back up in two places, for example a cloud drive and a USB drive. Keep a log: title, date, medium, dimensions (height before width, then depth), and file names.
Matting. A window mat is a board with an opening cut to frame the work. It separates the work from glass, gives it breathing room, and makes a portfolio look consistent. Use acid-free mat board (sold in craft stores) so it does not yellow or damage the work over time; heavy poster board or clean cardboard is a low-cost practice alternative. Standard mat borders are equal on top and sides, often with the bottom slightly wider, which looks balanced to the eye. For a 9 x 12-inch drawing in a 14 x 17-inch mat, with the opening overlapping the drawing by a quarter inch on each side, the opening is 8.5 x 11.5 inches. Side borders are (14 − 8.5) ÷ 2 = 2.75 inches. Vertically, 17 − 11.5 = 5.5 inches of border to divide: a top of 2.5 inches and a bottom of 3 inches adds a slightly weighted bottom. Measure twice on the back of the board, cut with a bevel mat cutter or craft knife along a metal straightedge, with an adult present, and hinge the work to a backing board with acid-free tape, not to the mat.
Preserving. Store works flat, interleaved with clean paper, away from sunlight and damp. Protect charcoal and pastel with a sheet of glassine or clean paper on top rather than fixative; if fixative is used at all, it is sprayed only outdoors, with an adult present. Standard VA:Pr5A.III asks you to compare methods for preserving and protecting different kinds of work: a collage needs different care from a sculpture.
📖 Read for this lesson
The reading opens over the lesson; close it to come back to exactly where you were. The checks below draw on it.
Studio: Photograph, correct and mat
Question. How can you document a two-dimensional and a three-dimensional work so that the images represent them accurately, and present a work on paper so it is framed and protected?
Materials
- Three of your works, including one three-dimensional work
- A phone or camera, a tripod or stack of books, two lamps or indirect daylight from a window, and white cards or paper
- A computer with GIMP (free) or a free phone photo editor, and a USB drive or cloud drive for backup
- Acid-free mat board and backing board, acid-free hinging tape (low-cost alternative: heavy poster board or clean cardboard and paper hinges)
- Metal straightedge, a bevel mat cutter or a craft knife with fresh blades (used with an adult present), a pencil, a ruler and a self-healing mat or thick cardboard to cut on
- Mat cutters and craft knives are very sharp: use them only with an adult present, cut on a self-healing mat along a metal straightedge, keep the holding hand well behind the blade, cut away from the body, and retract or cap the blade every time it is set down.
- Dispose of used blades in a sealed container (a lidded jar or a taped box), never loose in the trash.
- Lamps get hot: keep them away from paper and fabric, and switch them off when not in use; tape down cables to prevent tripping.
- Rest your eyes every 20 minutes during screen editing by looking at something far away.
Procedure
- Photograph a two-dimensional work flat on a wall with even light and the camera parallel and centered; take three exposures.
- Photograph a three-dimensional work on a paper sweep from the front, a three-quarter view and a detail.
- In GIMP, crop, correct perspective, set levels and correct color balance; compare each image with the real work and stop when they match.
- Name the files consistently, save full-resolution and web-size versions, and back them up in two places; fill in the documentation log.
- Calculate the mat opening and borders for one work on paper, with the bottom border slightly larger; check the arithmetic with the check in the lab sheet (side border times 2 plus opening width equals the mat width).
- With an adult present, mark the back of the mat board, cut the window with the bevel cutter or craft knife along a metal straightedge, and hinge the work to the backing board with acid-free tape.
Data
| Work | Dimensions (h x w x d) | Views photographed | Edits made | File names | Backup locations |
|---|---|---|---|---|---|
Analysis
- Put your corrected image beside the real work. Where does it still differ in color, value or shape, and why?
- Which edit came closest to misrepresenting the work? Where is the line between correction and alteration?
- Show your mat calculation. Does the finished mat look balanced, and would you change the bottom border?
If you cannot do this studio in person: Photograph work by a window in indirect daylight with a phone propped on books, and correct it in any free photo editor or on the phone. Make a mat from heavy cardboard or poster board with scissors, or with a craft knife and a ruler with an adult present, using the same measurements.
Formative check
Work through these before moving on. They are not graded — they tell you whether the standard below has landed yet.
A 9 x 12-inch drawing goes in a 14 x 17-inch mat with a 8.5 x 11.5-inch opening. What is each side border?
It is acceptable to digitally remove a smudge that is on the real artwork, as long as the photo looks better.
You photograph a burnished colored-pencil drawing with the phone’s flash on. What will the image most likely show?
How confident are you that you can photograph and correct my work honestly, back it up, and cut a mat to present and protect it?
Practice
Work these on paper or in your notebook, then open Check your answer. Aim for all of Fluency and Application; try at least one Challenge.
Printable version: this unit’s practice workbook (PDF)
Fluency
Build speed and accuracy with the core skill.
- Define keystone distortion, levels, sweep and acid-free.
Check your answer
Answer: Keystone distortion: the trapezoid produced when a camera is not parallel to a flat artwork. Levels: an editing control setting the darkest and lightest points and the tones between. Sweep: a curved sheet of paper behind a 3D object that hides the line between table and wall. Acid-free: made without acids that yellow paper and damage art over time.Glossary terms from the lab. - How should you light and position the camera for a two-dimensional work, and why turn off the flash?
Check your answer
Answer: Soft, even light (bright overcast shade, or two lamps at 45 degrees on either side); work flat on a wall; camera centered and exactly parallel, on books or a tripod; fill the frame with a small margin. Flash causes glare on glossy surfaces such as burnished colored pencil, pastel and varnish.Parallel placement prevents keystone distortion. - What views should you photograph of a three-dimensional work, and how do you light it?
Check your answer
Answer: At least front, three-quarter and a detail, on a plain paper sweep, with one main light from the side and a white card on the other side to soften shadows.Dimensions are logged height, then width, then depth.
Application
Use the skill in context. Show your reasoning.
- Use the lab sheet’s mat formula for an 11 x 14 inch drawing in a 16 x 20 inch mat with a 0.25-inch overlap on each side. Find the opening, the side borders and the total vertical border, and check the width.
Check your answer
Answer: Opening 10.5 x 13.5 inches; side borders 2.75 inches; total vertical border 6.5 inches (for example 3.0 top, 3.5 bottom).Opening: 11 – 2(0.25) = 10.5; 14 – 2(0.25) = 13.5. Sides: (16 – 10.5) / 2 = 2.75. Vertical: 20 – 13.5 = 6.5. Check: 2.75 x 2 + 10.5 = 16. - A web copy of a 4:3 photo is 1,600 pixels on the long side. What are its dimensions, and how many megapixels is it?
Check your answer
Answer: 1600 x 1200 pixels, 1.92 megapixels.1600 x 3/4 = 1200. 1600 x 1200 = 1,920,000 pixels = 1.92 megapixels. - Sort these edits into honest correction or misrepresentation: (a) cropping to the edge of the work; (b) removing a smudge that is on the real drawing; (c) using Perspective to straighten keystone; (d) brightening colors beyond the original; (e) setting levels so the white paper is white.
Check your answer
Answer: Honest: (a), (c), (e). Misrepresentation: (b), (d).Standard VA:Cr2B.II: documentation must represent the work as it is; compare side by side with the real work and stop when they match. If you edit, say so. - Compare how you would preserve a charcoal drawing and a collage or sculpture, as Pr5.HSIII asks.
Check your answer
Answer: Charcoal: store flat, interleaved with clean paper or with glassine on top rather than fixative (if fixative is used at all, sprayed only outdoors with an adult present), away from sunlight and damp. A collage or sculpture needs different care: for example a box or shelf that protects raised parts and keeps it dry and out of sun, with documentation photos backed up in two places.Different kinds of work need different methods; the answer should name a reason tied to each material.
Challenge
Stretch problems. Expect to think before you write.
- Design a mat for a 12 x 16 inch practice drawing in an 18 x 22 inch board with 0.25-inch overlap, choosing a bottom border 0.5 inch larger than the top. Give the opening, side, top and bottom borders, and verify both directions.
Check your answer
Answer: Opening 11.5 x 15.5; sides 3.25; top 3.0; bottom 3.5.Opening: 12 – 0.5 = 11.5; 16 – 0.5 = 15.5. Sides: (18 – 11.5) / 2 = 3.25; check 3.25 x 2 + 11.5 = 18. Vertical: 22 – 15.5 = 6.5; top t and bottom t + 0.5: 2t + 0.5 = 6.5, t = 3.0, bottom 3.5; check 3.0 + 15.5 + 3.5 = 22.
Review
Keep earlier skills sharp.
- Review (Lesson 1.4): the trompe l’oeil workshop and this lab both say to keep the camera parallel to a flat surface. What goes wrong otherwise, and how can you check it on the photo?
Check your answer
Answer: Perspective (keystone) distortion turns rectangles into trapezoids. Check by measuring the board’s two diagonals on the photo: if they are equal, the camera was square; if one is clearly longer, retake (or straighten with Perspective in GIMP).The diagonal check comes from the Unit 1 technique sheet.
Documentation and Matting Lab Sheet: Formulas and Worked Mats, Photo Setup Numbers, File Rules and a Sample Log
SLS original lab reference sheet; all dimensions and values set or computed by SLS · SLS original
Why this reading. The lab has you photograph, correct, back up and mat your work. This sheet gives the mat formulas with worked answers so you can check yours, the photo setup numbers, the correction checklist and a filled-in documentation log. The example works and log are constructed by SLS.
1. Mat formulas
Let the work be w wide and h tall, the mat board W wide and H tall, and the overlap o on each side (0.25 in.). Then: opening width = w − 2o; opening height = h − 2o; each side border = (W − opening width) ÷ 2; total vertical border = H − opening height; a top of about 45 percent and a bottom of about 55 percent of that total gives a slightly weighted bottom (in Lesson 4.2’s example, 2.5 and 3 in. of 5.5).
| Work (w × h) | Mat (W × H) | Opening | Side border | Vertical total | Top / bottom |
|---|---|---|---|---|---|
| 9 × 12 in. | 14 × 17 in. | 8.5 × 11.5 in. | 2.75 in. | 5.5 in. | 2.5 / 3.0 in. |
| 11 × 14 in. | 16 × 20 in. | 10.5 × 13.5 in. | 2.75 in. | 6.5 in. | 3.0 / 3.5 in. |
| 12 × 16 in. (practice) | 18 × 22 in. | 11.5 × 15.5 in. | 3.25 in. | 6.5 in. | 3.0 / 3.5 in. |
Check: side border × 2 + opening width must equal W. For the second row, 2.75 × 2 + 10.5 = 16. For the third, 3.25 × 2 + 11.5 = 18. Mark the opening on the back of the board, cut with the bevel cutter along a metal straightedge, and hinge the work to the backing with acid-free tape.
2. Photo setup numbers
- Two lamps at 45 degrees on each side of a work on a wall, each about 3 ft from it.
- Camera 3 to 4 ft away, lens centered on the work and level. Check that the two diagonals of the work measure the same in the photo (a rectangle photographed straight on has equal diagonals).
- Frame so the work fills the image with about 5 percent margin.
- Three-dimensional work: sweep of paper curved up behind it, one main light from the side at 45 degrees, a white card opposite; take front, three-quarter and a detail.
3. Correction order in GIMP, and what to stop at
- Crop to the edge of the work.
- Perspective tool, only if the diagonals differ.
- Levels: set the black point at the darkest dark of the work, and the white point on the white paper.
- Color balance, only if the light was yellow or blue.
- Compare with the real work in the same light. Stop when they match.
The line: correction changes the light (brightness, color cast, angle). Alteration changes the work (removing a smudge that is on it, boosting saturation past the original). State every edit in your log.
4. Files
Name: lastname_title_year_view.jpg. Keep the original and the corrected copy. Web copy: 1600 pixels on the long side (for a 4:3 image, 1600 × 1200, 1.92 megapixels). Print copy: full resolution. Back up in two places.
5. A filled-in log (SLS original; constructed)
| Work | Dimensions (h × w × d) | Views | Edits | File names | Backups |
|---|---|---|---|---|---|
| Corner Store, 8 a.m. (graphite, 2027) | 9 × 12 in. | Front | Cropped; levels | rivera_cornerstore_2027_front.jpg | Cloud or computer folder; USB |
| Block Model (cardboard, 2027) | 6 × 8 × 8 in. | Front, three-quarter, detail | Cropped; color balance (warm lamp) | rivera_blockmodel_2027_front.jpg, _34.jpg, _detail.jpg | Cloud or computer folder; USB |
6. Preserving different works
Store works on paper flat with clean paper between sheets, away from sun and damp. Do not stack a collage face to face. Store a three-dimensional work on a shelf with room around it, in a box lined with soft paper, and never by its handle or a projecting part.