compare methods for sealing, mounting and protecting tactile work, test them on samples, and bring my final work to exhibition standard for both display and handling.
Instruction
Museums spend more effort protecting works than displaying them. Tactile art has a harder problem than most: it must be touched and still survive. This lab compares methods for preserving, presenting and protecting your work, and ends with your final piece ready to exhibit.
What damages tactile work. Abrasion from repeated rubbing wears down ridges and lifts edges. Hand oils and dirt darken surfaces, especially paper and pale fabric. Loose joins fail under the pull of fingers. Light fades dyes and paper over time. Moisture makes air-dry clay soften and paper buckle. Different works need different protection against different threats.
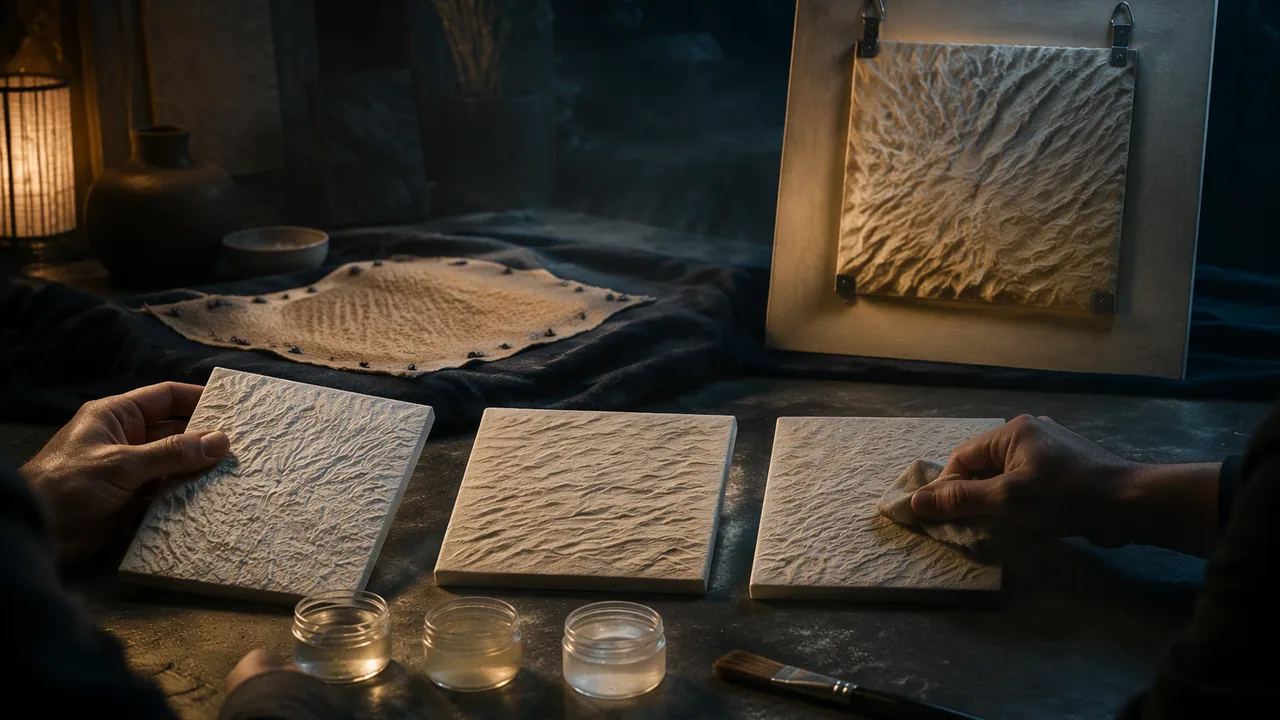
Sealing, compared. Test three finishes on matching samples of your main material: (1) diluted PVA glue, (2) acrylic matte medium, (3) acrylic gloss medium. Then do the Unit 3 wear test (twenty thumb rubs, ten cloth brushes). Record how each changes the look and feel, and how each survives. Sealers protect but also smooth: a gloss finish can make a rough texture feel slick. Choose the least change that gives enough protection. Fiber work is usually not sealed; instead, secure all ends and back it with fabric or card.
Mounting. Panels and reliefs need a rigid back (mat board, foam board or thin plywood) and secure hanging or standing hardware: D-rings and wire on the back for wall hanging, or an easel back for tables. Sculptures need a base wide enough to keep the center of gravity over it (Unit 1) and, for a touch table, a way to fix the base down, such as museum putty or a non-slip mat. Fiber pieces can hang from a dowel through a sleeve stitched across the top.
Present to be touched, or not. Decide, for each work, whether it will be touched. Some works are too fragile; show them with a touchable sample or a tactile graphic of the work beside them, plus a spoken description. This is a common museum solution and it is honest.
Care-and-handling card. Write a short card for your work: how to touch it (flat fingers, gentle pressure, where to start), what not to do, and how it should be stored and cleaned. Conservators write condition reports; your card is a simple version.
Documentation. Photograph the finished work before the exhibition in raking light and from each important side. If it is damaged later, these photos are your record.
Comparing approaches. The standard asks you to compare methods and processes for preserving, presenting and protecting a variety of works. Compare your choices with what the finishing sheet recommends for a different medium, or with how you finished one of last semester’s works in another medium; you will likely find the same problems solved differently.
📖 Read for this lesson
The reading opens over the lesson; close it to come back to exactly where you were. The checks below draw on it.
Studio: Finishing tests and exhibition preparation
Question. Which finishing and mounting methods best protect a tactile work while changing its look and feel the least?
Materials
- Three matching samples of your main material (for example small clay tiles, impasto cards or collage cards)
- Diluted PVA glue, acrylic matte medium and acrylic gloss medium, with brushes
- Mat board or foam board for backing, D-rings and picture wire or an easel back
- Museum putty or a non-slip mat for table works; a dowel and needle and thread for fiber
- A ruler, pencil, scissors and a screwdriver
- Card for the care-and-handling label
- Use only water-based, brush-on sealers. No spray varnish or solvent-based finishes.
- Cut board with a craft knife only with an adult present, on a cutting mat, with a metal ruler, cutting away from your body.
- Check that screws for D-rings are shorter than the backing is thick, so no point comes through the front.
- Lift heavy works with two hands and ask for help with anything larger than a tray.
Procedure
- Label three matching samples and apply one finish to each: diluted PVA, matte medium, gloss medium. Leave one area of each unsealed as a control.
- When dry, do the wear test on sealed and unsealed areas and record look, feel and damage.
- Choose a finish (or none) for your final work, with a reason, and apply it.
- Mount the work: back it, fit hanging hardware or a base, and check it hangs level or stands without tipping.
- Write the care-and-handling card: how to touch, what to avoid, storage and cleaning.
- Photograph the finished work in raking light from each important side as a condition record.
Data
| Finish | Look change | Feel change | After wear test: sealed area | After wear test: unsealed area |
|---|---|---|---|---|
| Diluted PVA | ||||
| Matte medium | ||||
| Gloss medium |
Analysis
- Which finish gave the best protection for the least change in feel? What evidence supports your choice?
- Compare your mounting solution with the one you would use for a work in a different medium (see the finishing sheet): what problem do both solve, and how differently?
- If your work cannot safely be touched, what touchable alternative will you provide, and why is that an honest solution?
If you cannot do this studio in person: No-cost version: test diluted PVA only on two samples against an unsealed control, back your work with cereal-box card or a cut-down box, and use a folded card easel or string loop for display. Photograph each step.
Formative check
Work through these before moving on. They are not graded — they tell you whether the standard below has landed yet.
A gloss sealer protects your rough impasto panel but makes it feel slick. What is the most defensible choice?
Showing a fragile work with a touchable sample or tactile graphic beside it is a legitimate exhibition solution.
Upload your finishing test table with photos, a photo of your mounted final work, and your care-and-handling card. Explain your finishing and mounting choices and compare them with how you would finish and mount a work in another medium.
How confident are you that you can choose and justify methods to protect and present tactile work?
Finishing, Mounting and Protecting Tactile Work: A Scored Wear Test With Worked Results, Mounting Measurements and a Care Card
SLS original technique sheet with invented, illustrative results; home-studio guidance, not conservation advice · SLS original (technique sheet and constructed results, illustrative)
Why this reading. The lab asks you to test three finishes, rate them by a wear test, choose a finish, mount the work and write a care-and-handling card. It gives the finishes and the test counts but not how to score a result, what a mounting spec looks like, or a model card. This technique sheet does. It is SLS original and the results are invented and illustrative. It is practical guidance for work made at home, not conservation advice for museum objects. Use water-based, brush-on finishes only, and have an adult present for any cutting with a craft knife.
The wear test, defined
On each sample, rub one 2 × 2 cm area of each finish, and of the unsealed control, with twenty thumb rubs (flat thumb, light steady pressure, one stroke each way is one rub) and then ten cloth brushes (a dry cotton cloth, one stroke each). Look and feel after each set. Score each area 0–2 on three things and total them out of 6.
| Score | Look change | Feel change | Damage after the test |
|---|---|---|---|
| 2 | Unchanged | Feels the same as unsealed | None |
| 1 | Slightly shinier or darker | A little slicker or stiffer | Slight polish or a lifted edge |
| 0 | Obviously changed | Slick, sticky or hard | Ridge worn down, flake or crack |
Worked result (invented), a rough clay tile:
| Finish | Look | Feel | After wear: sealed area | After wear: unsealed control | Total |
|---|---|---|---|---|---|
| Diluted PVA | 2 | 2 | 2 (no damage) | 0 (ridges worn, dust on fingers) | 6 |
| Matte medium | 2 | 1 | 2 | 0 | 5 |
| Gloss medium | 0 | 0 | 2 | 0 | 2 |
Reading it. All three sealers protected the surface, because the sealed areas survived while the control wore. The differences are in what they did to the look and feel. Diluted PVA changed nothing, gloss made a rough texture slick, so for this tile the choice is diluted PVA, the least change that gives enough protection. A different material, such as impasto with deep peaks, might come out differently; test yours.
Mounting, with measurements (SLS guidance)
- Panel or relief: a rigid back (mat board, foam board or thin plywood) cut 1–2 cm larger on each side than the work, for a margin. For hanging, two D-rings on the back, each about one third of the way down from the top edge and the same distance in from each side, joined by wire with a little slack. Check that each screw is shorter than the back is thick.
- Table work: an easel back, or a base wide enough that the balance point stays over it, held with museum putty or a non-slip mat.
- Sculpture: the base test from Lesson 1.2: the vertical from the balance point must fall inside the base.
- Fiber: a sleeve stitched across the top, a dowel through it, and a cord; secure all ends.
Test: hang or stand it, then nudge from four directions. Does it hang level? Does it stay put?
Care-and-handling card (SLS model, invented)
“Three Arches. Please touch. How: use flat fingers and light pressure. Begin at the smooth panel on the left and move slowly right. Press gently on the ridged arch. Please do not: scratch, pick, or lean on the work; do not touch it with wet hands. If it is damaged: tell the artist; do not try to fix it. Storage: stand upright in a dry place away from sun; wipe the frame only, with a dry cloth. Condition before the exhibition: photographed in raking light on 3 June, no damage.”
If a work is too fragile to touch, place a touchable sample of its material or a tactile graphic beside it, plus a spoken description. That is what museums do, and it is honest: the visitor knows what they are and are not feeling.