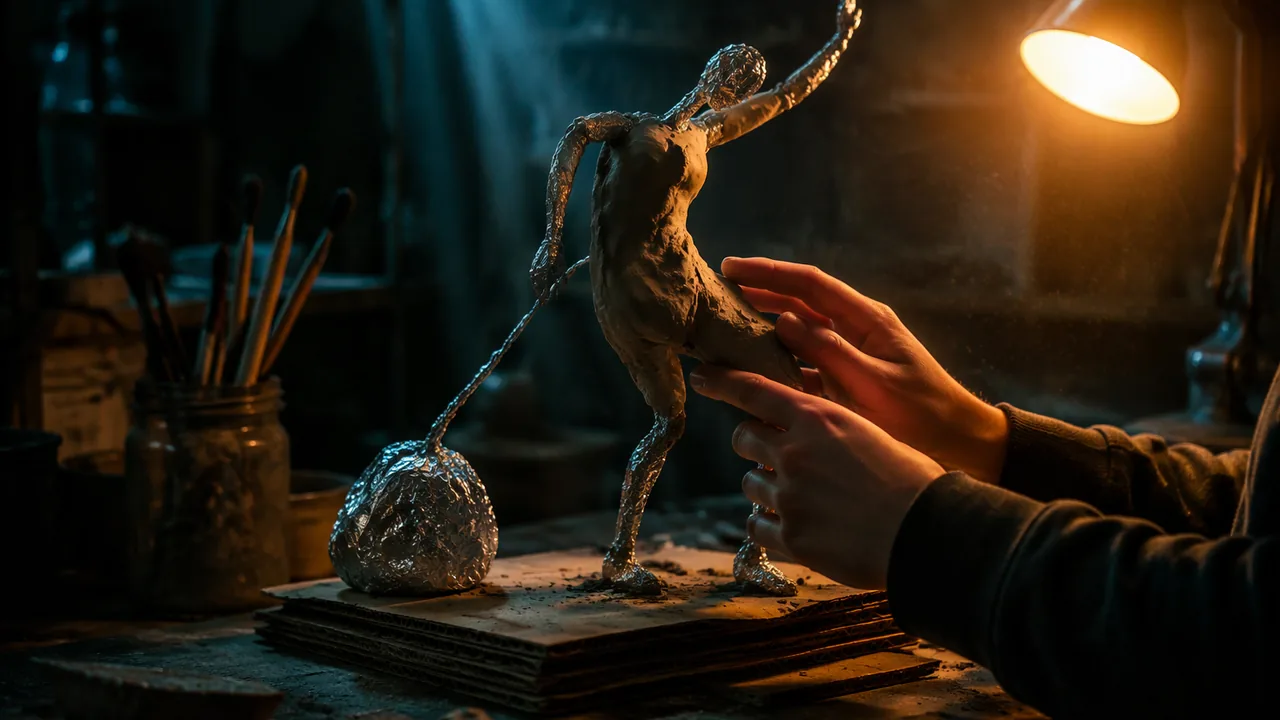
build a small sculpture in the round on a wire and foil armature, and test and adjust both its physical balance and its visual balance from three viewpoints.
Instruction
A sculpture in the round has to stand up. Soft materials such as clay and paper pulp cannot hold a raised arm or a leaning form on their own, so sculptors build an internal skeleton called an armature. Today you build one and learn to balance a form that must work from every side.
The armature. Bend aluminum armature wire (it bends by hand and does not spring back) into the main lines of your form — for a figure, a stick-figure “gesture” with a loop for the head; for an abstract form, the main curves. Fix it to a base: poke a hole in a thick layered-card base, or ask an adult to make a hole in a wooden block with a nail or awl, and anchor the wire with glue or a staple. Then bulk out the form by squeezing aluminum foil tightly around the wire. Foil makes the sculpture lighter and saves clay, and it stops thick clay from cracking as it dries.
The skin. Cover the foil with a layer of air-dry clay about 5-10 mm thick, pressing it firmly so there are no air gaps, or with paper-mâché strips (newspaper dipped in flour-and-water paste or diluted PVA). Thin, even skins dry without cracking; lumps and thick patches crack.
Physical balance. Every object has a center of gravity, the point where its weight is effectively concentrated. An object stands when its center of gravity is above its base; if the center of gravity moves outside the base, it tips. A leaning form therefore needs a wider base, a counterweight on the other side, or a stronger anchor. Test by nudging your sculpture gently from each side after each stage.
Visual balance. A sculpture can be physically stable and still look as if it is about to fall — or it can be perfectly anchored and still look light. Visual weight comes from size, mass, texture and position. Rodin’s Burgher of Calais looks heavy because its weight sinks into its feet; a form that rises on a narrow point looks light even when it is anchored.
Three viewpoints. Turn your sculpture a quarter turn at a time and sketch it from the front, side and back. Many beginners’ sculptures work from one side only. Revise until each view has its own interest, and until a hand moving around the form finds a continuous path rather than a dead end.
From AI image to form. Your source can be a figure or object from one of the course’s image cards (Cards A-D), or an abstract shape suggested by one. AI images show one fixed viewpoint; you must invent the sides and back the image never showed. Record in your sketchbook what you invented and why.
📖 Read for this lesson
The reading opens over the lesson; close it to come back to exactly where you were. The checks below draw on it.
Studio: The armature sculpture and balance test
Question. How do you build a form in the round that stands securely and reads well from every side?
Materials
- Aluminum armature wire (about 1.5-3 mm) and flat-nose pliers with a wire-cutting edge
- Aluminum foil
- A wooden block or thick layered-card base
- Air-dry clay, or newspaper strips with flour-and-water paste or diluted PVA
- Masking tape
- Modeling tools and a damp sponge
- Wear safety glasses when cutting wire; cut ends can fly. Bend each cut end back into a small loop so no sharp points remain.
- Point pliers and wire away from your face and from others while bending.
- Paste made from flour contains gluten; if anyone in your home has a wheat allergy, use diluted PVA instead. Do not use wallpaper paste, which may contain fungicides.
- Clean clay with a damp sponge, never by sweeping or brushing dry dust.
Procedure
- Sketch three thumbnails of your form from the front, side and top, based on your chosen AI image.
- Bend the wire armature to the main lines of the form, loop all cut ends, and anchor it firmly to the base.
- Bulk out the form with tightly squeezed foil, taped where needed, leaving room for a 5-10 mm skin.
- Balance test 1: nudge the armature gently from four directions and adjust the base or counterweight until it does not tip.
- Cover the form with an even clay or paper-mâché skin, then add texture where it serves the composition.
- Balance test 2 and viewpoint check: nudge again, then sketch the finished form from front, side and back, and revise any view that has no interest.
Data
| Stage | Nudge from front / back / left / right: stable? | Adjustment made | Visual weight notes |
|---|---|---|---|
| Armature | |||
| Skinned | |||
| Finished |
Analysis
- Where is your sculpture’s center of gravity, and what keeps it above the base? Give evidence from your balance tests.
- Which viewpoint was weakest before revision, and what did you change?
- Is your sculpture’s visual balance the same as its physical balance? Explain with one example of visual weight.
If you cannot do this studio in person: No-cost version: use garden wire or pipe cleaners, kitchen foil, a small box or wooden offcut as a base, and paper-mâché with flour paste (or PVA). Photograph the balance tests and the three viewpoints.
Formative check
Work through these before moving on. They are not graded — they tell you whether the standard below has landed yet.
Your leaning figure keeps tipping forward. Which fix addresses the cause?
Bending cut wire ends into small loops is a safety step, not just a finishing touch.
Upload photos of your sculpture at the armature, skinned and finished stages, your balance-test table and your three viewpoint sketches. Explain what you invented for the sides and back that the AI image never showed.
How confident are you that you can build a sculpture in the round that stands and works from every side?
Armatures and Balance in the Round: Finding the Center of Gravity, a Tipping Table and a Worked Test Record
SLS original technique sheet with invented, illustrative numbers · SLS original (technique sheet and worked example, illustrative)
Why this reading. The lab asks you to test your sculpture’s balance and explain where its center of gravity is. That needs a way to find it, a rule for when a form tips, and numbers to check your reasoning against. This technique sheet gives all three, with a worked example. It is SLS original; the arithmetic is simple trigonometry that you can check with a calculator.
The rule
A standing form tips when a vertical line dropped from its center of gravity (the balance point of its weight) lands outside its base. It stands if the line lands inside. So there are three ways to stop a lean from tipping: widen the base toward the lean, move the feet back on the base, or add a counterweight on the other side so the balance point moves back.
Finding the center of gravity
- Lay the armature (before the clay) sideways across a ruler’s edge and slide it until it balances. Mark that line on the wire with tape.
- Turn it a quarter turn and do it again. Where the two marks cross is the center of gravity, roughly.
- Stand the form on its base. Hold a thread with a washer on the end at the marked point so the thread hangs straight down. Where does it land: inside the base or outside?
Worked example: a leaning figure (SLS original, invented numbers)
A wire-and-foil figure is 18 cm tall and leans like a straight rod from its feet. Treat its center of gravity as the midpoint, 9 cm along the rod from the feet. If the rod leans at angle θ from vertical, the balance point is sideways from the feet by 9 × sin θ. Feet at the center of a 6 × 6 cm base are 3 cm from each edge.
| Lean | Sideways offset of the balance point | Stands on a 6 cm base with feet centered (3 cm to the edge)? |
|---|---|---|
| 10° | 9 sin 10° = 1.56 cm | Yes |
| 15° | 2.33 cm | Yes |
| 20° | 3.08 cm | No, by 0.08 cm: it tips at a nudge |
| 25° | 3.80 cm | No |
| 30° | 4.50 cm | No |
The limit is where 9 sin θ = 3, so sin θ = 0.333 and θ is about 19.5°. To keep a 25° lean, the base must reach at least 3.8 cm in front of the feet. Slide the feet back so the base reaches 4 cm ahead, or add a lump behind (a cloak or a counterweight) which moves the balance point back. That is the fix used in the critique example in Lesson 1.3.
Build sequence and measurements
Wire about 1.5–3 mm; every cut end bent into a small loop. Anchor to the base through a hole or with a staple. Squeeze foil tight to bulk out the form and leave room for a 5–10 mm skin of clay or paper-mâché. Nudge test after each stage, front, back, left, right, and record it.
Visual balance, and three viewpoints
Physical balance and visual balance differ. A form on a narrow point looks light even when anchored; a heavy head looks like it will tip even when it will not. Turn the sculpture a quarter turn at a time and sketch the front, side and back; a view with no interest, like the plain back of the critique example, is the one to revise. Record what you invented for the sides and back that an AI image never showed.
A worked test record (invented)
| Stage | Nudge front / back / left / right: stable? | Adjustment | Visual weight notes |
|---|---|---|---|
| Armature | No / yes / yes / yes | Base moved so the feet are 2 cm from the back edge | Wire looks light |
| Skinned | Yes / yes / yes / yes | None | Head is the heaviest form |
| Finished | Yes / yes / yes / yes | Added ridged cloak at the back | Back view now has a path for a hand |