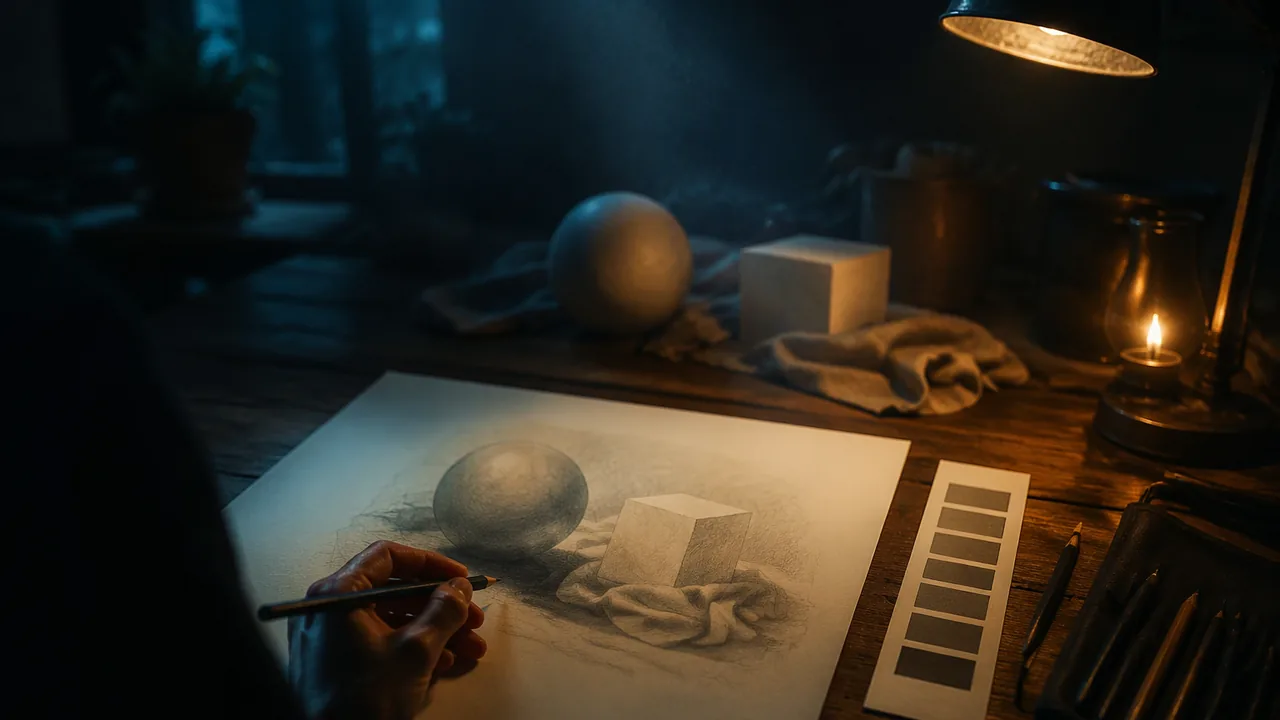
draw an observed arrangement with a full value range and use contrast of value and edge to make one area dominate.
Instruction
Most drawings that look flat have the same problem: the values are bunched in the middle. The student draws what they know about an object (its outline, its details) instead of what the light is doing to it. This lab rebuilds observational drawing around two tools that professional draftsmen rely on: a full value range and control of edges. Both are also the main tools for making one part of a picture dominate.
Value is relative. Value means lightness or darkness, independent of color. A nine-step scale runs from paper white (1) to the darkest mark your pencil can make (9). Most unplanned student drawings use steps 3 to 6 only. A convincing observed drawing usually needs both ends: a few true darks, usually in cast shadows and crevices, and a few untouched lights where the light hits hardest. Squint at your subject. Squinting reduces detail and shows you the big value shapes, which is what you should draw first.
Light on a form. On any rounded object under a single light you can find the same sequence: the highlight, the light side, the halftone where the form turns, the core shadow (the darkest part of the object itself, just past the turn), reflected light bouncing back into the shadow side, and the cast shadow on the table, darkest where it touches the object. Beginners make reflected light too bright; keep it darker than any value on the light side, or the form will look hollow.
Edges. Where two value shapes meet, the edge can be hard (a crisp change), soft (a gradual change) or lost (the two shapes merge because their values match). Look at how Seurat’s Conté study of a seated woman with a parasol (1884/85, Art Institute of Chicago) loses the edge of the figure into the ground in places and keeps it sharp in others. The eye goes to hard edges and strong contrast first. That gives you a rule for composition: put your hardest edge and your strongest value contrast at the point you want the viewer to see first, and soften and close up the values everywhere else.
Dominance and subordination. This course returns to this principle again and again, and it is the focus of this unit. Dominance means one element or area commands attention; subordination means other areas are deliberately made quieter so they support it. You can create dominance with contrast of value, edge, size, detail, color or isolation. You create subordination by reducing those same things. A drawing in which every area is equally sharp and equally contrasted has no dominance, and it tires the eye.
A worked example. Suppose your still life is a white mug, a crumpled paper bag and a dark apple on a gray cloth, lit from the upper left. If the apple is your focal point, place it off-center, let it carry the darkest dark (its core shadow and the cast shadow beneath it) beside the lightest light (the highlight on the mug behind it), and draw its edge crisply. Draw the bag with soft edges and middle values only. Let the far edge of the cloth disappear. You have not changed the objects; you have decided what the drawing is about.
Tools and care. A range of graphite from 2H to 6B, a kneaded eraser and a blending stump are enough. You do not need fixative: protect a finished drawing by slipping it into a clean folder or between sheets of plain paper. Never spray fixative indoors.
📖 Read for this lesson
The reading opens over the lesson; close it to come back to exactly where you were. The checks below draw on it.
Studio: Five thumbnails, one focal point
Question. How can you use value range and edge control alone, without color, to make one object in an observed arrangement dominate the picture?
Materials
- Graphite pencils 2H, HB, 2B, 4B and 6B (or a 2H, HB and 6B minimum)
- Kneaded eraser and blending stump or folded paper towel
- Sketchbook and one sheet of drawing paper at least 9 x 12 inches
- Three to five household objects of different surfaces (a mug, an apple, a crumpled paper bag, a shell)
- A single lamp or a window as the only light source, and a view-finder cut from card
- Use an enclosed pencil sharpener. If you sharpen with a craft knife, do it only with an adult present, cut away from your body, and keep the blade capped when not in use.
- Graphite dust is a mild irritant: blow dust off the paper away from your face and wash hands before eating.
- Do not use spray fixative indoors; the drawing does not need it. If an adult chooses to spray a finished drawing, it is done outdoors, away from people and pets.
Procedure
- Make a nine-step value scale from paper white to your darkest dark, keeping each step evenly spaced; label the steps 1-9.
- Make three small edge studies of the same sphere: one with a hard edge against the background, one soft, and one lost on the shadow side.
- Arrange your objects under one light. Using the view-finder, make five thumbnails of different crops and viewpoints, each no bigger than a playing card, blocking in only three values.
- Choose the strongest thumbnail and circle the focal point. Annotate what makes it dominate: value contrast, edge, size, detail or placement.
- On the larger sheet, block in the big value shapes first by squinting, then develop the focal object with the full range and hard edges, keeping everything else within steps 3-7 with soft edges.
- Photograph the drawing and convert the photo to grayscale on a phone or in GIMP to check that the strongest contrast sits where you intended.
Data
| Check | Your record |
|---|---|
| Darkest value used (1-9) and where | |
| Lightest value used and where | |
| Location of the hardest edge | |
| Areas deliberately subordinated, and how | |
| Thumbnail chosen and why |
Analysis
- Where does a viewer’s eye land first in your drawing? Leave it for a day, then glance at it for two seconds and note where your own eye lands; if a family member or other adult is willing, ask them to point to where their eye lands first without being told your plan. Record whether it matches.
- Which subordinating move (softening edges, compressing values, reducing detail) did the most work? Give the evidence from your drawing.
- If you did this drawing again, what would you change about the arrangement or the light before you started, and why?
If you cannot do this studio in person: Build the arrangement at home with any three objects and a single desk lamp or window. If drawing materials are limited, a single HB pencil and plain printer paper will still show the value and edge contrast; photograph the thumbnails and the final for submission.
Formative check
Work through these before moving on. They are not graded — they tell you whether the standard below has landed yet.
A student’s still life uses only values 3 to 6 everywhere. What will a viewer most likely notice first?
Reflected light on the shadow side of a form should be about as bright as the lit side, so the form looks well lit.
To make an area dominate, put the hardest and the strongest value there, and soften everything else.
How confident are you that you can draw an observed arrangement with a full value range and use contrast and edges to create a focal point?
Practice
Work these on paper or in your notebook, then open Check your answer. Aim for all of Fluency and Application; try at least one Challenge.
Printable version: this unit’s practice workbook (PDF)
Fluency
Build speed and accuracy with the core skill.
- Put the six zones of light on a rounded form in order from the light side to the table: cast shadow, halftone, highlight, reflected light, light, core shadow.
Check your answer
Answer: Highlight, light, halftone, core shadow, reflected light, cast shadow.The lesson’s sequence for any rounded object under a single light. - Define hard, soft and lost edges.
Check your answer
Answer: Hard: a crisp change between two value shapes. Soft: a gradual change. Lost: the two shapes merge because their values match.The eye goes to hard edges and strong contrast first. - On the nine-step scale, which step is paper white and which is the darkest mark? Which steps do most unplanned student drawings use?
Check your answer
Answer: Step 1 is paper white; step 9 is the darkest mark. Unplanned drawings usually use only steps 3 to 6.A convincing observed drawing needs both ends: a few true darks and a few untouched lights.
Application
Use the skill in context. Show your reasoning.
- The lab kit gives target brightness for the nine steps (step 1 = 100 percent of paper white, step 5 = 50, step 9 = 0). How far apart are the steps, and what brightness spread does a drawing that uses only steps 3 to 6 have?
Check your answer
Answer: Each step is 12.5 percentage points apart (100 / 8 = 12.5; the kit rounds to 88, 75, 63…). Steps 3 to 6 run from 75 to 38, a spread of 75 – 38 = 37 points.Eight equal intervals between 100 and 0 give 12.5 each. A convincing drawing reaches step 1 or 2 and step 8 or 9, a spread of at least 88 – 13 = 75 points. - A student draws the reflected light on an apple’s shadow side at step 4. The halftone on the lit side is at step 5. What is wrong, and how should it be fixed?
Check your answer
Answer: Reflected light must stay darker than any value on the lit side. Step 4 is lighter than the halftone (step 5), so the apple will look hollow. Darken the reflected light to step 6 or 7.The lit side reaches step 5 at its darkest, so reflected light belongs one or two steps beyond it. - In the lesson’s still life (white mug, crumpled bag, dark apple on gray cloth, light from the upper left), the apple is the focal point. List three decisions that make the apple dominate and two that subordinate the bag.
Check your answer
Answer: Apple: placed off-center; carries the darkest dark (core and cast shadow) beside the lightest light (the mug’s highlight behind it); drawn with a crisp edge. Bag: soft edges; middle values only. (The far edge of the cloth disappears too.)Nothing on the table changed; the drawing decided what it is about. - You make a lost-edge study: two shapes are both at step 5, so the boundary vanishes. How can you make the edge reappear at one corner only, and what does that show about how little contrast the eye needs?
Check your answer
Answer: Darken one shape by a single step (to 6) at that corner only. The eye needs only a one-step difference to see an edge.This recipe comes from the lab kit’s lost-edge study.
Review
Keep earlier skills sharp.
- Review (Lesson 1.1): which sketchbook purpose (collecting, testing or planning) do the lab’s five playing-card-sized thumbnails serve, and why?
Check your answer
Answer: Testing (and planning): each thumbnail tests a different crop and viewpoint so you can choose the strongest arrangement before the larger drawing.Thumbnails are small, fast sketches for comparing arrangements; the choice is annotated with what makes the focal point dominate.
Value and Edge Lab Kit: Nine Targets, Six Zones of Light, Three Edge Studies and a Worked Plan
SLS original technique kit; measurements from a public-domain reproduction of Georges Seurat, Seated Woman with a Parasol (Art Institute of Chicago, 1999.7; record retrieved 26 September 2026) · SLS original (kit and worked plan); CC0 (museum record)
Why this reading. The lab asks for a nine-step value scale, three edge studies and an observed drawing with a focal point. The lesson explains the ideas; this kit gives you the numbers and worked plans to check your own against: target values for the nine steps, a recipe for each edge study, the six zones of light on a form with the step each should get, a measured look at how Seurat’s crayon study handles edges, and a complete value-and-edge plan for the lesson’s mug, bag and apple. It is SLS original, with measurements from the Art Institute of Chicago’s public-domain reproduction of Seurat’s Seated Woman with a Parasol (study for La Grande Jatte), 1884/85, black Conté crayon on ivory laid paper, 48 x 31.5 cm, accession 1999.7 (CC0 record, retrieved 26 September 2026).
The nine-step scale, with targets
Rule nine squares, each 1 x 1 inch, in a row. Step 1 is the untouched paper; step 9 is the darkest mark your pencil can make. Fill the steps so they are evenly spaced. Check by photographing the row in even light and converting the photograph to black and white: the steps should look like a smooth staircase, with no two neighbors alike and no big jump.
| Step | Target brightness (percent of paper white) | Pencil suggestion (approximate; depends on brand and pressure) |
|---|---|---|
| 1 | 100 | Bare paper |
| 2 | 88 | 2H, very light |
| 3 | 75 | H or HB, light |
| 4 | 63 | HB, medium pressure |
| 5 | 50 | 2B |
| 6 | 38 | 4B, medium |
| 7 | 25 | 4B, firm |
| 8 | 13 | 6B, firm |
| 9 | 0 (the darkest you can make) | 6B pressed hard, or soft charcoal |
An unplanned drawing uses only steps 3 to 6 (a spread of about 37 percentage points). A convincing observed drawing uses 1 or 2 and 8 or 9 somewhere (a spread of at least 75).
Light on a form: the six zones and their steps
A sphere lit from the upper left, for example the apple. Use these as a starting plan and adjust to what you see.
| Zone | Where it is | Step |
|---|---|---|
| Highlight | The spot facing the light | 1 or 2 |
| Light | The lit side around it | 2 or 3 |
| Halftone | Where the form turns | 4 or 5 |
| Core shadow | The darkest part of the object itself, just past the turn | 8 or 9 |
| Reflected light | A band of bounce light inside the shadow side | 6 or 7 |
| Cast shadow | On the table, darkest where the object touches it | 8 or 9 |
The reflected light rule, as a check. The lit side reaches step 5 at its darkest (the halftone). Reflected light must be darker than that, so it belongs at step 6 or 7. A reflected light drawn at step 4 makes the form look hollow.
Three edge studies (each 3 x 3 inches)
- Hard edge. A step 2 shape against a step 8 shape with a crisp boundary. Keep the pencil sharp and draw the boundary in one confident line.
- Soft edge. The same two values, with the change spread over about 1 inch as a gradation. Blend with a stump, moving from the dark toward the light.
- Lost edge. Two shapes given the same step (for example both 5) so that the boundary disappears; then darken one shape by a single step (to 6) at one corner only, so the edge reappears there. The eye needs only a one-step difference to see an edge.
Edges in Seurat’s crayon study (measured on a reproduction)
The AIC’s sheet is a tall vertical (48 x 31.5 cm). A seated woman in profile faces left; the sheet has no drawn outlines. About 21 percent of the sheet is very dark and about 62 percent is light paper. Hard: the back of the bodice at the right is a crisp, nearly vertical edge where dark crayon meets bare paper. Soft: the front of the bodice and the slope of the skirt at the left fade over a wide band of gradation. Lost: the hat and head merge into one dark mass, so the face’s profile is not drawn as a separate edge at all. The eye goes first to the hard edge and the darkest mass at the right. Notice that the study is a demonstration of the lesson’s rule: the hardest edge sits with the darkest dark.
A complete value-and-edge plan (SLS original; invented as a model)
The lesson’s still life: a white mug, a crumpled paper bag and a dark apple on a gray cloth, lit from the upper left. The apple is the focal point.
| Element | Values used | Edge | Role |
|---|---|---|---|
| Apple, off-center in the lower right third | Highlight 1 or 2; core shadow 9; cast shadow 9 at the contact point | Hard at the core shadow and at the contact point | Dominant |
| Mug behind the apple | Lit side 2; shadow side 5; the highlight on its rim 1, next to the apple’s darkest area | Hard at the rim next to the apple; soft elsewhere | Supporting: makes the apple’s dark look darker |
| Crumpled paper bag at the left | Only steps 4 to 6 | Soft everywhere | Subordinate |
| Gray cloth | Steps 3 to 5 | Soft; the far edge fades to step 3 and disappears into the wall | Subordinate |
| Wall | Step 3, quiet | Lost against the cloth at the back | Ground |
Check: only one place holds step 1 beside step 9 (the mug’s rim highlight beside the apple’s core shadow); the bag and cloth stay within a three-step range (4 to 6); only the apple has hard edges at its darkest. The drawing is about the apple even though nothing changed on the table. Squint test: squint at your drawing from arm’s length; the apple should still be the first shape you see.
Sources: Art Institute of Chicago, Seated Woman with a Parasol (study for La Grande Jatte), 1999.7 (artic.edu)