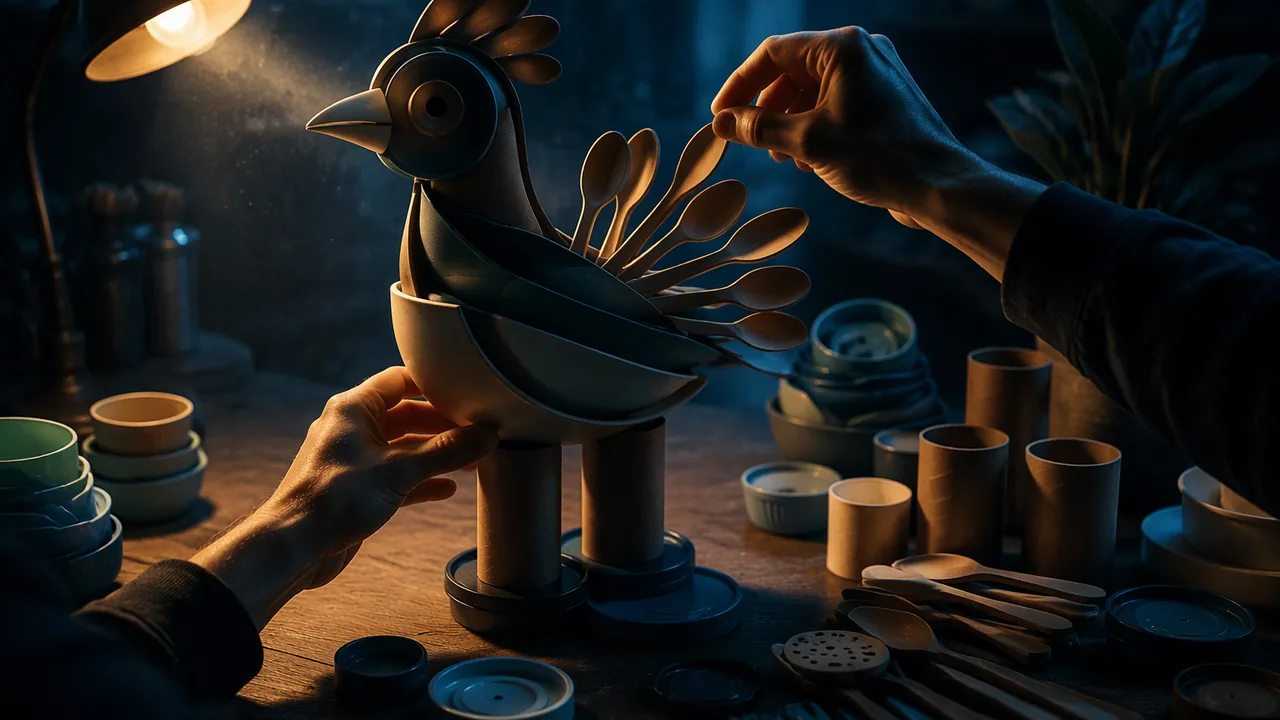
assemble found objects into a cohesive, stable sculpture, solving problems of organization, transformation, visual logic and structure.
Instruction
The found-object sculpture is an exercise in aesthetic decision-making, with four problems to solve: organization (line, form, shape, color), transformation (how the found objects work as components of the sculpture), aesthetic harmony (a visual logic, with dominance and subordination) and structural stability. This lab takes those four problems one at a time.
Collect with a rule. A random pile of objects produces a random sculpture. Give yourself a collecting rule: only objects of one color; only kitchen tools; only things that once held something; only broken things; only objects from one room. The rule gives your sculpture a visual logic before you glue anything. Collect only clean, safe objects that your household owns or that someone has given you: no glass, no sharp metal edges, no batteries, nothing that held chemicals, and nothing taken from parks, streets or other people’s property.
Organization. Lay your objects on a table and sort them by shape (linear, flat, volumetric), by color and by texture. Look for rhythms: repeated circles, a family of curves, a gradient of sizes. Sculptures organized around one repeated form tend to read as unified.
Transformation. A found-object sculpture works when the objects become parts of something new while staying recognizable enough to be interesting. Consider three levels. At the first, objects are simply arranged. At the second, they are recontextualized: a row of spoons becomes a spine, a lampshade becomes a skirt. At the third, the materials are altered (painted, cut, bent) so that their identity is partly hidden. Most strong pieces mix the second and third levels, keeping some objects legible. A consistent coat of one paint color is a quick way to unify diverse objects, but it erases their histories, so use it only if that is your intention.
Dominance and subordination in three dimensions. A sculpture is seen from many sides. Choose a main view but check all four. Give the sculpture one dominant element (the largest, most unusual or most central object) and arrange the others to lead toward it or support it. Negative space, the air through and around the sculpture, is part of the composition.
Structural stability. The base must be wider or heavier than the top unless you design an anchor. Joints are where sculptures fail. Match the joining method to the materials:
- Wire (18-20 gauge) binds objects with holes or handles; twist with pliers, not fingers.
- Hot glue (low-temperature, with an adult present) holds light plastics, fabric and cardboard, but fails on smooth metal and under weight.
- Two-part epoxy putty or strong craft adhesive holds heavier joints; use it only with an adult present, follow the label, wear gloves, and open a window.
- Nuts and bolts or zip ties make mechanical joints you can adjust.
- Tabs and slots join cardboard without glue.
A worked example. One student collected only objects that had once held liquid: bottle caps, a watering-can spout, a funnel, a coffee pot. She wired the funnel upside down on a weighted coffee-can base as the body, fanned the caps into a crest along its top on a wire armature, and set the spout as a single projecting beak. Painting was limited to the base. When she showed it to her family without explaining it, they read it as a bird made of vessels, and every object was still recognizable.
Testing joints first. Before building, make a test board of at least four joints using your actual materials, and pull on each. Choose the methods that held.
📖 Read for this lesson
The reading opens over the lesson; close it to come back to exactly where you were. The checks below draw on it.
Studio: Found-object assemblage
Question. How can a set of found objects, gathered by a rule you choose, be organized and joined into a stable sculpture with a visual logic and a dominant element?
Materials
- Clean found objects your household owns, collected by a stated rule (no glass, batteries, sharp metal or chemical containers; nothing taken from parks or other people’s property)
- 18-20 gauge wire (or pipe cleaners, string or twist ties), pliers and wire cutters
- Low-temperature hot glue gun (used with an adult present), strong water-based craft adhesive or white glue, zip ties or rubber bands
- A base: a wood scrap, a weighted can or a heavy cardboard box
- Acrylic paint and brushes (optional); scrap cardboard for a joint test board
- Use a low-temperature glue gun only with an adult present, on a heat-proof surface; never touch the nozzle or fresh glue, and keep a cup of cold water nearby for burns.
- Wear safety glasses or goggles when cutting or bending wire; ends can spring. Cover cut wire ends with tape or bend them under.
- Use epoxy putty and strong adhesives only with an adult present, with gloves and an open window, following the label; do not use solvent-based adhesives or spray products indoors.
- No power tools and no drilling in this lab: choose objects that already have holes or handles, or join them with glue, tabs, string or zip ties. Tape or file any sharp edge, with an adult’s help, before handling.
Procedure
- Write your collecting rule and gather 8-15 objects that follow it. Photograph them laid out and sorted by shape, color and texture.
- Make a joint test board: try at least four joining methods with your actual materials and pull-test each; record which held.
- Arrange the objects in three different configurations on the table and photograph each. Choose one, marking the dominant element and the main view.
- Build from the base up, securing each joint before adding weight above it. Check stability after every addition by nudging the sculpture gently.
- Walk around the sculpture and adjust at least one element so that the second and third views are resolved, not only the front.
- Decide whether to paint, and write down the reason. Photograph the finished sculpture from four sides.
Data
| Joint method | Materials joined | Pull test (held / slipped / failed) | Used in final? |
|---|---|---|---|
Analysis
- How did your collecting rule shape the visual logic of the sculpture? Would a different rule have produced a stronger piece?
- Which objects are still recognizable and which have been transformed? What does the balance between the two do for the meaning of the work?
- Which joint came closest to failing, and how would you redesign it? What did the pull tests teach you?
If you cannot do this studio in person: Build a smaller assemblage (under 10 inches) at home from clean recyclables and household objects, joined with string, tape, rubber bands, tabs and slots, or white glue. Photograph from four sides and submit the joint test results.
Formative check
Work through these before moving on. They are not graded — they tell you whether the standard below has landed yet.
A student hot-glues a heavy metal can on top of a plastic bottle. What is most likely to happen?
Which collecting rule gives a sculpture the clearest visual logic?
Safety goggles are needed when cutting and bending wire.
How confident are you that you can assemble found objects into a stable sculpture with a visual logic and a dominant element?
Practice
Work these on paper or in your notebook, then open Check your answer. Aim for all of Fluency and Application; try at least one Challenge.
Printable version: this unit’s practice workbook (PDF)
Fluency
Build speed and accuracy with the core skill.
- Name the four problems the found-object sculpture asks you to solve.
Check your answer
Answer: Organization (line, form, shape, color); transformation (how the found objects work as components); aesthetic harmony (a visual logic, with dominance and subordination); structural stability.The lab takes these one at a time. - Describe the three levels of transformation.
Check your answer
Answer: First: objects are simply arranged. Second: they are recontextualized (a row of spoons becomes a spine). Third: the materials are altered (painted, cut, bent) so their identity is partly hidden. Most strong pieces mix the second and third levels.Keeping some objects legible keeps the piece interesting. - Match each joining method to what it suits: wire, hot glue, epoxy putty, tabs and slots.
Check your answer
Answer: Wire (18-20 gauge): objects with holes or handles. Hot glue: light plastics, fabric and cardboard (fails on smooth metal and under weight). Epoxy putty or strong craft adhesive: heavier joints. Tabs and slots: cardboard without glue.Nuts and bolts or zip ties make adjustable mechanical joints.
Application
Use the skill in context. Show your reasoning.
- Use the kit’s stability test: one edge of a 12-inch base is lifted 1 inch. What is the slope of the tilt, and roughly what angle is it?
Check your answer
Answer: A slope of 1 in 12 (about 0.083), a tilt of about 5 degrees.1 / 12 = 0.083; the angle whose tangent is 0.083 is about 4.8 degrees, which the kit rounds to about 5. If the sculpture stays up without support, it passes. - The kit’s rule of thumb keeps the base at least one-third as wide as the sculpture is tall. What minimum base suits a 15-inch sculpture? The worked bird is 12 inches tall on a 6-inch tin: does it pass?
Check your answer
Answer: 15-inch sculpture: at least a 5-inch base. The bird needs at least 4 inches and has 6, so it passes.15 / 3 = 5; 12 / 3 = 4; 6 > 4. Heavy objects go low (the tin holds 2 pounds of sand). - A student hot-glues a heavy metal can on top of a plastic bottle. Predict the result and redesign the joint.
Check your answer
Answer: The joint fails: hot glue grips smooth metal poorly and cannot carry weight. Redesign: use wire through a hole or handle, a mechanical fastener (nut and bolt or zip tie) or epoxy putty with an adult present; better still, put the heavy can at the bottom as the base.The base must be wider or heavier than the top unless you design an anchor. - Write a collecting rule of your own and explain how it gives the sculpture a visual logic. Then list three objects that follow it and are safe to use.
Check your answer
Answer: Model rule: “only kitchen tools.” The shared function and materials make the parts seem to belong together before anything is joined. Safe objects: a wooden spoon, a plastic funnel, a whisk. (No glass, sharp metal, batteries, chemical containers, or anything taken from parks, streets or others’ property.)A specific rule creates shared qualities the viewer can read; “anything I find” gives a random sculpture.
Review
Keep earlier skills sharp.
- Review (Lesson 1.2): how does dominance and subordination change when a work is a sculpture instead of a drawing?
Check your answer
Answer: A sculpture is seen from many sides, so you choose a main view but check all four; you give it one dominant element (largest, most unusual or most central object) with the others leading toward or supporting it, and the negative space through and around it is part of the composition.In the drawing lab, dominance came from value and edge; in 3D it also comes from position, size and views.
Found-Object Sculpture Kit: The Envelope, Real Collecting Rules, a Joint Test with a Pass Mark and a Worked Build
SLS original technique kit; Smithsonian American Art Museum record 2012.34A-B (Nick Cave, Soundsuit, 2009); Metropolitan Museum of Art object 495553 (El Anatsui, Dusasa II, 2007); retrieved 26 September 2026 · SLS original (kit and worked example); museum data cited under each institution’s open-access terms (Metropolitan Museum: CC0)
Why this reading. The lab has you collect by a rule, organize, transform, plan dominance in three dimensions, and test joints on a board before building a sculpture no larger than 18 inches in any direction. This kit gives you the measurable versions of those instructions: the size envelope, a joint test with a pass mark, a stability test with an angle, a joint choice table, a worked example with dimensions, and real collecting rules from the artists studied in Lesson 4.1, with their museum records. It is SLS original. Museum facts are from the Smithsonian American Art Museum (Nick Cave, Soundsuit, 2009, accession 2012.34A-B) and the Metropolitan Museum of Art (El Anatsui, Dusasa II, 2007, 2008.121), retrieved 26 September 2026; both artists’ work is in copyright and is described, not reproduced.
The envelope and the safety rule
The finished sculpture fits inside an 18 x 18 x 18 inch box (5,832 cubic inches). Collect only clean, safe objects: no glass, no sharp metal edges, no batteries, nothing that held chemicals. Wear goggles when cutting or bending wire, because cut ends can spring toward the face.
Collecting rules from real artists
A collecting rule gives a sculpture a visual logic before any glue is used. Nick Cave, according to the Smithsonian American Art Museum, sources materials from thrift stores and discarded items: this suit uses doilies, others toys, hair and buttons. El Anatsui’s Dusasa II (Metropolitan Museum) is made of found aluminum, copper wire and plastic disks and measures 599.4 x 731.5 x 5.1 cm; the record shows a material rule (found aluminum joined with wire) and a huge, flat size. Your rule can be as narrow as these: all one material, all once held liquid, all from one room.
Testing joints: a protocol with a pass mark
Before you build, make a test board with at least four joints using your actual materials. For each joint: hang a bag containing 1 pound (0.45 kg) of rice from it for 60 seconds, then pull it sideways gently three times. Pass if it holds all three pulls and the minute without slipping. Fail if it shifts, cracks or lets go. Record the materials, the method, the result and the fix.
| Method | Good for | Fails on |
|---|---|---|
| Wire, 18-20 gauge (twist with pliers, not fingers) | Objects with holes or handles; adjustable | Smooth objects with nowhere to grip |
| Hot glue | Light plastics, fabric, cardboard | Smooth metal; anything heavy |
| Two-part epoxy putty or strong craft adhesive (follow the label, gloves, ventilate) | Heavier joints | Anything you want to move afterward |
| Nuts and bolts, or zip ties | Adjustable mechanical joints | Objects without holes |
| Tabs and slots | Cardboard, without glue | Heavy loads |
The stability test
Set the sculpture on a table. Lift one edge of its base until that edge is 1 inch above the table, on a 12-inch base. That is a tilt of about 5 degrees (the angle whose tangent is 1 in 12). If it stays up without support, it passes. A useful rule of thumb (SLS, not a law): keep the base at least one-third as wide as the sculpture is tall unless you design an anchor; for an 18-inch sculpture that is a 6-inch base. Put heavy objects low.
A worked example with dimensions (SLS original; invented as a model)
Rule: objects that once held liquid. Parts: a biscuit tin as the base (6 inches across, 3 inches tall, filled with 2 pounds of sand); a funnel wired upside down on the tin as the body (5 inches tall); twelve bottle caps fanned along a wire armature as a crest (4 inches); a watering-can spout as a beak (6 inches long, projecting 5 inches beyond the funnel). Size check: height 3 + 5 + 4 = 12 inches; width 6 inches for the base plus the 5-inch beak = 11 inches; both inside the 18-inch envelope. Stability check: the base is 6 inches, 50 percent of the height, over the one-third rule of thumb; in the model, the sculpture passed the 1-inch lift test on the beak side. Joint tests: hot glue between cap and wire failed the 1-pound test; wire through the cap’s edge passed. Dominance: the spout beak is the most unusual element and the leading line of the piece. Transformation: painting only the base.
Sources: Smithsonian American Art Museum, Soundsuit (Nick Cave), 2012.34A-B (americanart.si.edu); Metropolitan Museum of Art, Dusasa II (El Anatsui), 2008.121 (metmuseum.org)