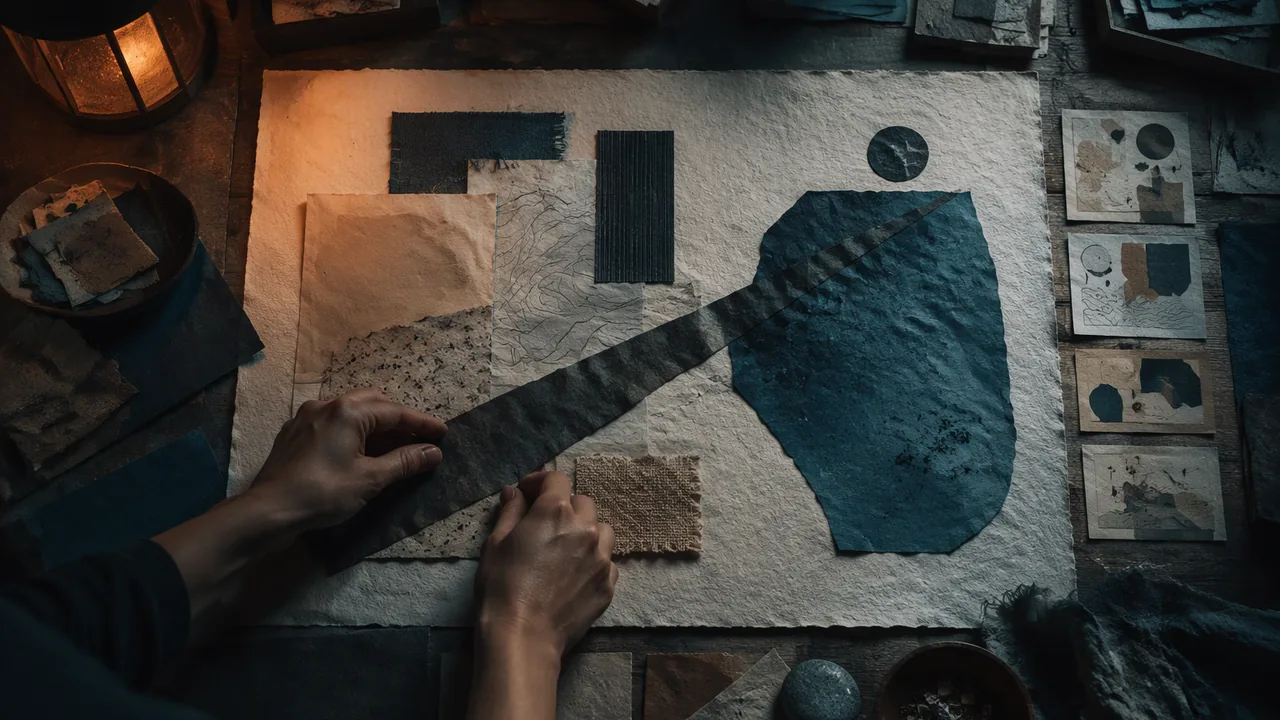
compose a layered collage that interprets my poem, using gathered and made materials and a clear dominant area.
Instruction
A collage can fail in two ways. It can become a pile of pleasing scraps with no structure, or it can become a poster in which images simply sit next to their captions. This workshop builds your collage so that it holds together as a composition and carries your poem’s meaning.
Gather with intention. Before you glue anything, assemble a collection: papers you made in the sampler (paste papers, monoprints, transfers), papers you collected (tickets, packaging, maps, letters, fabric, receipts, wrappers), and images you photographed or drew. Standard VA:Cr2C.III asks you to show how visual and material culture shapes people’s lives. The printed things of a place, its signs, labels, transit maps and packaging, are that material culture. Choose pieces that belong to the place in your poem.
Credit what you borrow. Any image you did not make must be credited in your materials list. Prefer your own photographs and public-domain images. If you use a magazine image, transform it substantially and credit the source.
Plan the structure first. Make three thumbnails that arrange the big areas before any detail. Decide:
- The dominant area. Which line of the poem matters most? That idea gets the strongest contrast, the largest scale or the most isolated position.
- The ground. The first layer should be a large, quiet field of color or texture (a wash, a paste paper, a monoprint) that unifies everything above it.
- The path. How will the eye travel? A diagonal strip, a repeated shape, or a line of letters can lead it.
- The letters. The acrostic letters can appear in the collage, cut from found print, or be absent. If they appear, treat them as shapes in the composition, not as labels.
Build from back to front. Glue large background pieces first and press them flat. Add middle-ground elements next. Place the dominant element last, so you can position it exactly. Lay pieces out and photograph the arrangement before gluing; you can compare arrangements on your phone.
Unity and variety. Collage invites variety, so unity needs deliberate work. Repeat a color across the piece at least three times. Repeat a shape or edge type. Use a glaze of transparent color over areas that feel disconnected. Leave some quiet space; a collage with no rest area exhausts the viewer.
A worked example. A student whose poem was about his grandmother’s town in Michoacán, which he had visited once, built the ground from a pale orange paste paper combed in wavy lines. Across it he wove strips of a road map with strips of a photograph of her hands, so the two were inseparable. The dominant area, lower right, was a transfer of an old family photograph (used with his family’s permission), surrounded by the darkest values in the piece. Letters cut from bus tickets ran up the left edge. When he looked at a photograph of it the next day, he saw that the upper left was overcrowded; he removed two elements and added a tissue layer to quiet the rest.
Stop for self-critique when the structure is set and the dominant area is placed but details can still change. Photograph the collage, leave it for a day, and then check the photograph against the Portfolio Task 3 rubric before you continue.
📖 Read for this lesson
The reading opens over the lesson; close it to come back to exactly where you were. The checks below draw on it.
Formative check
Work through these before moving on. They are not graded — they tell you whether the standard below has landed yet.
Your collage feels chaotic. Which revision most directly improves unity?
Tickets, packaging and maps from a place can carry its material culture into a collage.
Photograph two arrangements of your collage before gluing. Which one will you use, and what does the dominant area say about your poem?
How confident are you that you can build a layered collage with a clear structure and dominant area that interprets my poem?
Practice
Work these on paper or in your notebook, then open Check your answer. Aim for all of Fluency and Application; try at least one Challenge.
Printable version: this unit’s practice workbook (PDF)
Fluency
Build speed and accuracy with the core skill.
- Name the two ways a collage can fail, according to the workshop.
Check your answer
Answer: It becomes a pile of pleasing scraps with no structure, or a poster in which images simply sit next to their captions.The workshop builds a composition that holds together and carries the poem’s meaning. - Define material culture and give three examples that could belong to the place in a poem.
Check your answer
Answer: The physical things a community makes and uses, such as signs, packaging, clothing and tools. Examples: transit maps, labels, tickets, receipts, wrappers, letters.Standard VA:Cr2C.III asks you to show how visual and material culture shapes people’s lives. - Put the build in order: dominant element; middle-ground elements; large background pieces (the ground).
Check your answer
Answer: Ground (large background pieces) first, pressed flat; middle-ground elements next; dominant element last, so it can be positioned exactly.Lay pieces out and photograph the arrangement before gluing.
Application
Use the skill in context. Show your reasoning.
- The technique sheet limits the dominant area to 15 percent of an 11 x 14 board and requires a rest area of at least 10 percent. Compute both limits. Does a 4 x 5 inch dominant area and a 4 x 4 inch rest area pass?
Check your answer
Answer: Board = 154 sq in. Dominant limit = 23.1 sq in; rest minimum = 15.4 sq in. Yes: 4 x 5 = 20 sq in (about 13 percent) and 4 x 4 = 16 sq in (about 10.4 percent) both pass.11 x 14 = 154. 0.15 x 154 = 23.1; 0.10 x 154 = 15.4. 20 / 154 = 0.13; 16 / 154 = 0.104. - Thumbnails for the collage are 2.75 x 3.5 inches for an 11 x 14 board. What fraction of the final size are they in each direction, and why choose that size?
Check your answer
Answer: One quarter in each direction (11 / 4 = 2.75; 14 / 4 = 3.5), so the proportions match the final and nothing distorts when you enlarge.Matching proportion is the same rule as the 2:3 thumbnails in Unit 1. - Your collage feels chaotic. List three moves from the workshop that build unity without removing variety.
Check your answer
Answer: Repeat one color across the piece at least three times; repeat a shape or edge type; glaze transparent color over disconnected areas; leave a quiet rest area. (Any three.)A collage with no rest area exhausts the viewer. - In the Michoacán example, the student saw the next day that the upper left was overcrowded. What did he change, and what does the example show about when to stop for self-critique?
Check your answer
Answer: He removed two elements and added a tissue layer to quiet the rest. It shows why you stop when the structure is set and the dominant area placed, but details can still change: a fresh look the next day can still fix the composition.Photograph the collage, leave it a day, then check the photo against the rubric. - You found a magazine image of a city skyline you want in your collage. What does the workshop require you to do?
Check your answer
Answer: Transform it substantially and credit the source in your materials list. (Prefer your own photographs and public-domain images.)Any image you did not make must be credited.
Review
Keep earlier skills sharp.
- Review (Lesson 3.2): which sampler technique did the Michoacán student use to make his grandmother’s hands and the road map “inseparable,” and why does it carry that meaning?
Check your answer
Answer: Weaving. Where vertical and horizontal strips cross, both images are present at once, so the map and the hands read as one.Weaving is the sampler’s way to show two places, times or languages together.
Building a Poem Collage in Layers: Measurements, Adhesives, a Worked Layout with Areas, and the Credit List
SLS original technique sheet; Cleveland Museum of Art Open Access record 1963.1 (Kurt Schwitters, Little Dance, retrieved 26 September 2026) · SLS original (technique sheet and worked layout); CC0 (museum record)
Why this reading. The workshop asks you to gather a collection, credit what you borrow, plan the structure with three thumbnails, and build a collage of at least 11 x 14 inches from back to front until the structure is set. This sheet supplies what that needs: the measurements and grids, an adhesive guide, a layer plan with areas, a step sequence with pressing times, the credit-list format with worked entries that use free museum images, a full worked layout with numbers, and one verified example of unity in a small collage. Everything is SLS original except the museum facts about Kurt Schwitters’s Little Dance (Cleveland Museum of Art, 1963.1, CC0, retrieved 26 September 2026).
Measurements and grids
| Item | Specification |
|---|---|
| Support | A stiff board or heavy paper, at least 11 x 14 inches (154 square inches), that will not buckle when wet with glue |
| Thumbnails | Three, each 2.75 x 3.5 inches (one quarter of the final size in each direction, so the proportions match) |
| Thirds guide, portrait (11 wide x 14 tall) | Vertical lines at 3.67 in and 7.33 in from the left; horizontal lines at 4.67 in and 9.33 in from the top. Crossing points: (3.67, 4.67), (7.33, 4.67), (3.67, 9.33), (7.33, 9.33) |
| Thirds guide, landscape (14 wide x 11 tall) | Vertical lines at 4.67 in and 9.33 in; horizontal lines at 3.67 in and 7.33 in |
| Dominant area | No more than 15 percent of the board: 23 square inches on 11 x 14, for example 4 x 5 inches (20 square inches, 13 percent) |
| Rest area | At least one quiet area with only the ground showing, at least 10 percent of the board: 15.4 square inches, for example 4 x 4 inches |
| Repeated color | At least three separate places (the lesson’s rule). Check by counting |
| Cutting | Scissors for most cuts. A craft knife only with an adult present: use a cutting mat or thick cardboard and a fresh blade, cut away from your hand, and keep fingers behind the ruler |
Adhesive guide
| Adhesive | Good for | Watch for |
|---|---|---|
| PVA (white craft glue) | Paper to board, thick papers, tickets, fabric scraps | Wrinkles thin paper if applied thickly; dilute 1 part water to 3 parts glue for large sheets |
| Acrylic matte medium | Paper layers and a protective top coat; makes tissue transparent when brushed over it | Brush in one direction; can leave brush marks if overworked |
| Acrylic gel medium | Heavier objects and image transfers; strong hold | Slow to dry; needs weight to press flat |
| Glue stick | Temporary placement while you plan | Not permanent; edges lift over time. Fix by re-gluing with PVA |
| Fabric glue | Cloth to board or paper | Test a scrap first; some stiffen the cloth |
The step sequence
- Gather (Session 1, 25 minutes). Put your papers you made in the sampler, papers you collected and images you photographed or drew into three piles: large quiet, medium, small and bright.
- Thumbnails (15 minutes). Three thumbnails that arrange the big areas before any detail. On each, mark: dominant area, ground, path, letters. Pick one; write two sentences saying why.
- Ground (10 minutes). Glue a large, quiet field of color or texture over the whole board, edge to edge. Press it flat under a book for 15 minutes.
- Middle layer (Session 2). Lay out all middle-ground pieces on the dry ground without gluing. Photograph the arrangement. Move pieces and photograph a second arrangement. Compare the two photographs side by side, also in black and white; choose one. Then glue back to front.
- Dominant element last. Position it, check against the thirds guide, glue. Surround it with the darkest or lightest values in the piece.
- Unity check. Repeat a color three times; repeat a shape or edge type; glaze with a thin coat of matte medium mixed with a little color over areas that feel disconnected; leave the rest area.
- Stop for self-critique when the structure is set, the dominant area is placed, and details can still change. Photograph it, leave it a day, and check the photograph against the checklist at the end of this sheet and the Portfolio Task 3 rubric.
How to glue. Brush a thin, even coat of adhesive onto the back of the piece, out to the edges. Lay it down, cover with a clean scrap of paper, and smooth from the center to the edges to push out air bubbles and squeezed-out glue. Wipe squeeze-out with a damp cloth. Press under a weight for 15 to 30 minutes between layers, and at the end press the whole piece flat under weight for at least 24 hours.
A full worked layout with numbers (SLS original; invented as a model)
The poem: the acrostic SEDALIA from Lesson 3.3 (heat haze over the fairground barns, Dad’s keys from the hardware store, interstate lights like lanterns). Board: 11 x 14 portrait, 154 square inches.
| Layer and element | Size | Area (sq in) | Share of the board | Notes |
|---|---|---|---|---|
| 1. Ground: pale orange paste paper, combed in wavy lines | Whole board | 154 | 100% | Quiet, warm, unifies everything |
| 2. Fairground roofs: monoprint, across the top | 11 x 4 | 44 | 29% | Gray-blue; a white tissue veil covers it and reaches 1 inch lower (heat haze) |
| 2. Dark halo behind the dominant area | 6 x 7 | 42 | 27% | Navy paper; the darkest value in the piece |
| 2. Road-map strips woven on a diagonal | 6 strips, 0.75 x 8 each | 36 | 23% | Their direction leads the eye toward the dominant area |
| 3. Dominant: transfer of a photograph of keys | 4 x 5, centered at (7.33, 9.33) | 20 | 13% | Only place with pure white beside navy; orange border on the transfer |
| 3. Letters S E D A L I A, cut from old ticket stubs | 7 letters, each about 1 x 1.2 | 8.4 | 5% | Up the left edge, treated as shapes |
| Rest area: ground only | 4 x 4, lower left | 16 | 10.4% | Nothing glued here |
Checks. The dominant area, 20 square inches, is 13 percent (under 15 percent); it sits on the thirds crossing point (7.33, 9.33). The rest area, 16 square inches, is 10.4 percent (over 10 percent). The pieces overlap (the halo sits under the transfer, the strips cross the halo), so the shares do not add to 100. Color repeat count: orange appears in the ground, in the border of the keys transfer, and in small paste-paper squares scattered along the strips: three places. Two arrangements photographed: A put the strips horizontally; B put them on the diagonal. In the black-and-white photographs, B showed a clear path to the dominant area and A did not; B was chosen.
Unity in a very small collage: a verified example
Kurt Schwitters’s Little Dance (1920; collage; sheet 13.1 x 10.4 cm, about the size of an index card; Cleveland Museum of Art, 1963.1) combines scraps of brown wrapping paper, gray newsprint and printed tickets. The museum notes that the color red “dances” among the subdued tones of white, gray and ochre. On viewing, the red appears in four separate places on the sheet (upper left, near the center, at middle left and at lower left), which is the repeated-color rule in action: a small, deliberate accent repeated in several places holds a piece of many different papers together.
The credit list: format and worked entries
Any image you did not make must be credited. Keep this table with the work. Prefer your own photographs and images from the public domain or CC0.
| Item | What it is and where you used it | Source | Rights | How you changed it |
|---|---|---|---|---|
| 1 | Keys transfer, dominant area | Own photograph, taken 12 Oct | Own work | Printed and transferred; cropped 4 x 5 in |
| 2 | Road-map strips | Free paper road map, picked up at a visitor center; cover printed 2026 | Free public handout | Cut in 0.75-inch strips and woven |
| 3 | Wave-pattern shapes in the haze layer | Katsushika Hokusai, Under the Wave off Kanagawa, 1830/33, Art Institute of Chicago, 1925.3245 | Public domain, per the museum | Photocopied, tinted gray, cut into small shapes |
| 4 | Star shape | Cleveland Museum of Art, Luster Wall Tile with a Couple, 1915.524 | CC0 | Shape only, traced and cut from paste paper |
Where to find images you may use (these are tools, not sources you must read): the Art Institute of Chicago’s public-domain filter, the Cleveland Museum of Art Open Access collection, the Metropolitan Museum of Art Open Access collection, Smithsonian Open Access, and the Library of Congress. Write down the accession number and the rights statement from the object page when you take the image. A magazine photograph is copyrighted: if you use one, transform it substantially and credit the source.
A checklist to stop and photograph
Dominant area placed at a thirds crossing point, 15 percent or less. Ground visible in at least one quiet area, 10 percent or more. One color in three places. Every borrowed image in the credit list. Two arrangements photographed, one chosen with a reason.
Sources: Cleveland Museum of Art, Little Dance (Kurt Schwitters), 1963.1 (clevelandart.org)