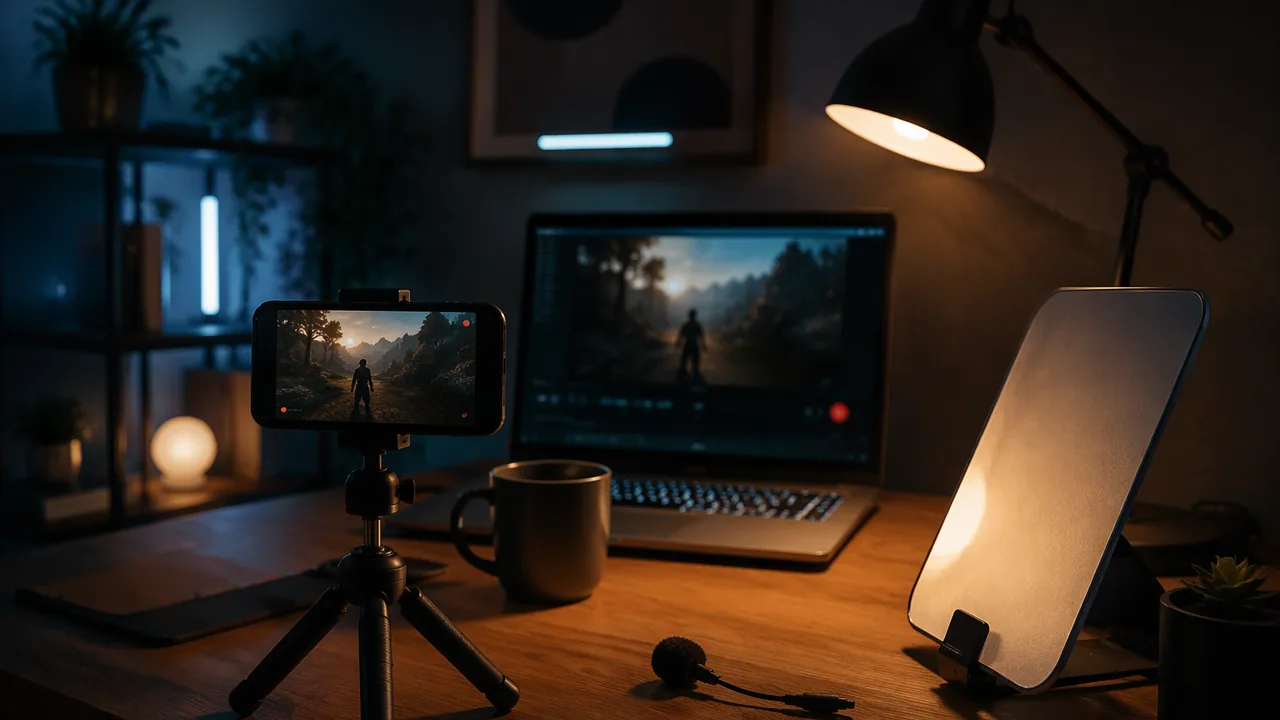
apply basic filming techniques (camera angles, shot sizes, camera movement, lighting and sound) to a short devlog shot filmed at home with a phone, capture gameplay of your capstone game with OBS Studio, and gather and import video, audio and image files into a video editor.
Instruction
Why a trailer, and why now. Your capstone game needs a way to be seen in about a minute. Valve’s Steamworks documentation on trailers warns that a shopper moving through recommendations may give a trailer less than 10 seconds, may watch it with the sound off, and in most cases wants to see gameplay, ideally with the in-game HUD visible. In this supplement you produce a 60-90 second trailer for your own game, the way a small studio’s marketing artist would, except that you do every job yourself. You already wrote a storyboard and shot list for a cut-scene earlier in the course (Missouri objective MM.VID.1). This lesson turns a trailer version of that plan into footage of two kinds: gameplay captured straight from the screen with OBS Studio, and one short live-action devlog shot filmed with a phone, either you on camera or only your hands at the desk sketching, typing or holding a controller.
Who and what may appear. Film only yourself or, with a parent’s OK, members of your own household who agree to it. No friends, neighbors or strangers, and no one under 18 unless their parent has said yes. Keep house numbers, street signs, mail, family photos, screens with private information and anything that names your school or town out of the frame. A hands-at-the-desk shot never shows your face and works just as well in a devlog.
Camera angles and shot sizes. The angle is where the lens sits relative to the subject. An eye-level shot feels neutral and honest. A high angle looks down and makes the subject seem smaller; straight overhead (a top-down shot of your hands and sketchbook) is a devlog favorite because it shows the work. A low angle looks up and makes a subject seem strong. Shot size is how much of the subject fills the frame: a wide shot shows where, a medium shot (waist up, or the whole desk) shows what is happening, and a close-up shows detail, such as fingers on the keys or a pencil line. Shoot at least one of each so the edit has choices. Use the rule of thirds: put eyes or the key action on one of the lines that divide the frame into thirds. Hold the phone horizontally so every clip fills a 16:9 trailer frame; Lesson 5.3 shows how to make a vertical cut from it.
Camera movement. Most shots should be still. Rest the phone on a stand or a stack of books so it cannot shake. Move only with a purpose: a pan turns left or right to follow action, a tilt turns up or down to reveal (from the sketch up to the monitor), and a push-in slides the phone slowly toward the subject, for example on a book pushed along the desk, to build emphasis. Move slowly and evenly, hold still for two seconds before and after each move so the editor has spare frames (handles), and record every shot three times.
Lighting. Light the subject from the front or the side, never from behind. A bright window behind you turns you into a silhouette because the camera sets its exposure for the window. Face the window instead, or place a desk lamp to one side of the phone and bounce it off a white wall or a sheet of paper to soften the shadows. On many phones you can tap the subject to set focus and exposure, and press and hold to lock them so the brightness does not pump while something moves. Lamps get hot: never touch the bulb or drape cloth over it.
Sound. A phone microphone hears the whole room. Choose the quietest room, close the door, switch off fans, keep the phone within an arm’s length of your mouth, and use a room with soft furnishings to cut echo. Record ten seconds of silence, called room tone, before you speak, so the editor can patch gaps. Play every take back on headphones before you move on. If the voice is still poor, record narration separately in Audacity and lay it under the shot in Lesson 5.2.
Capturing gameplay with OBS Studio. The OBS Project describes OBS Studio as free and open source software for video recording and live streaming on Windows, macOS and Linux; you only record, so you never set up a streaming service or any account. Following the OBS Quick Start Guide: run the Auto-Configuration Wizard (Tools menu) and choose recording; in the Sources dock click + and add Window Capture (Windows and Linux) or macOS Screen Capture to record just the running Godot game window (Display Capture records the whole desktop, and Game Capture is Windows-only, for 3D games). OBS captures desktop audio and your microphone by default, so watch the Audio Mixer meters and mute the microphone for gameplay takes. Under Settings > Output, the Standard Recording Output Guide explains Recording Path and Recording Format and recommends MKV, because an MKV file is not corrupted if recording stops unexpectedly. Convert it with File > Remux Recordings, or tick Automatically remux to mp4 under Settings > Advanced. Run a test recording for a few minutes first, as the guide strongly advises, then record several 30-60 second takes of each beat on your storyboard.
Gathering and importing file sources. Objective MM.VID.3 asks you to access, capture and import different kinds of files. Make one project folder with subfolders for gameplay (the OBS files), phone (copied over a USB cable or a parent-approved transfer), audio (your own WAV music and effects, or CC0 packs from Kenney, credited) and graphics (a logo PNG with a transparent background, a title card, screenshots). Shotcut needs no separate import step: its feature list says it edits files natively, reads formats through FFmpeg and images such as PNG, JPEG, SVG and WebP, and lets you drag files from the file manager. Phone video is sometimes recorded at a variable frame rate; the Shotcut User Guide says to set Settings > Video Mode manually, open the clip and use Convert… in the Properties panel if Shotcut does not offer it. Log every file as you go.
📖 Read for this lesson
The reading opens over the lesson; close it to come back to exactly where you were. The checks below draw on it.
Build: Trailer Shoot Day: Devlog Shot and Gameplay Capture
Question. Can you film a steady, well-lit, clearly recorded devlog shot at home and capture clean gameplay takes with OBS Studio, then bring every file source into an editor ready to cut?
Materials
- A computer with your capstone Godot project and OBS Studio installed (free, no account)
- A phone or tablet that records video, a phone stand or a stack of books, and a USB cable to copy files
- A window or a desk lamp, and a sheet of white paper or a white wall to bounce light
- Headphones for checking takes
- Your trailer storyboard and shot list, and this lesson’s reading (shot-list template, capture log and OBS settings card)
- Shotcut or Kdenlive installed (free, no account) for the import check
- Film only yourself or, with a parent’s OK, household members who agree; no one else, and no one under 18 without their parent’s permission.
- Keep your address, house number, street signs, mail, school name and private screens out of every frame.
- Lamps get hot: do not touch the bulb, keep cloth and paper away from it, and run cords where nobody can trip.
- Take a short screen break at least every 30 minutes and keep headphone volume moderate.
Procedure
- Copy the reading’s shot-list template and write a trailer shot list from your storyboard: 8-12 gameplay shots (the hook, core loop, escalation, best moment) and one 5-10 second devlog shot, each with its angle, shot size and any movement.
- Set up the devlog shot: phone horizontal on a stand or books, light from the front or side, the quietest room you have. Record ten seconds of room tone, then three takes of the shot, holding still two seconds before and after any pan, tilt or push-in. Check each take on headphones.
- In OBS Studio run the Auto-Configuration Wizard for recording, add a Window Capture (or macOS Screen Capture) of the running game window, mute the microphone in the Audio Mixer, set the Recording Path to your project’s gameplay folder and the format to MKV, and turn on Automatically remux to mp4 (or remux afterwards with File > Remux Recordings).
- Make a two-minute test recording and play it back to check picture, game sound and smoothness. Then record two or three 30-60 second takes of every gameplay shot on your list.
- Copy the phone takes into the phone folder and put your music, sound effects and graphics (logo PNG, title card, screenshots) in their folders, with clear file names.
- Open Shotcut (or Kdenlive), set the Video Mode to 1080p at the frame rate you recorded, drag in one file of every kind (gameplay, phone clip, audio, image) and confirm each plays; convert any variable frame rate phone clip with Convert… in Properties.
- Fill in the capture log for every file: name, type, length, source, what it shows and whether you will use it.
Data
| File | Type (gameplay / phone / audio / graphic) | Length or size | Angle, shot size, movement | Light and sound check | Imported and plays? |
|---|---|---|---|---|---|
| devlog_take2.mp4 | phone | ||||
| hook_take1.mp4 | gameplay | ||||
| theme_music.wav | audio | — | |||
| logo.png | graphic | — | — |
Analysis
- Compare your best and worst devlog takes: which change to angle, light, movement or sound made the biggest difference, and how can you tell from the footage?
- Why does the OBS guide recommend recording to MKV, and what did you have to do before your editor would use the file?
- Which shot on your list is the hook for the first ten seconds, and does it show gameplay with the HUD visible, as the Steamworks guidance suggests?
If you cannot do this build in person: If OBS will not run smoothly on your computer, rescale the recording to 1280 × 720 in the Advanced output settings (a common resolution Steam names) and close other programs while recording; if you cannot record the screen at all, film the monitor with the phone on a stand in a darkened room, square to the screen. If you have no phone, film the devlog shot with a webcam added in OBS as a Video Capture Device, or replace it with a slow pan across your printed storyboard and sketches made in the editor with a keyframed zoom.
Formative check
Work through these before moving on. They are not graded — they tell you whether the standard below has landed yet.
Missouri standard: MM.VID.2
High angle (overhead)
Tap to revealThe lens looks down on the subject; straight overhead shows hands and work on the desk and makes a subject seem smaller.
Low angle
Tap to revealThe lens looks up at the subject, which makes it seem strong or important.
Close-up
Tap to revealA shot size that fills the frame with one detail, such as fingers on the keys or a pencil line.
Push-in
Tap to revealA slow camera move toward the subject that builds emphasis; hold still two seconds before and after it.
Room tone
Tap to revealTen seconds of the room’s own silence, recorded so the editor can patch gaps in the sound.
Missouri standard: MM.VID.2
You film your devlog shot at a desk with a bright window directly behind you, and your face comes out almost black. What is the best fix?
Missouri standard: MM.VID.2
Which plan for a 6-second devlog shot of your hands sketching a level map gives the editor the most usable footage?
Missouri standard: MM.VID.3
The OBS Standard Recording Output Guide recommends recording to MKV because an MKV file is not corrupted if recording stops unexpectedly; you can then convert it with File > Remux Recordings or turn on Automatically remux to mp4.
Missouri standard: MM.VID.3
Which OBS source records only your running Godot game window on Windows or Linux?
Missouri standard: MM.VID.2, MM.VID.3
Paste your trailer shot list and capture log. For the devlog shot, name the angle, shot size, movement, light setup and sound steps you used, and say what you changed between takes. For the gameplay capture, list the OBS source, recording format and path, and how you converted the files. Finish by listing one file of each kind you imported into the editor (gameplay, phone clip, audio, image) and whether it played.
How confident are you that you can film a steady, well-lit, clearly recorded shot at home, capture gameplay with OBS Studio, and import video, audio and image files into an editor?
Practice
Work these on paper or in your notebook, then open Check your answer. Aim for all of Fluency and Application; try at least one Challenge.
Printable version: this unit’s practice workbook (PDF)
Fluency
Build speed and accuracy with the core skill.
- Name the camera angle or shot size: (a) the lens looks straight down on your hands and sketchbook; (b) the lens looks up at the subject; (c) the frame shows the whole desk and what is happening; (d) the frame is filled by fingers on the keys.
Check your answer
Answer: (a) high angle (overhead); (b) low angle; (c) medium shot; (d) close-up.High angles make a subject seem smaller; low angles make it seem strong. Shoot at least one wide, one medium and one close-up so the edit has choices. - Define pan, tilt and push-in, and say what you must do before and after each move.
Check your answer
Answer: Pan: turn left or right to follow action. Tilt: turn up or down to reveal. Push-in: slide slowly toward the subject to build emphasis. Hold still for two seconds before and after each move (handles), and record every shot three times.Most shots should be still; move only with a purpose. - What is room tone, how long should you record it, and why?
Check your answer
Answer: A recording of the room’s own background sound, about ten seconds, recorded before you speak so the editor can patch gaps and the audio never drops to dead silence.Play every take back on headphones before moving on.
Application
Use the skill in context. Show your reasoning.
- A trailer frame is 1920 × 1080. Where are the rule-of-thirds lines? Give the x positions of the two vertical lines and the y positions of the two horizontal lines.
Check your answer
Answer: Vertical lines at x = 640 and x = 1280; horizontal lines at y = 360 and y = 720.1920 ÷ 3 = 640, so 640 and 1280. 1080 ÷ 3 = 360, so 360 and 720. Put eyes or the key action on one of these lines. - You record at 30 frames per second and hold still for two seconds before and after a push-in. How many spare frames (handles) does that give the editor in total for that shot?
Check your answer
Answer: 120 frames.2 s × 30 fps = 60 frames before and 60 after; 60 + 60 = 120. - Your devlog face comes out dark against a bright window, and the brightness pumps as your hand moves. Give two fixes from the lesson.
Check your answer
Answer: Face the window (or light from the side with a lamp bounced off white paper or a wall) so the light is on you; tap the subject to set focus and exposure, then press and hold to lock them.The camera sets exposure for the brightest area, so a window behind you makes a silhouette. - Which OBS source would you add to record only the Godot game window on (a) Windows; (b) macOS? Which source is for a webcam? What should you do with the microphone for gameplay takes?
Check your answer
Answer: (a) Window Capture; (b) macOS Screen Capture; Video Capture Device is for a webcam. Mute the microphone in the Audio Mixer.Display Capture records the whole desktop; Game Capture is Windows-only, for 3D games. - List the privacy rules for what may appear in a devlog shot filmed at home.
Check your answer
Answer: Film only yourself or, with a parent’s OK, household members who agree; no friends, neighbors, strangers or anyone under 18 without their parent’s yes. Keep house numbers, street signs, mail, family photos, private screens and anything naming your school or town out of frame. A hands-at-the-desk shot avoids showing your face.These rules apply to every take, not just the ones you use.
Challenge
Stretch problems. Expect to think before you write.
- Explain why the OBS guide recommends recording to MKV, what remuxing does, and why remuxing does not lower picture quality.
Check your answer
Answer: An MKV file is not corrupted if recording stops unexpectedly. Remuxing moves the audio and video streams into a different container, such as MP4, for editors and upload sites. It does not re-encode the streams, so the picture is unchanged.Use File > Remux Recordings or tick Automatically remux to mp4.
Review
Keep earlier skills sharp.
- Review (Lesson 4.2): your capture log names files such as hook_take1.mp4. How does this connect to the release-checklist habit of naming and versioning builds?
Check your answer
Answer: Clear, consistent names (with version or take numbers) let you and anyone else find the exact file again, just as a version number lets testers report which build they played.Log every file as you go: name, type, length, source and whether you will use it.
Trailer Shoot Kit: Shot List, Phone Filming Checklist, OBS Settings Card and Capture Log
SLS original technique sheet; OBS Studio facts from the OBS Project home page and its Knowledge Base articles Quick Start Guide and Standard Recording Output Guide; trailer advice from Valve’s Steamworks Documentation (Trailers); import steps from Shotcut’s feature list and the Shotcut User Guide and from the Kdenlive 26.08 Manual (all retrieved 2026-11-10); the Lantern Run game and file names are invented examples · SLS original
Why this reading. Lesson 5.1 asks you to plan, film and capture the raw material for your trailer. This sheet gives a shot-list template with a worked example, a filming checklist, an OBS Studio settings card and a capture log, so you can work through the shoot on your own.
1. Rules before you shoot
- Film only yourself or, with a parent’s OK, household members who agree. No one under 18 without their parent’s permission. No one else.
- Keep addresses, house numbers, street signs, mail, family photos, private screens and your school’s name out of the frame.
- Use only music and sound you made, or CC0/CC BY sounds with a credit line.
2. Shot-list template (worked example: an invented platformer, Lantern Run)
| # | Trailer beat | Source | What we see | Angle and size | Movement | Target length |
|---|---|---|---|---|---|---|
| 1 | Hook | Gameplay | Player dodges three falling lanterns, HUD visible | Game camera | — | 4 s |
| 2 | Hook | Gameplay | Wall-jump into the tallest tower | Game camera | — | 3 s |
| 3 | Core loop | Gameplay | Collect, avoid, unlock a door | Game camera | — | 10 s |
| 4 | Devlog | Phone | Hands sketching the tower level | Overhead, close-up | Slow push-in | 6 s |
| 5 | Escalation | Gameplay | Boss lantern chase | Game camera | — | 12 s |
| 6 | Title | Graphic | Logo PNG over the last gameplay frame | — | Keyframed zoom | 5 s |
Copy the table and write 8-12 gameplay rows and one devlog row for your own game. Steamworks notes that viewers may give a trailer less than 10 seconds and may watch muted, and that most want to see gameplay with the HUD, so put your best gameplay in rows 1 and 2.
3. Filming checklist (phone)
- Frame: phone horizontal, on a stand or a stack of books; key action on a rule-of-thirds line.
- Angle and size: one wide, one medium, one close-up of the same action; overhead for hands at the desk.
- Movement: pan, tilt or push-in only with a purpose; slow and even; two seconds still before and after.
- Light: window in front or to the side, never behind; a lamp to one side bounced off white paper; tap to focus, press and hold to lock if your phone offers it.
- Sound: quietest room, door closed, fans off, phone within arm’s length; ten seconds of room tone first; check on headphones.
- Takes: three of every shot; say the shot number aloud or hold up a card with it at the start.
4. OBS Studio settings card
OBS Studio is free and open source and runs on Windows 10 and 11, macOS 13.0 or newer, and Linux (OBS Project home page). You only record; you never connect a streaming service or create an account.
- Tools > Auto-Configuration Wizard: choose to optimize for recording.
- Sources dock > +: Window Capture (Windows, Linux) or macOS Screen Capture; pick the running game window. Display Capture records the whole desktop; Game Capture is Windows-only.
- Audio Mixer: OBS records desktop audio and the microphone by default. Mute the microphone for gameplay takes; if the meters do not move, choose devices in Settings > Audio.
- Settings > Output: set Recording Path to your project’s gameplay folder; Recording Format MKV (the OBS guide recommends it because an MKV is not corrupted if recording stops unexpectedly).
- Settings > Advanced: tick Automatically remux to mp4, or later use File > Remux Recordings.
- Test for a few minutes before real takes, as the Quick Start Guide strongly advises.
Low-spec computer: the Standard Recording Output Guide notes that, in the Advanced output mode, you can rescale the recording to a lower resolution such as 1280 × 720 while keeping the aspect ratio; Steam lists 1280 × 720 as a common resolution.
5. Project folder and capture log
Folders: trailer/gameplay, trailer/phone, trailer/audio, trailer/graphics, trailer/exports. Name files by shot and take, for example 03_coreloop_t2.mp4.
| File | Type | Length | Shot # | Keep? | Notes (light, sound, problems) |
|---|---|---|---|---|---|
| 04_devlog_t3.mp4 | phone | 0:09 | 4 | yes | Steady push-in; slight fan hum, use room tone |
| 01_hook_t1.mp4 | gameplay | 0:41 | 1 | yes | Best dodge at 0:12-0:16 |
6. Importing into the editor
- Shotcut: no import step; drag files from the file manager into the Playlist or the timeline. It reads video and audio through FFmpeg and images such as PNG, JPEG, SVG and WebP. Set Settings > Video Mode yourself first (Automatic copies the first file you add). If a phone clip has a variable frame rate, accept Shotcut’s offer to convert it, or click Convert… in the Properties panel.
- Kdenlive: drag files into the Project Bin, then onto the timeline; a clip with sound is split onto a video track and an audio track.
Sources: OBS Studio (OBS Project): home page and Knowledge Base articles Quick Start Guide and Standard Recording Output Guide (obsproject.com); Steamworks Documentation: Trailers (Valve) (partner.steamgames.com); Shotcut: Full List of Features (Meltytech) (shotcut.org); Shotcut User Guide (PDF, November 2026) (shotcut.org); Kdenlive 26.08 Manual: Timeline (CC BY-SA 4.0) (docs.kdenlive.org)