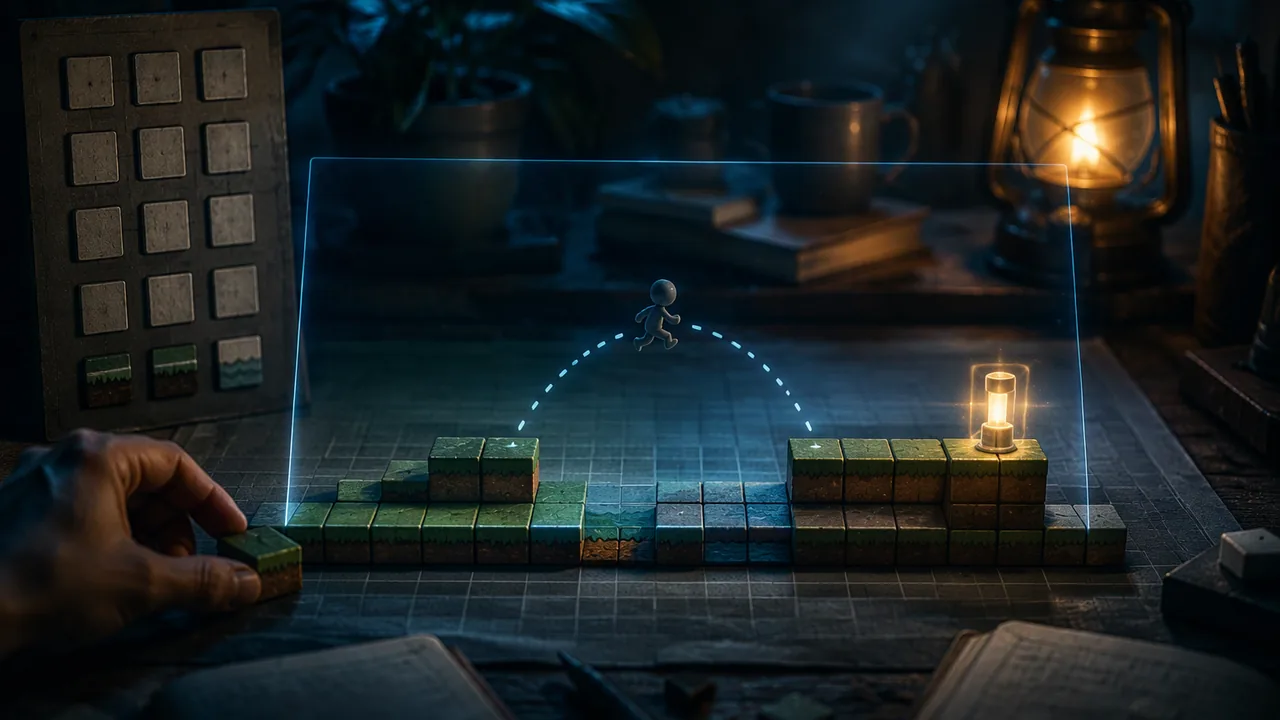
build a tile-based level in Godot with collision, checkpoints and camera limits, spacing gaps and ledges by my character’s measured jump metrics.
Instruction
Tiles let you paint a level quickly from a grid of reusable pieces. They also make level design measurable: if you know how many tiles your character can jump, you can build challenges on purpose. (Adapted from the Godot documentation’s “Using TileSets”, “Using TileMaps” and “Singletons (Autoload)” pages, CC BY 3.0.)
TileMapLayer and TileSet. In Godot 4.3 and later, a level’s tiles live in a TileMapLayer node, which uses a TileSet resource describing the tiles. (The older TileMap node is deprecated; use one TileMapLayer per layer, such as background, ground and decoration.) You create the TileSet once: set its tile size to match your art (the Kenney pack’s page lists it), drag the tile sheet into the TileSet panel and let Godot create the tiles. To make tiles solid, add a physics layer to the TileSet and paint collision onto the tiles that should be solid. Then paint the level in the viewport, left-click to paint and right-click to erase.
Level metrics. Metrics are the measurements that keep a level fair: how high and far the character can jump, how wide a corridor must be, how much warning a hazard needs. In Semester A you computed that with gravity 980 px/s² and jump velocity −420 px/s, the jump peaks at about 90 px and covers about 189 px horizontally at 220 px/s. With 32-pixel tiles that means:
- Ledge height: 2 tiles (64 px) is comfortable; 3 tiles (96 px) is just out of reach.
- Gap width: 4 tiles (128 px) is comfortable; 5 tiles (160 px) is a hard, precise jump; 6 tiles (192 px) is impossible from a standing platform at the same height.
Write your own character’s metrics at the top of your level plan and never design right at the limit unless you mean it to be the hardest jump in the level. If you change the character’s physics later, every level changes, which is why teams fix metrics early.
Checkpoints need memory. When the hazard reloads the scene, every node is rebuilt, including the player at its starting point. To remember a checkpoint across reloads, store it in an autoload: a script Godot creates once when the game starts and keeps alive across scene changes. Add this script as an autoload named GameState (Project Settings, Autoload tab, under Globals in recent versions):
extends Node

var has_checkpoint: bool = false
var checkpoint_position: Vector2 = Vector2.ZERO
The checkpoint is an Area2D that saves its position when the player touches it:
extends Area2D

func _ready() -> void:
	body_entered.connect(_on_body_entered)

func _on_body_entered(body: Node2D) -> void:
	if body.is_in_group("player"):
		GameState.has_checkpoint = true
		GameState.checkpoint_position = global_position
And the player moves there when the level loads, by adding this to the player script:
func _ready() -> void:
	if GameState.has_checkpoint:
		global_position = GameState.checkpoint_position
Where you place checkpoints is a design decision. Place one just before a hard section, not before a long easy walk, so failure costs a retry, not five minutes of boredom.
The camera. A Camera2D as a child of the player follows it. Turn on Position Smoothing for a softer follow, and set the four Limit values to the level’s edges so the camera never shows empty space beyond the level. Look-ahead matters too: a camera that shows more space in the direction of travel gives players time to react.
Mood through the environment. Tiles are also art. Use your mood board’s palette: separate background tiles (lower contrast, cooler) from the ground the player stands on (higher contrast), and use line and color to draw the eye toward the path.
📖 Read for this lesson
The reading opens over the lesson; close it to come back to exactly where you were. The checks below draw on it.
Build: Tile-based level built to metrics
Question. Do the gaps and ledges you built to your character’s measured metrics play as easy, hard or impossible as you intended, and do checkpoints and camera limits work across restarts?
Materials
- Your prototype project in the Godot 4 desktop editor (4.3 or later)
- A Kenney tile pack (CC0) whose tile size you have checked
- Your character’s jump metrics from Semester A (or re-measured today)
- Graph paper for the level plan
- Keep the ergonomic set-up and 20-20-20 breaks.
- Back up the project before adding the autoload, since it changes project settings.
Procedure
- Write your metrics at the top of your plan: maximum ledge height and gap width in pixels and in tiles. Sketch a short level on graph paper with one comfortable gap, one hard gap and one ledge at each height class.
- Add a TileMapLayer, create its TileSet at your pack’s tile size, import the tile sheet, add a physics layer and paint collision on the solid tiles.
- Paint the level from your sketch. Add a Camera2D to the player with position smoothing on, and set its four limits to the level’s edges.
- Create the GameState autoload, the Checkpoint scene and the player’s _ready() code. Place a checkpoint before the hard section and a hazard after it.
- Test each gap and ledge five times and record whether it plays as intended. Test that dying after the checkpoint restarts you there.
- Adjust one gap or ledge that did not play as intended and record the change.
Data
| Feature | Size (tiles / px) | Intended | Cleared (of 5) | Plays as intended? |
|---|---|---|---|---|
| Gap A | comfortable | |||
| Gap B | hard | |||
| Ledge A | comfortable | |||
| Ledge B | out of reach (needs a route) | |||
| Checkpoint restart | — | restarts at checkpoint |
Analysis
- Did your success counts match the intended difficulty? Explain any mismatch using the metrics.
- Why does the checkpoint position survive a scene reload when the player’s own variables do not?
- How did your tile colors and contrast guide the eye toward the path? What would you change?
If you cannot do this build in person: Without Godot, build the level on graph paper at 1 square = 32 px, mark every gap and ledge with its pixel size, and test it with a paper character cut to scale and a ‘jump arc’ template cut from card using the computed height (90 px) and distance (189 px).
Formative check
Work through these before moving on. They are not graded — they tell you whether the standard below has landed yet.
A character can jump 189 px horizontally. With 32-pixel tiles, a gap of 5 tiles is px wide, which is close to the limit, and a gap of 6 tiles is px, which is too wide.
Why store the checkpoint in an autoload rather than in the player’s script?
In Godot 4.3 and later, the recommended node for painting tiles is TileMapLayer, with one node per layer.
How confident are you that you can build a tile-based level to metrics with checkpoints and camera limits?
Practice
Work these on paper or in your notebook, then open Check your answer. Aim for all of Fluency and Application; try at least one Challenge.
Printable version: this unit’s practice workbook (PDF)
Fluency
Build speed and accuracy with the core skill.
- What are a TileMapLayer and a TileSet, and which node from older Godot versions should you not use?
Check your answer
Answer: A TileMapLayer (Godot 4.3+) holds one layer of tiles; a TileSet is the resource that defines the tiles, their size and their collision. The older TileMap node is deprecated.Use one TileMapLayer per layer, such as background, ground and decoration. - Convert to pixels with 32-pixel tiles: (a) a 3-tile ledge; (b) a 4-tile gap; (c) a 7-tile gap.
Check your answer
Answer: (a) 96 px; (b) 128 px; (c) 224 px.Multiply tiles by 32: 3 × 32 = 96; 4 × 32 = 128; 7 × 32 = 224. - What is an autoload, and why does the checkpoint need one?
Check your answer
Answer: A script Godot loads once at start-up and keeps alive across scene changes. Reloading the level rebuilds the player and erases its variables, so the checkpoint position must live somewhere that is not reloaded.The autoload GameState stores has_checkpoint and checkpoint_position.
Application
Use the skill in context. Show your reasoning.
- A new character has jump velocity −420 px/s, gravity 980 px/s² and speed 250 px/s. The jump lasts about 0.86 s. How far does it travel sideways? With 32-pixel tiles, is a 6-tile gap comfortable, near the limit or impossible? A 7-tile gap?
Check your answer
Answer: About 214 px. 6 tiles (192 px) is near the limit; 7 tiles (224 px) is impossible from a standing platform at the same height.250 × 0.857 ≈ 214 px. 6 × 32 = 192 < 214, but only 22 px of room; 7 × 32 = 224 > 214. - Your level is 120 tiles wide and 20 tiles tall with 32-pixel tiles, starting at (0, 0). What should the Camera2D’s four limits be?
Check your answer
Answer: Left 0, top 0, right 3,840, bottom 640.120 × 32 = 3,840 and 20 × 32 = 640. Limits stop the camera showing empty space beyond the level. - Code reading: the player’s _ready() checks if GameState.has_checkpoint: before moving. What would happen at the very start of the game if that check were removed?
Check your answer
Answer: The player would be moved to checkpoint_position, which starts as Vector2.ZERO, the top-left corner of the level, instead of the start point.has_checkpoint is false until a checkpoint is touched, so the check keeps the normal start position. - Where should you place a checkpoint in a level that has a long easy walk followed by a hard jump section? Explain.
Check your answer
Answer: Just before the hard section, so failure costs a retry, not five minutes of walking.Checkpoint placement is a design decision about the cost of failure. - Using the lesson’s mood advice, how should background tiles differ from the ground tiles, and why?
Check your answer
Answer: Background tiles: lower contrast and cooler colors; ground the player stands on: higher contrast. This separates where you can stand from scenery and draws the eye along the path.Use your mood board’s palette and use line and color to lead the eye.
Review
Keep earlier skills sharp.
- Review (Lesson 2.1): your tile level has a 5-tile gap (160 px) near the jump limit. Where in the introduce-test-twist-challenge sequence does it belong?
Check your answer
Answer: Near the end, as part of the final challenge (or the hardest jump in the level), not where the jump is first introduced.Never design right at the limit unless you mean it to be the hardest jump.
Level Metrics Worksheet: Jump Arithmetic, Tile Classes and Checkpoint Cost
SLS original technique sheet; arithmetic uses the lesson’s Semester A values · SLS original
Why this reading. The lab asks you to space gaps and ledges by your character’s measured metrics. This sheet shows how the lesson’s numbers (gravity 980, jump velocity 420, speed 220, 32-pixel tiles) produce the tile limits, so you can redo the arithmetic with your own values. SLS original.
Where the metrics come from
Peak height = v squared / (2 x g) = 420 x 420 / (2 x 980) = 176,400 / 1,960 = 90 px. Air time = 2 x v / g = 840 / 980 = 0.857 s. Horizontal distance = air time x speed = 0.857 x 220 = 188.6 px, which rounds to 189.
Tile classes at 32 px per tile
| Feature | Tiles | Pixels | Share of the limit | Class |
|---|---|---|---|---|
| Ledge | 2 | 64 | 64 / 90 = 71% | Comfortable |
| Ledge | 3 | 96 | 96 / 90 = 107% | Out of reach; needs a route |
| Gap | 4 | 128 | 128 / 189 = 68% | Comfortable |
| Gap | 5 | 160 | 160 / 189 = 85% | Hard, precise |
| Gap | 6 | 192 | 192 / 189 = 102% | Impossible from level ground |
Checkpoint cost, worked
A hard section starts at tile 40. A checkpoint at the level start means every retry walks 40 x 32 = 1,280 px, which is 1,280 / 220 = 5.8 seconds. A checkpoint at tile 38 leaves 2 x 32 = 64 px, or 0.3 seconds. Ten retries cost 58 seconds against 3 seconds, which is why checkpoints belong just before hard sections.
Camera limits, worked
A level 60 tiles wide and 20 tiles tall is 1,920 by 640 px. Camera limits: left 0, top 0, right 1,920, bottom 640.
Filled lab data (invented)
| Feature | Size | Intended | Cleared of 5 | As intended? |
|---|---|---|---|---|
| Gap A | 4 tiles | Comfortable | 5 | Yes |
| Gap B | 5 tiles | Hard | 2 | Yes |
| Ledge B | 3 tiles | Out of reach | 0 | Yes |
| Gap C | 5 tiles | Comfortable | 1 | No: it plays hard; shorten to 4 tiles or add a landing arc |