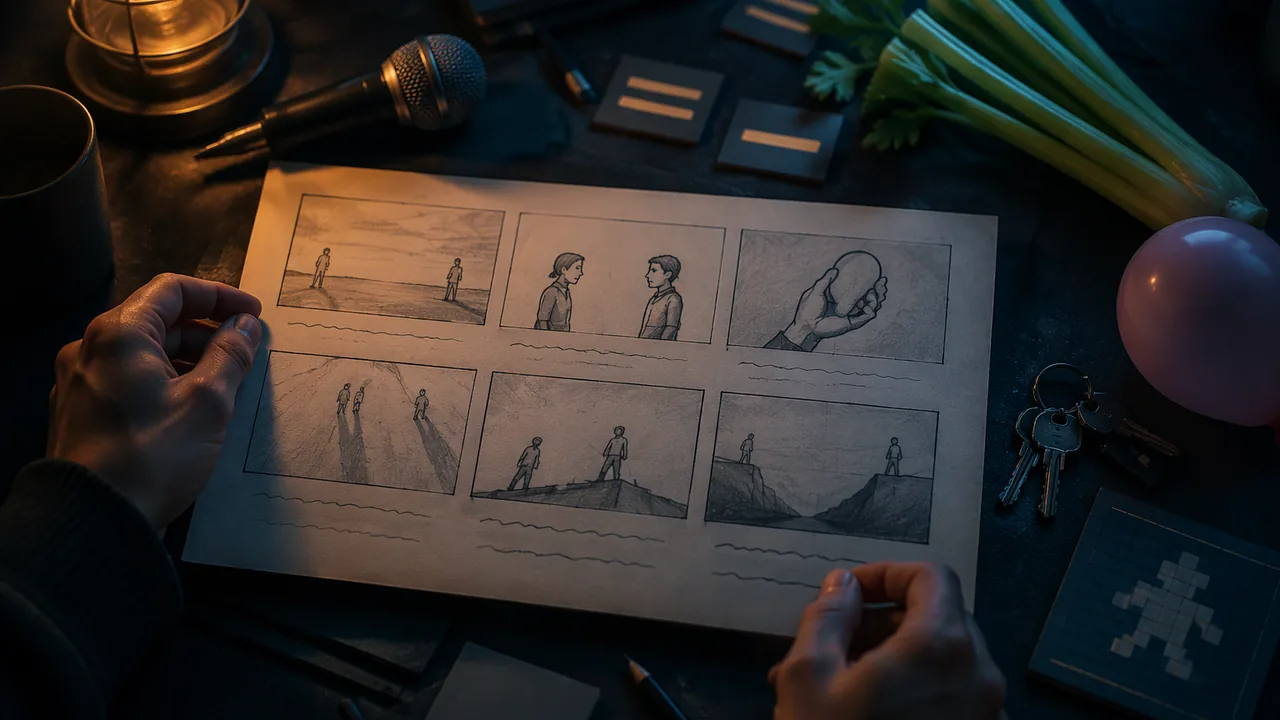
storyboard a short cut-scene using shot types and camera principles, record, edit and export original sound effects, and make an original sprite at the right resolution, converting working files to game-ready formats.
Instruction
A cut-scene is a short non-interactive sequence, and it is expensive: every second needs art, animation, sound and often voice. Studios plan cut-scenes with storyboards so they spend that money only once.
Storyboarding. A storyboard is a sequence of panels, each showing one shot, with notes underneath: action, dialogue, sound and duration. Stick figures are fine. What matters is the shot choice.
- Wide shot: shows the setting and where characters stand. Use it to establish a new place.
- Medium shot: waist up. Good for conversation and action.
- Close-up: a face or an important object. Use it for emotion or a key detail.
- Camera angle: a low angle, looking up, makes a subject look powerful; a high angle, looking down, makes it look small or vulnerable.
- The 180-degree rule: imagine a line between two characters and keep the camera on one side of it, so the characters stay on consistent sides of the screen and viewers do not lose track of who is where.
A strong cut-scene is short, ends by handing control back to the player at a moment of intent, and never repeats information the player already has. Six panels are enough to plan a 20-30 second scene.
Sound design. Many game sounds are recorded from everyday objects, a technique called Foley after the film sound artist Jack Foley. Celery snapped near a microphone becomes a breaking bone; a shaken bunch of keys becomes treasure; rubbing a balloon becomes a creaking door. You will record two effects in Audacity (free and open source) and edit them:
- Record close to the microphone in the quietest room available, with a second or two of silence before and after.
- Trim the silence so the sound starts instantly: in a game, a gap of even a tenth of a second makes a jump feel late.
- Normalize so the loudest point sits just below the maximum without clipping (distorting).
- Fade out the tail so the sound does not end with a click.
- Export with File → Export Audio, choosing the format for where the sound is going. For a short game effect choose WAV, 16-bit, 44,100 Hz, mono, named clearly (jump_01.wav), and import it into Godot. For music or a long ambience choose Ogg Vorbis, which is far smaller. For a clip you will share on the web, MP3 plays almost everywhere. The Audacity manual advises using only letters, numbers, underscores and dashes in file names.
Keep the Audacity project (.aup3) as your working file and export copies; never edit the exported copy and lose your edit history. Converting a WAV to Ogg is the same step: open it in Audacity and export again as Ogg Vorbis.
Layering two sounds, such as a whoosh and a click, often sounds richer than either alone. Pitching a sound up makes it feel smaller and lighter; pitching it down makes it heavier.
Original 2D art. Make one original sprite for your concept, perhaps a collectible or an enemy, in Piskel (a free pixel-art editor in the browser, no account needed) or in Krita. Work at a small size (16 × 16 or 32 × 32 pixels), with a limited palette from your mood board, and check the silhouette by filling it with black. Resolution for the use. A game sprite is measured in pixels, not inches: a 32 × 32 sprite is shown at 32 × 32 pixels (or scaled in the engine), so draw it at exactly that size. A printed image is different: its print size depends on resolution, so a 3-inch print at 300 pixels per inch needs 900 × 900 pixels. To show your 32-pixel sprite large on a portfolio page, enlarge a copy by a whole number, for example 8 times to 256 × 256, with Image → Scale Image and interpolation set to None, which copies each pixel from its nearest neighbor and keeps the edges crisp; other methods blur pixel art. Working files and game files. Save your working file in the editor’s own format (.kra in Krita, .xcf in GIMP), which keeps layers; the Krita manual notes that most other applications cannot open .kra files. Then export a flattened .png for Godot. PNG is lossless and keeps transparency; avoid JPEG for sprites, because its compression smears hard edges and it has no transparency. Students interested in 3D can model a simple low-poly object in Blender and export it as glTF, which Godot imports directly.
Quality. Professional work is judged on small things: clean edges on sprites, sounds without clicks or hiss, and files named so anyone opening the project, including you months later, can find them. Hold your assets to that standard.
Consent. Only record other people’s voices with their permission, and never record in a place where others expect privacy.
📖 Read for this lesson
The reading opens over the lesson; close it to come back to exactly where you were. The checks below draw on it.
Build: Foley recording and a first original sprite
Question. Can you record, edit and import two sound effects, and draw one sprite, that are clean enough to use in a game and match your mood board?
Materials
- A computer with Audacity (free, open source) and a USB or headset microphone, or a phone voice-recorder app (any built-in recorder; no account)
- Household objects for Foley: keys, paper, celery or a carrot, a balloon, a cup of dry rice
- Headphones
- Piskel (www.piskelapp.com, no account needed) or Krita, and your mood-board palette
- Set headphone volume low before playback; loud monitoring while recording can damage hearing.
- Keep food items away from keyboards and electronics, and do not eat Foley props after they have been handled and recorded.
- Record only your own voice or household members who have agreed (for anyone under 18, with a parent’s OK), and keep microphone cables out of walkways.
Procedure
- Plan two sounds your game needs (for example, jump and collect) and choose objects to create each.
- Record three takes of each in the quietest space available, with silence before and after.
- In Audacity, choose the best take, trim the silence, normalize and apply a short fade-out. Save the project (.aup3), then use File → Export Audio to export WAV, 16-bit, 44,100 Hz, mono, with a clear file name. Export one of the two effects a second time as Ogg Vorbis and record both file sizes.
- Import both into your Godot project, assign one to an AudioStreamPlayer2D, and test it in play; adjust the trim if it feels late.
- Draw one 32 × 32 sprite in Krita, GIMP or Piskel using your palette; check its silhouette by filling it black. Save the working file (.kra or .xcf) and export a PNG for the game. Then make a portfolio copy enlarged 8 times to 256 × 256 with interpolation None, and compare it with a copy enlarged using Cubic.
- Add the sprite to your Godot scene and record all new assets in your asset log as your own original work.
Data
| Asset | Object or tool used | Edits made | Working file | Exported file (format, size) | Tested in Godot? |
|---|---|---|---|---|---|
| Sound 1 | |||||
| Sound 1 as Ogg Vorbis | |||||
| Sound 2 | |||||
| Sprite (32 × 32) | |||||
| Portfolio copy (256 × 256) | n/a |
Analysis
- Which edit made the biggest difference to how the sound felt in the game, and why?
- Does your sprite’s silhouette read clearly at game size? What would you change?
- How do your two sounds and your sprite support the mood described in your art-direction notes?
- Compare the WAV and Ogg Vorbis sizes of the same effect, and the None and Cubic enlargements of your sprite. Which file goes into the game, which into the portfolio, and why?
If you cannot do this build in person: Record on a phone’s voice-recorder app and edit on any computer later, or submit the unedited takes with written edit notes and the export settings you would choose. The sprite can be drawn on 32 × 32 graph paper with colored pencils, photographed, and cleaned up with Brightness-Contrast before export.
Formative check
Work through these before moving on. They are not graded — they tell you whether the standard below has landed yet.
A cut-scene introduces a vast, ruined city the player is about to explore. Which shot should open it?
Leaving a short silence at the start of a jump sound effect makes the jump feel more responsive.
Describe your six storyboard panels in a list: shot type, angle, action, sound and duration for each. Explain in one sentence where the scene hands control back to the player.
Missouri standard: MM.FIL.4, MM.AUD.6
You finished coin.kra in Krita, jump.aup3 in Audacity and a 90-second theme in Audacity. Which set of files belongs in the Godot project?
Missouri standard: MM.IMG.2
A 32 × 32 sprite enlarged 8 times for a portfolio page becomes × pixels; a 3-inch print at 300 pixels per inch needs pixels on each side.
How confident are you that you can storyboard a cut-scene and record and edit original sound effects?
Practice
Work these on paper or in your notebook, then open Check your answer. Aim for all of Fluency and Application; try at least one Challenge.
Printable version: this unit’s practice workbook (PDF)
Fluency
Build speed and accuracy with the core skill.
- Name the shot or rule: (a) waist up, good for conversation; (b) shows the setting and where characters stand; (c) a face or key object; (d) keep the camera on one side of an imaginary line between two characters.
Check your answer
Answer: (a) medium shot; (b) wide shot; (c) close-up; (d) the 180-degree rule.Open a new place with a wide shot; use close-ups for emotion or a key detail. - What does a low camera angle do to a subject? A high angle?
Check your answer
Answer: Low angle (looking up): makes the subject look powerful. High angle (looking down): makes it look small or vulnerable.Shot choice matters more than drawing skill; stick figures are fine. - What is Foley, and give one example from the lesson.
Check your answer
Answer: Recording everyday objects to create sound effects, named after film sound artist Jack Foley. Examples: celery snapped for a breaking bone, shaken keys for treasure, a rubbed balloon for a creaking door.Layering two sounds often sounds richer than either alone.
Application
Use the skill in context. Show your reasoning.
- Put the Audacity steps in order and say why each matters: normalize, export, trim silence, fade out the tail, record.
Check your answer
Answer: Record → trim silence (so the sound starts instantly) → normalize (loudest point just below the maximum without clipping) → fade out the tail (no click at the end) → export (WAV 16-bit, 44,100 Hz, mono for a short effect).Keep the .aup3 project as the working file and export copies. - A 4-inch-wide print at 300 pixels per inch needs how many pixels across? A 16 × 16 sprite enlarged 8 times for a portfolio becomes what size, and which interpolation should you choose?
Check your answer
Answer: 1,200 pixels; 128 × 128; interpolation None.4 × 300 = 1,200. 16 × 8 = 128. None copies each pixel from its nearest neighbor and keeps the edges crisp; other methods blur pixel art. - Fix these file names using the Audacity manual’s advice: “Jump Sound!.wav”, “coin (final) v2.wav”.
Check your answer
Answer: Model: jump_sound_01.wav and coin_final_v2.wav.Use only letters, numbers, underscores and dashes, and name files clearly so anyone opening the project can find them. - Why should a game sprite be exported as PNG rather than JPEG, and what happens to the .kra working file?
Check your answer
Answer: PNG is lossless and keeps transparency; JPEG compression smears hard edges and has no transparency. Keep the .kra as the source (it keeps layers) and export a flattened .png for Godot.Most other applications cannot open .kra files, so the export is what the game uses. - Describe a six-panel storyboard plan (one line per panel: shot type, action, sound, duration) for a 24-second cut-scene in which a player finds a locked gate, and end with handing control back.
Check your answer
Answer: Model: 1 wide, the gate in the fog, wind, 5 s; 2 medium, hero walks up, footsteps, 4 s; 3 close-up, the lock, metal clink, 3 s; 4 low angle, the gate towers over her, creak, 4 s; 5 close-up, her face as she spots a key glint, chime, 4 s; 6 medium, she turns toward the key, music swells, 4 s, then control returns. Total 24 s.A strong scene opens wide, uses close-ups for key details, stays short, adds up to the planned time (5 + 4 + 3 + 4 + 4 + 4 = 24) and ends at a moment of intent.
Review
Keep earlier skills sharp.
- Review (Lesson 4.2): why does the lesson’s sound plan export the jump effect as WAV but the theme as Ogg Vorbis?
Check your answer
Answer: WAV costs almost nothing to play, which suits a short, repeated effect; Ogg Vorbis is far smaller for long music (about 16 KB per second against 88).Compressed formats discard detail the ear is unlikely to miss.
Storyboard, Sound Effects and a Sprite: A Technique Sheet With a Worked Six-Panel Example
SLS original technique sheet; arithmetic computed by SLS · SLS original
Why this reading. The workshop asks for a six-panel storyboard, two edited sound effects and one original sprite. This technique sheet gives a worked six-panel storyboard with durations that add up, the sound-editing steps with numbers, and a 16 by 16 sprite grid with its pixel count, so you can check your work without any other example. It is SLS original.
Worked storyboard: Dam Break intro (24 seconds)
| Panel | Shot | Angle | Action | Sound | Seconds |
|---|---|---|---|---|---|
| 1 | Wide | Eye level | Farm valley at dawn; the dam far away | Low water rumble | 4 |
| 2 | Medium | Eye level | Ines loads seed sacks onto the boat | Sacks thump, seeds rattle | 3 |
| 3 | Close-up | Eye level | A crack runs across the dam wall | Sharp crack | 4 |
| 4 | Medium | Low angle | Ines looks up at the dam (it looks huge) | Wind, rumble grows | 4 |
| 5 | Wide | High angle | Boat pushes off; the water marker rises | Water splash | 5 |
| 6 | Over the shoulder | Eye level | Boat at the starting space; the Row! prompt appears | Music starts | 4 |
Total: 4 + 3 + 4 + 4 + 5 + 4 = 24 seconds, inside the 20 to 30 second target. Control returns to the player at panel 6, when the prompt appears. Ines moves left to right in panels 2 to 5, so the camera stays on one side of the 180-degree line and the direction never flips.
Sound editing, with numbers
- Record 1 to 2 seconds of silence before and after the sound.
- Trim so the sound starts at the first visible waveform. A 0.1 s gap is 4,410 samples at 44,100 samples per second, six frames at 60 fps.
- Normalize the peak to −1.0 dB. Full scale in 16-bit audio is 32,767; −1 dB is 10(−1/20) = 0.891 of full scale, about 29,204.
- Fade the tail over about 30 ms (1,323 samples) so it does not click.
- Export WAV, name it jump_01.wav. A 0.3 s mono 16-bit file at 44,100 samples per second is 26,460 bytes.
Layer a whoosh and a click, pitching up for lighter and down for heavier. Record other people’s voices only with permission.
A 16 by 16 sprite grid (a boat)
................
................
........#.......
........##......
........#.#.....
........#..#....
........#...#...
........#....#..
........#.....#.
..#############.
...###########..
....#########...
................
................
................
................
The # marks filled pixels: 46 of 256, or 18 percent. Fill every # with black: if you can still tell it is a boat with a mast and hull, the silhouette works. Now use at most four colors from your board: hull, sail, shadow and one accent. Check contrast with the greyscale values in Reading 4.3.