identify the major muscle groups each of four foundational exercises engages, perform each with its critical elements, and use video self-analysis to detect and correct one error.
Instruction
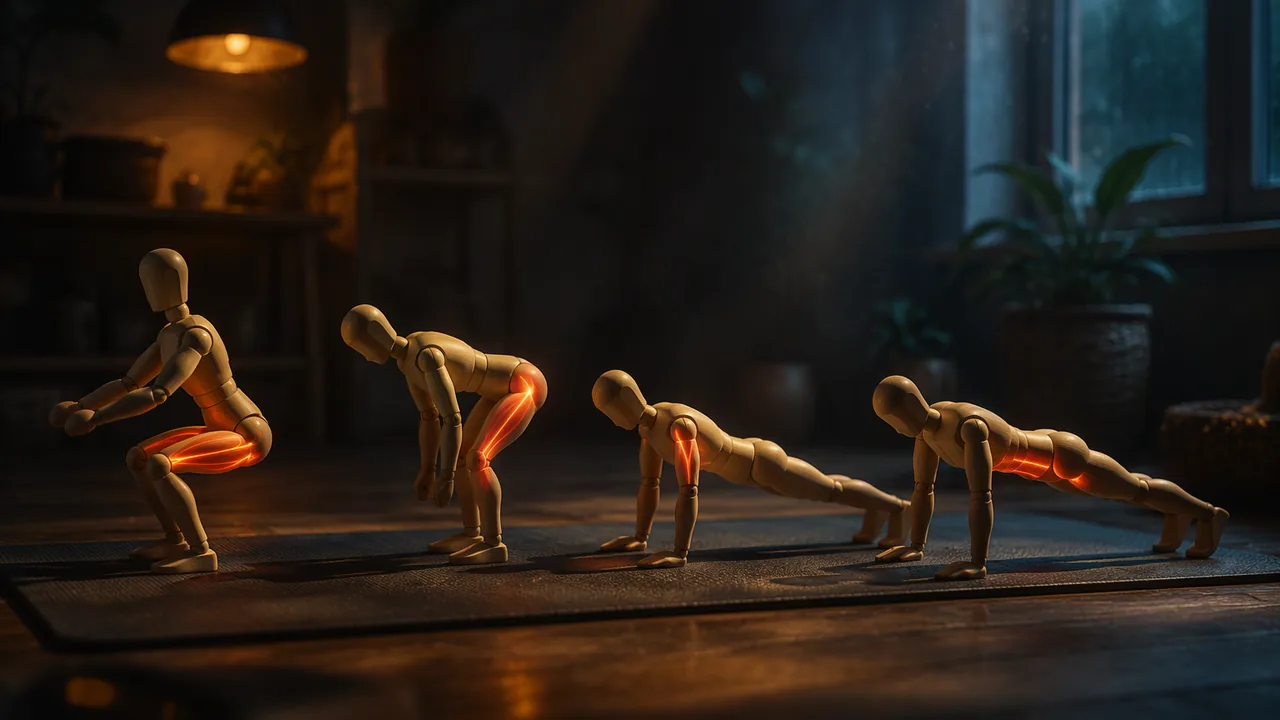
Why form comes first. Four movements show up in almost every training program, sport and daily task: the squat (sitting down and standing up), the hip hinge (picking something up off the floor), the push-up (pushing yourself or an object away) and the plank (holding the trunk steady). Learning them correctly now, with no added weight, prevents the most common training injuries later and lets you add load safely in Unit 3. Each movement has critical elements: the few checkpoints that separate safe, effective technique from risky technique.
Muscle groups, briefly
A prime mover (agonist) produces most of the movement; stabilizers hold other joints still so the prime movers can work. The groups you will meet: quadriceps (front of the thigh; straighten the knee), hamstrings (back of the thigh; bend the knee and extend the hip), gluteals (buttocks; extend the hip), pectorals (chest), deltoids (shoulders), triceps (back of the upper arm; straighten the elbow), abdominals and obliques (front and sides of the trunk), and the erector spinae (along the spine).
The four movements
| Exercise | Prime movers | Key stabilizers | Critical elements |
|---|---|---|---|
| Bodyweight squat | Quadriceps, gluteals | Hamstrings, abdominals, erector spinae | Feet about shoulder-width, toes slightly out; hips move back and down; knees track in line with the toes (not caving in); heels stay down; chest up, back neutral; depth only as low as you can keep those elements |
| Hip hinge (good-morning with hands on hips, or a light object pick-up) | Gluteals, hamstrings | Erector spinae, abdominals | Soft knees; push the hips straight back; back stays flat from head to tailbone (no rounding); weight in mid-foot and heels; stand up by driving the hips forward |
| Push-up (wall, incline or floor) | Pectorals, triceps, front deltoids | Abdominals, gluteals, serratus anterior | Hands slightly wider than shoulders; body in one straight line from head to heels; elbows about 45 degrees from the body, not flared straight out; lower until the chest nears the surface; press up without the hips sagging or piking |
| Front plank (forearms) | Abdominals, obliques (holding, not moving) | Gluteals, shoulders, quadriceps | Elbows under shoulders; straight line head to heels; squeeze glutes; neck neutral, eyes to the floor; breathe steadily; stop when the line breaks |
Worked example: detecting an error
A fictional student, Ana, films her squat from the side and from the front. From the front, her knees drift inward as she stands up. That error, often called knee valgus, places stress on the inside of the knee. Her correction cue is “push the knees out over the little toes,” and she reduces the depth until she can keep the knees in line. Her second recording shows the knees tracking over the toes on all five repetitions. Notice the pattern: record → compare with the checklist → choose one cue → record again. Fix one error at a time.
Choosing the right level
Progressions let everyone train with good form. A push-up can be done against a wall, with hands on a sturdy counter or bench, from the knees, or on the toes; choose the hardest version you can do for 8 to 10 good repetitions. A squat can be done to a chair (touch and stand) before free squats. A plank can start from the knees. Muscles grow stronger at any level; poor form at a harder level only adds risk. Strength training for young people is endorsed in the federal guidelines, which call for muscle-strengthening activity at least 3 days a week for ages 6 to 17 (Physical Activity Guidelines for Americans, 2nd ed.).
Recording privately
Prop your phone at hip height about 8 to 10 feet away, first from the side, then from the front. Wear clothing that lets you see knee and hip position. A parent or guardian may hold the camera if you like. These recordings are for your own analysis: keep them private, never post them online, and delete them when the unit ends if you wish.
Formative check
Work through these before moving on. They are not graded — they tell you whether the standard below has landed yet.
Which muscle groups are the prime movers in a push-up?
Squat
Tap to revealQuadriceps and gluteals
Hip hinge
Tap to revealGluteals and hamstrings
Push-up
Tap to revealPectorals, triceps, front deltoids
Plank
Tap to revealAbdominals and obliques, holding steady
In a hip hinge, the back should round forward so that the hands can reach the floor more easily.
Video self-analysis: record five repetitions of the squat and the push-up (your chosen level) from the side and the front, and a 20-30 second plank from the side. Score each against the critical-element table (yes / not yet for each element). Pick the one error that matters most, write the cue you will use to fix it, record again, and describe what changed. Keep your recordings private.
How confident are you that you can name the muscle groups each foundational exercise engages and correct my own form using a recording and a checklist?
Practice
Work these on paper or in your notebook, then open Check your answer. Aim for all of Fluency and Application; try at least one Challenge.
Printable version: this unit’s practice workbook (PDF)
Fluency
Build speed and accuracy with the core skill.
- Name the prime movers for each: (a) bodyweight squat; (b) hip hinge; (c) push-up; (d) front plank.
Check your answer
Answer: (a) quadriceps and gluteals; (b) gluteals and hamstrings; (c) pectorals, triceps and front deltoids; (d) abdominals and obliques (holding, not moving).Taken from the lesson’s movement table. - Define prime mover and stabilizer.
Check your answer
Answer: A prime mover (agonist) is the muscle or group mainly responsible for producing a movement. A stabilizer contracts to hold a joint or body part steady so the prime movers can work.Example: in a push-up, the abdominals and gluteals stabilize while the chest and triceps push. - Fill in: the quadriceps ____ the knee; the hamstrings bend the knee and ____ the hip; the triceps ____ the elbow.
Check your answer
Answer: straighten; extend; straighten.From the lesson’s muscle-group list.
Application
Use the skill in context. Show your reasoning.
- An example student, Kai, films his push-up from the side. His hips sag toward the floor on every repetition. Which critical element is missing, which muscles should be holding it, and what cue could fix it?
Check your answer
Answer: The body is not in one straight line from head to heels. The stabilizers (abdominals and gluteals) should hold the line. Cue: “squeeze the glutes and brace the belly,” or move to an easier progression (incline or knees) until the line holds.The lesson’s process: record, compare with the checklist, choose one cue, record again. - In a squat, an example student’s heels lift off the floor at the bottom. Name the critical element and give a reasonable correction drawn from the lesson.
Check your answer
Answer: Heels stay down. Correction: reduce the depth to only as low as she can keep the heels down (and the other elements), or squat to a chair (touch and stand), sending the hips back and down.Depth is limited by the ability to keep every critical element. - A student can do 4 good floor push-ups, 9 good knee push-ups and 15 good wall push-ups. Which progression should he train with, using the lesson’s rule? Explain.
Check your answer
Answer: Knee push-ups. The rule is to choose the hardest version you can do for 8 to 10 good repetitions; 9 knee push-ups fits, 4 floor push-ups is too few, and the wall version is easier than needed.Muscles grow stronger at any level; poor form at a harder level only adds risk. - Explain why the lesson tells you to fix only one error at a time during video self-analysis, and describe the four-step pattern.
Check your answer
Answer: Changing one thing at a time lets you see whether that cue worked. Pattern: record → compare with the checklist → choose one cue → record again.Ana’s example: knees caving in, cue “knees out over the little toes,” reduced depth, second recording showed knees tracking on all five reps.
Challenge
Stretch problems. Expect to think before you write.
- Describe how you would set up a private recording of your squat (camera position, distance, views, clothing) and what you will do with the file afterward.
Check your answer
Answer: Prop the phone at hip height about 8 to 10 feet away; record first from the side, then from the front; wear clothing that shows knee and hip position. Keep the recording private, never post it online, and delete it when the unit ends if you wish.Side view shows depth, back and heel position; front view shows knee tracking.
Review
Keep earlier skills sharp.
- Review (Lesson 1.2): why do the warm-up’s slow squats and lunges help prevent injury before you train the full squat?
Check your answer
Answer: They raise muscle temperature and rehearse the movement before it is loaded; warm muscles and tendons stretch more easily and contract more quickly.Rehearsing a movement before loading it is part of injury prevention.